How to Craft your Coffee latte Art like a pro

OneHundredCoffee is reader-supported, and some products displayed may earn us an affiliate commission. Details
There’s a small moment in the morning when the world hasn’t quite begun and the kettle is just starting to whisper. The kitchen is quiet, the light is soft, and in your hands is a warm ceramic mug. You tilt a pitcher, the milk ribbon meets the crema, and—suddenly—there’s a heart floating on your latte. It never gets old. Latte art feels like magic the first time you pull it off, but it’s actually a repeatable craft powered by a handful of fundamentals.
I’ve messed up more cups than I can count, learned from a hundred tiny mistakes, and picked up the reliable cues—the look of glossy microfoam, the sound of good stretching steam, the way the crema thickens when the shot is just right—that turn “random swirl” into a clean, confident heart, tulip, or rosetta. This is everything I wish I’d known earlier, distilled into an easy-to-follow, real-world guide you can use at home to pour café-quality latte art consistently.
The Only Three Things That Truly Matter (and How to Nail Them)
Latte art lives or dies on three pillars: espresso quality, milk texture, and pour control. Think of them like the legs of a tripod—if one is wobbly, the picture blurs. Most beginners focus on drawing the art and forget the canvas. The canvas here is a balanced shot with stable crema and a pitcher of properly textured milk. The good news: once you can reliably hit these two, the pour becomes far more forgiving.
A strong espresso shot is more than “dark coffee.” You want a 1:2 ratio by weight—say 18 grams of finely ground coffee yielding about 36 grams of espresso in 25–35 seconds. That window gives you balanced sugars and pleasing bitterness with enough oils to create a durable crema. Don’t chase exact seconds like a robot; taste your shot. If it’s sour and thin, grind finer; if it’s bitter and astringent, grind coarser. When dialed in, the crema sits like a tawny blanket, not a spotty bubble bath. That blanket is the stage your milk will dance on.
Milk texture is the second pillar. Forget big soap bubbles. You’re looking for a paint-like gloss—microfoam so fine it looks like wet silk. If you’ve ever seen professional baristas gently swirl the pitcher and the surface looks mirror-shiny, that’s what you want. When you get it right, the milk folds into espresso effortlessly, white designs pop crisply, and the surface polishes itself without effort. If the milk is too airy, it sits on top like shaving foam and your pattern breaks; if it’s too flat, it sinks and disappears.
Pour control is the third pillar, and it’s about tempo, height, and proximity. The beginning of the pour is about mixing—starting a little higher to dip the milk under the crema—then the art happens close to the surface, with the spout almost kissing the espresso. Tempo sets the shape: steady and slow for hearts, pulsed for tulips, and fluid lateral movement for rosettas. The pitcher is your pen, and your wrist is the ink flow.
Master these three in order—shot, milk, pour—and the designs suddenly start “clicking.”
Espresso: Building a Crema That Can Carry Art

A good canvas starts at the grinder. Fresh beans (ideally roasted within a month and rested for a few days after roasting) will make a night-and-day difference. If your espresso tastes flat no matter what you try, the beans may simply be too old. Choose medium to medium-dark roasts when you’re learning. They’re forgiving, offer stable crema, and accentuate chocolate and caramel notes that play beautifully with milk.
Tamp level and firm, but don’t overthink it. What matters more is a consistent dose, an evenly distributed puck, and avoiding channeling. If you see blond stripes jetting down one side of the portafilter spout, your puck prep needs attention. A simple WDT (a few thin needles to declump grounds) before tamping can clean this up dramatically.
If you’re using a home machine with a pressurized basket, you can still pour art, but you’ll find more control with a non-pressurized basket once you’re comfortable. Keep your water temp stable (most machines target around 93°C/200°F), purge the group head briefly before locking in the portafilter, and watch the shot: a steady, syrupy stream that darkens, then lightly blondes near the end. Stop it before it turns pale and watery—protect that sweetness and body.
When your espresso is right, the crema will support the white of the milk like a stage light on velvet. You’ll see crisp edges where white meets brown instead of muddy edges that feather apart. That crispness is your sign: time to steam.
Milk Microfoam: The Science of Wet Paint

Milk is largely water, with fats, proteins, and sugars. When you steam it, you do two things: introduce air (stretching) and distribute and polish that air (texturing). The proteins wrap around the air bubbles, stabilizing them; the fats give the foam body and sheen. You want micro-bubbles so tiny they’re invisible, creating that glossy, liquid-paint texture.
Start with cold milk and a cold pitcher. Whole cow’s milk is the easiest latte art partner thanks to its fat and protein balance. If you prefer alternatives, look for “barista” versions—oat and soy barista milks can pour gorgeous art when properly steamed, though each behaves a bit differently. Oat typically needs slightly less air and a touch lower temp to keep it silky; soy likes careful texturing to avoid a dry, meringue-like foam.
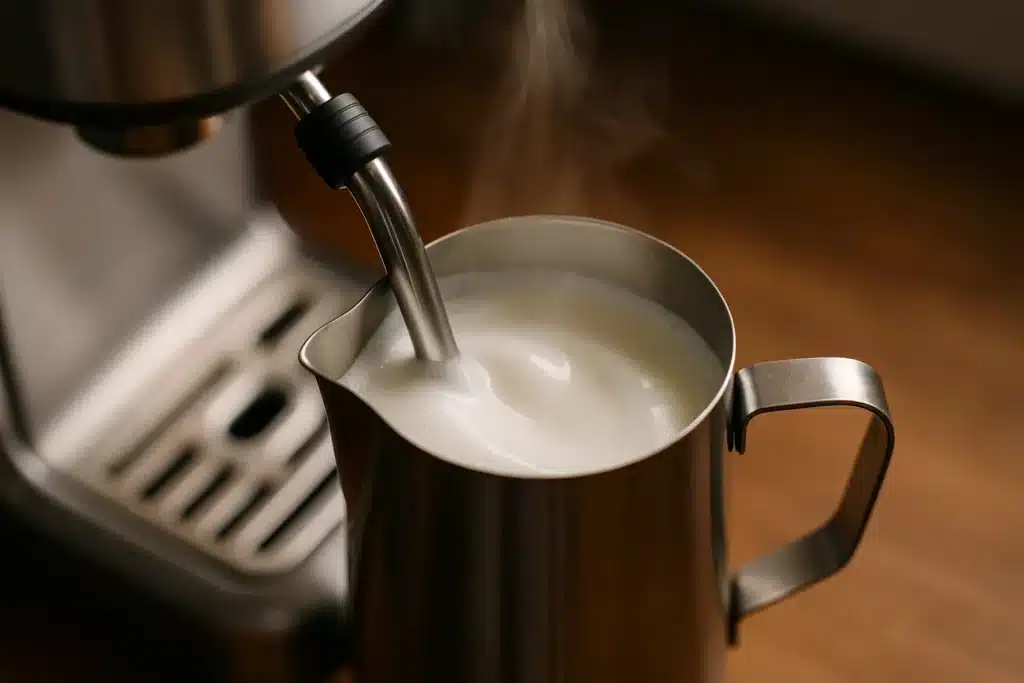
Position the steam tip just below the surface near the pitcher’s sidewall. Open the steam fully. You’ll hear a gentle paper-tearing sound—that’s air integrating in micro-bursts. If it sounds like a jet engine or you see big bubbles, you’re too high. If there’s silence and the milk doesn’t expand, you’re too deep. In the first few seconds, the milk should expand by about 20–30% in volume—that’s your stretching. Then sink the tip slightly to stop adding air and create a whirlpool that polishes and distributes the foam evenly. The swirl is critical; it’s what erases big bubbles and tightens the microfoam.
Temperature matters. Aim for around 55–60°C (130–140°F) on your first pours. Hotter than that, and sugars scald, proteins tighten, and your foam loses its sheen and flexibility. If you don’t have a thermometer, use your hand on the pitcher: when it’s almost too hot to hold but not scorching, you’re there. Wipe and purge the steam wand immediately after, then give the pitcher a firm tap and a gentle swirl. If the surface looks like wet glass and the milk flows as a single, glossy mass when you tilt the pitcher, you’ve nailed it.
The Pour: From Brown Canvas to White Contrast
Think of the process in two phases: integrate, then design. In the integration phase, you start a little higher (maybe an inch or two above the surface) and pour steadily into the center to mix milk with espresso. Watch the crema color deepen and the surface rise. This creates a uniform base so your art sits on top rather than plunging underneath.
When the cup is about half to two-thirds full, lower the pitcher until the spout nearly touches the surface. This proximity lets the foam ride across the top. Keep your hand steady and your wrist relaxed. The pitcher angle matters: tilt enough that the milk flows freely, but not so much that it floods. It’s a delicate, confident lean—like you mean it.
From here, the motion depends on the design you want, but the rules stay the same: control flow (how much milk), control distance (how close you are to the surface), and control movement (do you stay still, pulse, or wiggle). Practice each on its own, then combine them.
The First Three Patterns Every Home Barista Should Learn
The Heart
Start with the cup slightly tilted toward you. After your integration pour, bring the spout to the surface, right at the center. As white appears, hold your position and let the round “puddle” grow. When it’s the size you want, lift the pitcher slightly and draw a thin line through the middle to split the circle into a heart. The trick is patience—don’t rush the draw-through. If you yank too fast, the line tears the shape.
Common hiccups: If you see a white blob that refuses to shape, you either poured too much too fast or your milk is too thick. If the design sinks, you were too high or your milk is too flat. Adjust the milk first, then refine your proximity.
The Tulip
Pour a small round base as if starting a heart, then briefly stop the flow, move the spout back a touch, and pour a second round onto the first, creating a stacking effect. Two or three “drops” compose a classic tulip. Finish by lifting slightly and drawing a thin stem through the stacks. The secret is rhythm—short pulses of milk that land decisively, not timid dribbles. Each layer should push the previous one forward, giving that layered petal look.
The Rosetta
Begin with a low, steady pour near the surface. Once white emerges, gently wiggle the pitcher side to side while moving backward across the cup. The wiggle is in your wrist, not your whole arm—think of vibrating your fingers, not shaking your shoulder. The waves lay down the leaves. As you reach the far side, lift a little and pull a thin line forward through the center. Clean rosettas come from an even wiggle and a consistent flow rate; too much flow and the leaves blur, too little and they won’t show.
Why Your Latte Art Fails (and How to Fix It)
If your art looks muddy, start with the shot. Pale crema suggests under-extraction or very light roast beans that were difficult to pull. Grind a notch finer, extend the shot a few seconds, and try again. If your art sits up like meringue and won’t integrate, your milk has too much air; introduce air only in the first seconds and then immediately focus on the whirlpool to polish. If your design vanishes into the depths, the milk is too flat, or you’re pouring from too high during the design phase.
Pitcher size can also sabotage you. A 12-oz pitcher for a 6–8-oz drink gives you enough depth to create a stable vortex without drowning the cup. Pitchers with a pronounced spout are easier for beginners—there’s a reason many baristas keep a favorite, they’re borderline superstitious about. Temperature mistakes are silent killers: milk steamed too hot will look fine for two seconds, then dull and break apart. Stay in the 55–60°C range and watch how the surface stays glossy even after you set the cup down.
And then there’s flow control. Many beginners pour like they’re trying to finish before the kettle cools. Slow down. Give the white time to bloom. A tiny change in tilt angle can halve the flow rate, a nd suddenly your edges sharpen and your leaves acquire definition. If you’re shaky, rest the pitcher spout on the cup rim to stabilize your hand as you learn; later, you can hover confidently.
Home Setup That Makes Everything Easier
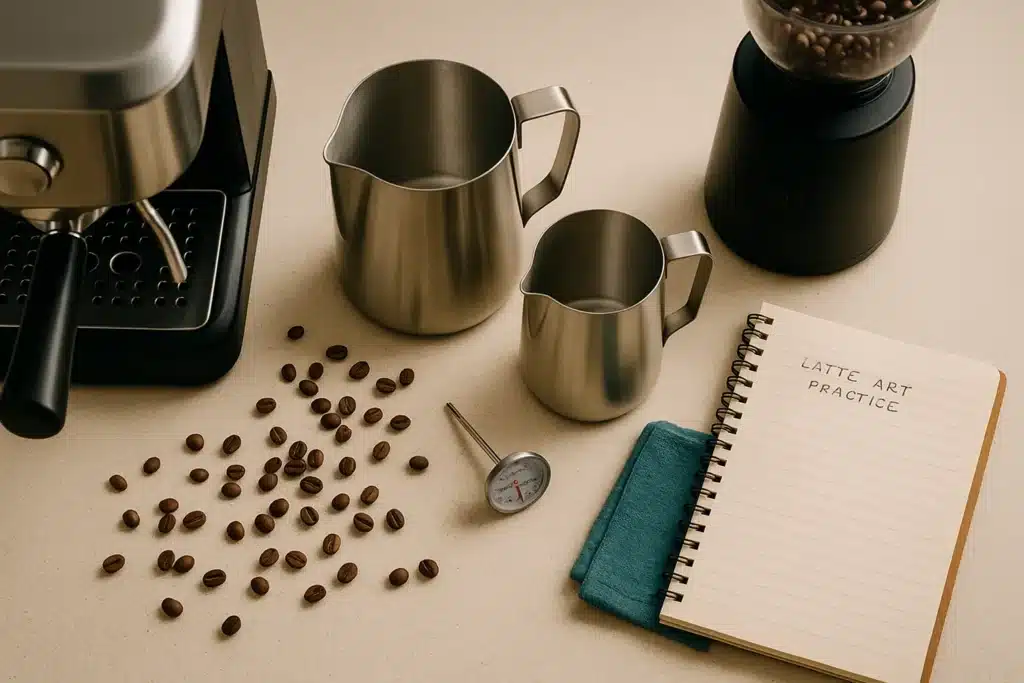
While technique beats tools, the right gear lowers the learning curve. A consistent burr grinder is non-negotiable for good espresso—latte art needs stable crema, and that needs even particle size. If your grinder can’t make fine espresso grinds without clumping, you’ll fight channeling. Consider a simple distribution tool or WDT needles to break up clumps before tamping; it’s a cheap upgrade with outsized impact.
For steaming, machines with a single-hole or two-hole tip give you precise control. Multi-hole commercial tips can be powerful but require fast, assertive technique. If your machine’s wand lacks power, don’t chase endless swirling—introduce a whisper of air, find the smallest angle that creates a vortex, and be patient. You’re sculpting, not power-washing.
Keep a small cup of water and a microfiber cloth next to the machine. Purge, wipe, purge again. Dried milk on a wand ruins the texture in the next pitcher and leaves off-flavors you’ll taste. And put a tiny thermometer in your pitcher while you’re learning—it trains your hand. Soon you’ll ditch it and rely on touch.
Milk Choices: Dairy, Oat, Soy, and Beyond
Whole cow’s milk is the classic for a reason. It stretches readily and finishes with a shine that makes patterns leap. If you prefer lower fat, 2% still steams beautifully, though it’s slightly less luscious. Skim can draw crisp art but lacks body; your tulips may look great, but the mouthfeel feels thin.
Plant-based milks have improved dramatically. Barista oat is the crowd favorite for its sweetness and creamy texture. Steaming oats requires slightly less air at the start, and it prefers a hair cooler finish temperature to keep the gloss. Soy can pour stunning rosettas when textured carefully; introduce air for a second or two max, then focus on polishing. Almond is the most temperamental—brands differ wildly—so test a few and dial in your stretching time until you find a mix that holds patterns without creating big bubbles.
Whichever milk you choose, consistency is key. Buy the same brand for a few weeks while you practice so your hand learns its behavior. Swapping brands daily resets the learning curve.
Practicing Without Wasting Espresso
One of the smartest hacks I picked up was practicing with food-coloring water or cheap instant coffee. Pulling espresso for every attempt is time-consuming and costly. Mix a small amount of instant coffee with hot water to mimic the look of espresso and crema (it won’t be perfect, but it’s good enough to practice proximity and flow). Steam your milk as usual and focus on the pour mechanics—height, speed, wrist wiggle, and draw-through. You’ll develop pattern muscle memory without burning through your best beans.
Another trick: draw with a dry pitcher on a table. Move it through the motions of a rosetta—back and forth wiggles with a slow, straight pull through the center. It sounds silly, but training your wrist to create small, even oscillations pays off the moment you face a real cup.
From Heart to Swan: Progression That Actually Works
Once you can pour hearts ten times out of ten, move to tulips. Tulips teach rhythm and how to control flow in short bursts. When your tulips look like stacked petals with a defined stem, graduate to rosettas to learn lateral motion while maintaining a steady flow. Then, combine both—pour a tulip base and finish with rosetta leaves for a more complex composition. The swan builds on these: a teardrop base, a rosetta body, a neck drawn upward with a thin stream, and a tiny heart for the head if you’re feeling extra.
Don’t jump straight to complicated designs. Complexity exposes inconsistency. Mastering simple shapes smooths your motion and transforms your confidence. It’s like learning scales before solos—you’re not limiting yourself; you’re sharpening your voice.
Café-Level Polishing: Symmetry, Contrast, and Cup Prep
The polish that makes latte art look professional is mostly about symmetry and contrast. Symmetry starts with how you hold the cup—tilted toward you at the beginning so the design grows naturally toward the center. Rotate the cup subtly as you pour to keep the pattern aligned with the handle. If your heart always leans left, you’re likely favoring one side with your poor path. Pay attention to your centerline.
Contrast comes from protecting the crema and introducing white decisively. If your integration phase is too aggressive, you’ll erase the brown canvas, and your design will look washed out. Keep the early pour controlled and watch for that moment when the surface thickens; then go low and let the white sit proudly.
Cup shape helps too. Round-bottomed cups with wide mouths make life easier. Tall, narrow mugs force too much depth and limit your surface area. Start with a 6–8-oz cappuccino cup—latte art’s sweet spot.
Cleaning Up Your Workflow (and Your Counter)
Latte art is a sequence. Dial your shot, purge, and lock in. Steam milk while the shot runs if your machine allows it, or immediately after if it’s a single-boiler setup. Pour as soon as the milk is ready; microfoam degrades by the second. Then wipe the wand, purge again, rinse the pitcher, and reset. A tidy workflow keeps temperatures tight and your focus sharp. The more you repeat the same moves, the less you think and the more you feel, which is when your art starts to look like you meant it.
Troubleshooting Diary: Real Mistakes, Real Fixes
There was a week when every Rosetta I poured turned into a pale ghost halfway through. The culprit wasn’t my wrist—it was my milk temperature. I’d started steaming hotter without noticing, and the foam lost its elasticity before I finished the leaves. Dropping 5°C brought the shine back and the leaves sprang to life. Another time, my heart had a little “comet tail” instead of a clean point. I realized I was drawing the line too fast and too high. Slowing the draw-through and keeping the spout just above the surface sharpened the tip instantly.
Writing down what went wrong and what you changed seems nerdy until you have three solid improvements in a single week. Patterns emerge. You get better faster.
Make Your Kitchen Feel Like a Training Bar
Set up your station so you can practice five or six pours back-to-back without a full reset. Keep extra milk ready, pitchers rinsed, and cups warm. If your machine allows, steam a larger pitcher and pour two small drinks in sequence to multiply your reps. Practicing in batches teaches consistency—can you pour three hearts in a row that look like siblings? When you can, switch to tulips and do the same.
Filming your pours helps more than you think. You’ll spot where your spout height crept up or where your wrist wiggled. Tiny corrections compound.
Beyond Free Pour: Etching, Chocolate, and Signature Flourishes
Pure free-pour art is the barista’s rite of passage, but there’s room for playful extras. A micro-etching tool (or even a clean toothpick) lets you drag lines through the white to sharpen edges or add definition to animal faces, leaves, or lettering. A light dusting of cocoa before the pour can create speckled contrast; a post-pour chocolate syrup dot can become an eye or accent with a quick etch. Use these as embellishments, not crutches. When your base shapes are solid, these touches look deliberate rather than corrective.
Frequently Searched Questions—Answered from Real Experience
What’s the best milk temperature for latte art? For consistent gloss and forgiving texture, finish between 55–60°C (130–140°F). Cooler and the sweetness hasn’t fully bloomed; hotter and you risk dull foam and a flabby mouthfeel.
Can I pour good latte art with plant-based milks? Absolutely, especially with barista-formulated oat or soy. They steam differently, so introduce less air at the start and keep a tight, gentle vortex. Expect a slightly different shine and a touch less elasticity than whole milk, but with practice, your hearts and rosettas will pop.
Do I need an expensive machine? No. A stable grinder and a machine with a capable steam wand help, but technique matters more. I’ve seen beautiful hearts from modest home machines. Focus on puck prep, milk texture, and pour height—those beat price tags.
Why does my latte art fade after I pour it? If the white drifts or blurs quickly, your milk may be too hot or too thin, or you may have overmixed the base. Protect the crema during integration, keep the milk glossy, and pour the design soon after steaming—waiting even 30 seconds can degrade the foam.
How long should it take to learn? With daily practice (even 10–15 minutes), you can pour consistent hearts within a couple of weeks and solid tulips soon after. Rosettas take a bit longer because of the wiggle coordination, but the day it clicks, it really clicks.
The Best Amazon-Available Picks to Support Your Latte Art Journey
If you want a short list of reliable, widely available gear and beans that make learning latte art simpler, these are proven, beginner-friendly choices that pair well with the techniques in this guide:
- Breville Barista Express Impress Espresso Machine
- De’Longhi La Specialista Arte Espresso Machine
- Rancilio Silvia Espresso Machine
- Lavazza Super Crema Whole Bean Coffee
The Mindset That Turns Practice Into Progress
When you start, every cup is a mystery. Some mornings everything works; other mornings, you’d swear the laws of physics were rewritten overnight. Progress comes from curiosity, not perfectionism. Instead of judging a bad pour, ask, “What variable changed?” Was the milk hotter? Did I introduce air too long? Was my shot running fast? This habit turns frustration into data and data into improvement.
Also, celebrate small wins. The first time your white sits boldly on the crema without sinking, that’s a win. The first heart with a clean point, another. String those together, and your kitchen starts to feel like a little café. Friends will assume you’ve taken a course. You’ll smile and pour them a tulip.
A Day-One to Day-Thirty Roadmap
If you like structure, here’s a practical arc that mirrors how baristas build repetition behind the bar, translated for home.
Days 1–3: Shot and Steam Fundamentals. Work on dialing a 1:2 espresso ratio and steaming milk that’s glossy and integrated. Don’t worry about art—just texture. Swirl until it looks like wet paint every time.
Days 4–7: Hearts. Pour nothing but hearts. Count your wins. Adjust milk temperature and spout height until edges are crisp and the tip is sharp.
Days 8–14: Tulips. Layer two- and three-stack tulips. Slow your pulse. Aim for symmetry centered on the cup.
Days 15–21: Rosettas. Practice the wiggle. Keep the amplitude small and the flow steady. Finish with a clean draw-through.
Days 22–30: Combine and Refine. Mix designs, experiment with different cups, try oat or soy barista milks, and shoot for consistency: same pattern size, centered, with a silky surface.
By the end of a month, you’ll have a muscle-memory foundation that doesn’t vanish under pressure. It’s the difference between “I got lucky” and “I can do this again.”
Flavor Still Matters: Latte Art That Tastes as Good as It Looks
It’s easy to get obsessed with the look and forget the sip. Latte art shines when the drink tastes fantastic. Choose beans that play nicely with milk—classic caramel-nut profiles or modern chocolate-forward blends make lattes sing. If your drink tastes dull, cut the milk ratio. A 5–6-oz cappuccino format is the sweet spot for many beans, offering intense flavor with a beautifully manageable canvas.
Syrups and spices are fun, but don’t bury your espresso. A thin line of caramel or a dusting of cinnamon after the pour can complement the art without stealing the stage. If you add syrups, mix them with the espresso before you steam and pour; dumping syrup in afterward can fracture the pattern.
Hosting and Sharing: Turning Your Counter Into a Café Moment
There’s a unique joy in handing someone a cup that you made. Warm your cups, set out a small sugar bowl, offer oat for the non-dairy crowd, and line up a few saucers so you can pour two or three drinks in quick succession. If you’re filming, place your camera off to one side at cup level—the angle where the white meets brown is the most satisfying shot. Even if you never post, the videos help you learn faster.
When friends ask how you made that swan, show them your heart first. It’s the gateway pattern: accessible, elegant, and genuinely delicious when paired with a creamy microfoam and a well-balanced shot. The art is the invitation; the flavor is what brings them back for a second cup.
When You’re Stuck, Change One Variable
Plateaus happen. If your rosettas all blur on the third leaf, don’t overhaul everything. Change one thing: lower milk temp by 3–5°C, or use a slightly smaller pitcher, or reduce your flow by adjusting the tilt, or shift your wiggle amplitude just a touch. Isolate and test. Sudden breakthroughs usually come from tiny, targeted adjustments rather than sweeping reinventions.
If nothing budges, reset to fundamentals for two days: hearts only, medium flow, perfect microfoam. Re-anchoring in the basics eliminates creeping bad habits and reminds your hands what “right” feels like.
The Quiet Payoff
It’s easy to see latte art as a party trick, but the process builds a calmer, more attentive morning ritual. You learn to feel temperature through steel, hear microfoam form by sound, and recognize when an espresso is balanced from the way the crema sits. Your hands move with confidence through a short, graceful routine that rewards you with something beautiful you can drink. That’s a rare and lovely combination.
And here’s the secret I wish someone had told me sooner: every beautiful pour is just a stack of tiny, ordinary cues followed faithfully. You already have everything you need—patience for the shot, attention for the milk, and a steady hand for the pour. Keep those three in order, practice a little each day, and the heart, the tulip, and the rosetta stop being tricks. They become part of how you make coffee.
So tomorrow morning, when the steam wand hisses and the pitcher cools your palm, permit yourself to go slowly. Watch the crema rise, lower the spout, and let the white bloom. Draw the line through. Hand the cup to someone you love—or to yourself—and take that first silky sip. That’s how you craft your coffee latte art like a pro: one attentive, delicious cup at a time.


