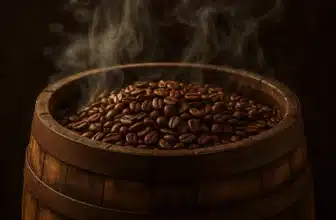
Filter Drip Coffee Brewing Guide: Ratios, Grind, Timing Tips

OneHundredCoffee is reader-supported, and some products displayed may earn us an affiliate commission. Details
Drip coffee gets treated like the “default setting” of coffee—something you drink when you’re not trying. But here’s the secret I wish more people heard early: filter drip can taste stunning—sweet, clear, aromatic, and genuinely café-level—if you treat it like a real brew method instead of a background appliance. And the best part? You don’t need a lab coat or a barista certification. You need a few repeatable rules: ratio, grind, water temperature, brew time, and a couple of tiny habits that fix the most common drip problems.
This guide is built to be used like a playbook. If your drip coffee is sometimes bitter, sometimes weak, sometimes flat, or just never quite “alive,” you’re going to find the exact lever to pull—without guessing. I’ll show you the baseline recipe that works for most people, how to scale it up, how to tune it for light vs dark roasts, how to make a cheap machine behave better, how to fix sour or harsh cups, and how to dial in a drip brew so it tastes like you actually meant to make it.
10 Best Basic Tools for the Best Filter Drip Coffee Brewing
| Image | Product | Features | Price |
|---|---|---|---|
|
Fresh roast favorite

|
Medium roast balance
|
Price on Amazon | |
|
Best drip grinder

|
Consistent burr grinding
|
Price on Amazon | |
|
Best barista scale

|
0.1g + timer
|
Price on Amazon | |
|
Best precision pour

|
Precise temperature control
|
Price on Amazon | |
|
Classic pour-over tool

|
V60 cone geometry
|
Price on Amazon | |
|
Clean cup maker
|
Sediment-free brewing
|
Price on Amazon | |
|
Best drip carafe

|
Heatproof glass server
|
Price on Amazon | |
|
Water upgrade essential

|
Optimized brew minerals
|
Price on Amazon | |
|
Best bean storage

|
Pushes out oxygen
|
Price on Amazon | |
|
Best drip machine

|
SCA-certified brewing
|
Price on Amazon |
And yes—because gear can genuinely help when it’s chosen thoughtfully, I’ll include a few useful Amazon items linked by name so you can upgrade only where it matters.
What “filter drip” actually means (and why it tastes different from other methods)

When we say “filter drip,” we’re talking about percolation brewing through a paper filter. Hot water flows through a bed of coffee grounds, extracts soluble flavors, and passes through the filter into a carafe or mug. That paper filter is a big deal: it removes most oils and fines (tiny particles), which is why drip coffee tends to feel cleaner and clearer than French press.
If you’ve ever tasted a pour-over and thought, “This tastes crisp and defined,” you already understand the paper-filter effect. Drip, when done well, can sit in that same “clean cup” neighborhood—especially with decent water temperature and even saturation. The difference is that the machine controls your pouring, which can be either your greatest friend (consistency) or your subtle enemy (uneven wetting).
So the goal in drip brewing is simple:
- Evenly wet the grounds
- Keep the brewing water hot enough
- Hit a sensible contact time
- Use a ratio that matches your taste
- Avoid channeling and under/over extraction
If those five things happen, drip coffee stops tasting like “basic coffee” and starts tasting like coffee with personality.
Start here: the one drip recipe I’d hand almost anyone
If you want the best “default” cup with minimal fuss, I’d start here.
The baseline drip recipe (balanced, sweet, reliable)
- Coffee: 30 g
- Water: 500 g (or ml)
- Ratio: 1:16.7
- Grind: medium (think: table salt leaning slightly coarser)
- Brew time: ~4 to 6 minutes total drip cycle (varies by machine)
This ratio is the calm middle ground: not weak, not aggressive, not overly intense. It gives you enough concentration to taste sweetness and aromatics without turning the finish into a bitter scrape.
If you want it stronger without changing bitterness, you usually adjust the ratio first, then grind second. Most people do the opposite and end up accidentally over-extracting.
Ratios: the drip coffee lever that matters most (and why)

Ratio is your steering wheel. I know people love to obsess over grind size first, but if your ratio is off, grind tweaks become a mess—because you’re trying to fix strength and extraction at the same time.
Here’s how to think about ratios in a simple, practical way:
- Ratio controls strength (how concentrated your coffee tastes)
- Grind and time control extraction (which flavors you pull out)
When you dial the ratio first, everything gets easier.
Common drip ratios (and how they taste)
- 1:15 (stronger): bolder, thicker, more intense, sometimes more bitter if your machine runs hot/slow
- 1:16 (balanced): classic “good coffee” zone, often the easiest to make sweet
- 1:17 (lighter): brighter, cleaner, gentler; can feel “tea-like” with light roasts
- 1:18 (very light): delicate, high clarity; can taste thin if grind/time isn’t adjusted
If you’re brewing dark roasts, you’ll often prefer slightly longer ratios (like 1:16.5 to 1:17.5) to keep bitterness in check. If you’re brewing medium roasts, the standard 1:16 to 1:17 zone is usually perfect. If you’re brewing light roasts, you can go either way—light roasts can taste amazing at 1:16 but also shine at 1:17 if you want extra clarity.
Best Coffee Beans for Filter Drip Coffee Brewing — At a Glance
| Image | Product | Features | Price |
|---|---|---|---|
|
Best Drip-Allrounder

|
Sweet, low-acid blend
|
Price on Amazon | |
|
Best Balanced Medium

|
Citrus-caramel profile
|
Price on Amazon | |
|
Best Bright-Sweet

|
Caramel + red apple
|
Price on Amazon | |
|
Best Organic Drip

|
Cocoa-stone fruit notes
|
Price on Amazon | |
|
Best Classic Aroma

|
Fruity aromatic Arabica
|
Price on Amazon | |
|
Best Easy Medium

|
Cocoa-praline notes
|
Price on Amazon | |
|
Best Bold Drip

|
Rich complex dark roast
|
Price on Amazon | |
|
Best 2lb Value

|
Medium-dark smooth blend
|
Price on Amazon | |
|
Best Fresh-Roast Pick

|
Honey-cherry tasting notes
|
Price on Amazon | |
|
Best Smooth Classic

|
Balanced medium body
|
Price on Amazon |
My “taste-based” ratio cheat sheet
- If your coffee tastes too strong or harsh → go longer (more water)
- If it tastes weak but not unpleasant → go shorter (less water)
- If it tastes weak and sour → don’t just shorten the ratio; you likely need finer grind / hotter water / better extraction
That last point matters. Sourness is usually an extraction issue, not a strength issue.
Measuring: scale vs scoops (and why consistency is the real luxury)

You can absolutely make great coffee with scoops and lines on a carafe. People did it for decades. But if you want drip coffee to taste good every day, the closest thing to a cheat code is a scale—because it turns “vibes” into repeatable reality.
A simple, reliable option is the Greater Goods Digital Coffee Scale. It’s not about being fancy; it’s about being consistent.
If you refuse to use a scale (totally fine)
At least do this:
- Use the same scoop every time
- Level it off the same way
- Keep the same water fill line
- And if the coffee tastes off, change only one variable (ratio or grind—not both)
But if you’re willing to use a scale, drip brewing becomes surprisingly easy to dial in.
Grind size: what “medium” really means for drip (and why grinders matter)

The grind is the next big lever, and it matters because grind size controls how quickly water extracts flavor. Finer grind = more surface area = faster extraction. Coarser grind = slower extraction.
If your drip coffee tastes:
- Sour, grassy, sharp → often too coarse or under-extracted
- Bitter, dry, smoky → often too fine, over-extracted, or brewed too hot/too long
- Flat and dull → often stale beans, poor water, dirty machine, or uneven wetting
What medium should look like (a visual you can actually use)
- Similar to table salt or slightly coarser
- Not powdery
- Not chunky like a French press
If you’re using pre-ground “drip coffee,” it’s usually in the right neighborhood, but it can still be inconsistent. The bigger issue is uniformity: if you have lots of dust (fines) mixed with bigger chunks (boulders), you can get bitterness and muddiness at the same time.
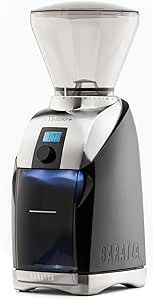
That’s why burr grinders are so widely recommended. A classic entry grinder is the Baratza Encore—not because it’s magical, but because it produces a more even grind than most blade grinders, and drip coffee loves evenness.
Blade grinder warning (gentle but real)
Blade grinders can make tasty coffee, but they also tend to create:
- too many fines → bitterness
- too many boulders → weak/sour notes
- inconsistency cup to cup
If you’re stuck with a blade grinder, you can still improve things by:
- grinding in short pulses
- shaking between pulses
- aiming for consistency rather than ultra-fine grinding
It’s not perfect, but it helps.
Best Coffee Bean Grinders for Filter Drip Coffee Brewing — At a Glance
| Image | Product | Features | Price |
|---|---|---|---|
|
Best Drip Classic

|
Consistent conical burr grind
|
Price on Amazon | |
|
Best Filter Specialist

|
Built for brewed coffee
|
Price on Amazon | |
|
Best Easy Electric

|
One-touch smart grinding
|
Price on Amazon | |
|
Best Budget Burr

|
Slow-heat gear motor
|
Price on Amazon | |
|
Best Upgraded Encore
|
Better burr performance
|
Price on Amazon | |
|
Stylish Drip Choice

|
Simple multi-setting burr
|
Price on Amazon | |
|
Best High-Capacity

|
18-position grind selector
|
Price on Amazon | |
|
Best All-Around Burr

|
Wide-range grind control
|
Price on Amazon | |
|
Best Manual Filter

|
Fast 48mm burrs
|
Price on Amazon | |
|
Best Built-In Scale

|
Grinds by weight
|
Price on Amazon |
Timing: what “brew time” means in drip (and how to use it)

Drip machines don’t give you a timer like pour-over does, but timing still matters because it reflects:
- How long does water contact coffee
- whether the flow is being restricted by a too-fine grind
- whether the filter is clogging from fines
- whether your machine is brewing too slowly or too quickly
A healthy brew time range for most drip machines
- 4 to 6 minutes is a common “good zone” for a full pot
- 3 to 4 minutes can be okay for smaller volumes
- 6+ minutes can be fine, but it increases the risk of over-extraction if your grind is fine
If your machine is blasting through the brew in 2 to 3 minutes, your coffee often tastes weak and underdeveloped. If it’s taking 8 minutes and your coffee tastes bitter and dry, you may be grinding too fine or using too many fines-heavy beans, or your machine might be struggling with water flow.
The practical timing trick
Do this once:
- Brew your normal batch
- Time from “water starts dripping” to “dripping mostly stops.”
- Write it down
Then you can make smart changes:
- If it’s too fast and tastes sour → grind finer
- If it’s too slow and tastes bitter → grind coarser
Timing is a feedback tool.
Water: the invisible ingredient that makes or breaks drip coffee
I’ve seen people buy better grinders and better machines, then keep using harsh tap water… and wonder why everything tastes dull. Water is most of the cup. If your water tastes weird, your coffee will taste weird—no matter how good your beans are.
A quick water checklist
- Does your water taste clean on its own?
- Does it smell like chlorine?
- Does it leave heavy scale in kettles or machines?
If yes, filter it. A simple filter pitcher helps. Even better, for travel or inconsistent water, use bottled water that tastes neutral. Coffee doesn’t need “perfect water,” but it does need not-awful water.
Temperature: the drip machine reality check
Great extraction usually happens when brewing water hits roughly 195–205°F (90–96°C). Many good drip machines aim for that. Some cheaper ones brew cooler, and that’s where you get “weak but also oddly bitter” cups—because you’re under-extracting some compounds while still pulling unpleasant ones from fines.
If your drip machine is known for brewing too cool, the best “fix” is, honestly, upgrade the machine or use a method that lets you control temperature. But you can also compensate a bit with:
- slightly finer grind
- slightly shorter ratio
- fresher beans
- better bloom (pre-wetting) techniques (more on that soon)
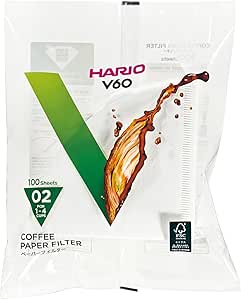
Filters: paper choice changes flavor more than people expect
Paper filters don’t just filter; they influence flow rate and flavor clarity.
Common filter types
- White bleached paper: clean taste when rinsed; consistent flow
- Brown unbleached paper: can add a paper taste if not rinsed thoroughly
- Thicker filters: cleaner cup, sometimes slower flow
- Thinner filters: faster flow, sometimes slightly more body
Always rinse your filter. It takes 10 seconds and prevents that papery edge.
If you want a clean, reliable option, consider Melitta #4 Coffee Filters (just match your brewer’s shape and size). The exact brand matters less than using the correct shape and rinsing.
Machine quality: what separates “good drip” from “wow drip.”

A drip machine basically does three important jobs:
- Heating water properly
- Distributing water evenly
- Controlling brew time and flow
A well-regarded benchmark machine is the Technivorm Moccamaster. You don’t need it, but it’s a good example of what happens when a machine nails temperature and saturation.
A more affordable but capable option many people love is the Bonavita 8-Cup Coffee Maker. Again, the point isn’t brand worship—it’s that better temperature stability and water dispersion lead to better extraction.
If you have a basic drip machine
You can still do a lot with:
- better beans
- proper ratio
- correct grind
- filter rinsing
- cleaning
- and a couple of “barista hacks” like pre-wetting
Which brings us to one of the most overlooked upgrades for drip coffee…
The pre-wet / bloom trick (even on drip machines)
Blooming is when you wet the coffee grounds and wait briefly so trapped gases (from fresh coffee) can escape. In a pour-over, blooming is standard. In drip, it depends on your machine, but you can still mimic the effect.
Why does blooming help drip?
Fresh coffee releases CO₂ when hot water hits it. If water starts flowing through while the coffee is still aggressively degassing, it can:
- repel water
- create uneven wetting
- increase channeling
- reduce extraction consistency
How to bloom on a drip machine (simple method)
- Start the brew cycle.
- When the grounds are just fully wet (usually within the first 30–45 seconds), pause the machine if it has a pause-and-serve feature, or briefly lift the carafe to stop dripping.
- Wait 30–45 seconds.
- Put the carafe back and let brewing continue.
Not all machines allow this neatly, but when it works, it can noticeably improve sweetness and clarity—especially with fresher beans.
Alternative bloom hack (for machines without pause)
Before you start the machine:
- Pour a small splash of hot water over the grounds (just enough to wet them)
- Wait 30 seconds
- Then start the machine
It’s a little extra effort, but it’s surprisingly effective.
The golden “drip dial-in” process (so you don’t chase your tail)
If you want drip coffee that gets better every day instead of randomly swinging, this is the simplest approach:
Step 1: Lock a ratio you like
Start at 1:16.7 (30g coffee / 500g water). Brew. Taste.
Adjust ratio only if:
- It tastes too strong (go longer, like 1:17)
- It tastes too weak (go shorter, like 1:16)
Step 2: Adjust grind for flavor balance
Once strength is in the right zone:
- sour/underdeveloped → grind finer
- bitter/dry/harsh → grind coarser
Step 3: Keep everything else stable
Don’t change beans, filters, and water all at the same time. One change per brew is how you learn fast.
Step 4: Take one tiny note
Nothing fancy. Just:
- ratio
- grinder setting (or description)
- “too bitter / too sour / just right.”
That’s enough.
How to troubleshoot drip coffee by taste (the part everyone actually needs)

Let’s get practical. You brew a pot. It tastes wrong. Here’s what to do.
Problem: “It’s sour, sharp, lemony, thin.”
This is classic under-extraction.
Try, in this order:
- Grind finer (small change)
- Make sure your water is hot enough (some machines brew cool)
- Add a bloom pause
- Increase dose slightly (move ratio toward 1:16) if it’s also weak
Also check:
- Are your beans very light roast? Light roasts often need a finer grind and proper temperature.
- Is your machine brewing too fast? Too fast often equals sour.
Problem: “It’s bitter, dry, harsh, ashy.”
This often suggests over-extraction or too many fines.
Try:
- Grind coarser (small change)
- Use a slightly longer ratio (1:17) if it also feels heavy
- Consider a cleaner filter or rinse more thoroughly
- Clean your machine (old oils create bitterness that no recipe can fix)
Also consider:
- Very dark roasts can taste bitter even when brewed “correctly” if the roast is aggressive. Try lowering the dose or using slightly cooler water (harder on the drip, but sometimes a machine with a “mild” setting helps).
Problem: “It tastes flat, dull, lifeless.”
This is usually not grinding. It’s usually:
- stale beans
- poor water
- dirty machine
- coffee sitting on a hot plate for too long
Fixes:
- Use fresher beans
- Use filtered water
- clean the basket, showerhead area, and carafe
- transfer brewed coffee to a thermal carafe (or drink sooner)
Problem: “It’s strong but kind of hollow.”
This often happens when the ratio is strong, but extraction is incomplete.
Try:
- grind slightly finer
- Add a bloom pause
- ensure even wetting (stir the grounds gently once early, if your basket allows it)
Problem: “It’s both bitter and sour.”
This is a classic sign of uneven extraction—some grounds over-extracted (fines), some under-extracted (boulders), often from inconsistent grinding or uneven wetting.
Fixes:
- Improve grinder consistency
- Avoid blade grinder dust.
- Use a bloom pause
- And make sure the coffee bed is level before brewing
The “coffee bed” matters: how to avoid uneven extraction in drip
A lot of drip baskets end up with a lopsided bed, especially if you just dump grounds in and press start. That uneven bed encourages channeling (water finds the easiest path).
Quick bed leveling habit
Before brewing:
- Give the basket a gentle shake side-to-side
- Or tap it lightly to level the grounds
If your machine allows it, one gentle stir early in brewing can help. Don’t overdo it—just enough to prevent dry pockets.
Roast-specific drip recipes (because light and dark behave differently)

Light roast drip (sweetness + clarity without sourness)
Light roasts need good extraction to reveal sweetness. They punish cool water and coarse grind.
Try:
- Ratio: 1:16 to 1:17
- Grind: medium leaning slightly finer
- Bloom: strongly recommended
- Batch size: avoid tiny batches on machines that struggle with heat stability
Optional micro-adjustments:
- If your machine brews cool, go a bit finer and slightly shorter ratio (like 1:16.2).
- If your light roast tastes “too sharp,” don’t immediately coarse; try finer with bloom first.
Medium roast drip (the easiest win)
This is drip heaven.
Try:
- Ratio: 1:16.5 to 1:17
- Grind: medium
- Bloom: Nice, but not mandatory if the machine is decent
Dark roast drip (smooth, not bitter)
Dark roasts extract easily and can tip into bitterness.
Try:
- Ratio: 1:17 to 1:18
- Grind: medium leaning slightly coarser
- Bloom: optional (still can help evenness)
- Avoid leaving it on a hot plate too long
If your dark roast tastes bitter, your first move should often be:
- more water (longer ratio), not finer grind
Batch size: why half pots can taste weird (and how to fix them)
Some drip machines are tuned for full batches. When you brew a small amount, you can get:
- less stable temperature
- uneven showerhead coverage
- too-fast flow
How to make small batches taste better
- Use a machine designed for small batches if possible
- If not, slightly finer grind for smaller doses
- Consider brewing a bit more and saving the rest in a thermal carafe
- Use the bloom pause trick—small batches benefit a lot from even wetting
Coffee freshness: the unglamorous truth that fixes a lot
If you want drip coffee that tastes sweet and aromatic, coffee freshness matters.
A realistic freshness guideline
- Best flavor often shows up roughly 5 to 30 days after roast (varies by coffee)
- After that, it doesn’t suddenly become “bad,” but aromatics fade, and cups can taste flatter.
If you’re buying grocery-store coffee, look for a roast date if possible. If you’re buying specialty coffee, store it sealed and away from heat/light.
Storage: how to keep beans tasting alive without becoming obsessive
You don’t need a vacuum chamber. You need:
- airtight container
- cool, dark place
- avoid frequent air exposure
A simple option like the Airscape Coffee Canister can help reduce oxygen exposure, especially if you’re not blowing through beans quickly.
But honestly, the biggest storage “upgrade” is buying amounts you can finish in a reasonable time.
Cleaning: the most boring step that makes the biggest difference
Drip machines quietly accumulate:
- coffee oils in the basket and carafe
- mineral scale in the heating system
- residue around the showerhead
Those oils go rancid. That rancid note can read as bitterness, flatness, or “old coffee” even when your beans are great.
The simple cleaning routine I actually recommend
- Rinse the basket and carafe after every brew
- Wash the carafe properly a few times per week (with soap)
- Descale monthly (or more if you have hard water)
A common descaling option is Dezcal Descaling Powder. Follow your machine’s instructions and rinse thoroughly after.
“Hot plate” vs thermal carafe: why your coffee tastes worse after 20 minutes

If your drip machine uses a hot plate, it keeps heating brewed coffee continuously. That can cause the coffee to develop a cooked, bitter edge over time.
If you want your coffee to taste good longer
- move it to a thermal carafe
- or brew into a machine with a thermal carafe
- or simply drink it fresh (my favorite option, emotionally and scientifically)
If your morning is slow and you sip for a long time, thermal storage can seriously protect flavor.
The pro “make drip taste like café” checklist (small habits, big results)

If I’m trying to make drip coffee taste as good as possible without turning it into a hobby, this is my personal baseline routine:
- Use a scale for coffee and water
- Rinse the filter
- Level the coffee bed
- Bloom pause for 30–45 seconds if possible
- Brew, then swirl the carafe gently to mix
- Serve promptly (or transfer to thermal)
- Keep the machine clean
- Use decent water
That’s it. No drama. And the taste difference is real.
Advanced tweaks (only if you want to play)
You don’t need these to make great drip coffee. But if you enjoy dialing things in, these are fun and effective.
1) Stirring or “bed agitation” (carefully)
A gentle stir early can improve evenness, but too much agitation can:
- clog filters (especially with lots of fines)
- increase bitterness
If you try it:
- Stir once, gently, early in brewing
- Keep it consistent so you can judge impact
2) Bypass brewing (strength and clarity control)
Bypass means brewing a stronger concentrate and then adding hot water after.
Why do it?
- can increase clarity
- can reduce over-extraction while maintaining strength
Example:
- Brew at 1:14 in the machine
- Then add hot water to reach 1:16.7 total
This is more common in pour-over, but it can work in drip if you’re chasing a certain style.
3) Paper filter choices for “cleaner” vs “fuller” cups
- Thicker filters: cleaner, brighter
- Thinner filters: slightly fuller body
If you’re always chasing “more body,” sometimes filter choice helps more than grind.
4) Water temperature hacks (limited, but possible)
Some machines have “bold” or “hot” settings that change temperature or flow. If you have this option:
- Use hotter settings for light roasts
- Use gentler settings for dark roasts
Not all machines do this well, but it’s worth testing.
A “perfect drip” workflow for different goals
If you want sweeter coffee
- Use fresh beans
- Add a bloom pause
- Grind slightly finer
- Keep the ratio around 1:16.5 to 1:17
- Use clean, filtered water
If you want stronger coffee
- Shorten ratio first (move toward 1:16 or 1:15.5)
- Only then adjust the grind if needed
- Avoid over-fining the grind to chase strength
If you want cleaner, brighter coffee
- Use a slightly longer ratio (1:17 to 1:18)
- Use quality filters and rinse
- Avoid too much agitation
- Consider a burr grinder upgrade for uniformity
If you want “bold but smooth.”
- Medium roast or well-behaved dark roast
- Ratio around 1:16.5 to 1:17.5
- Slightly coarser grind if bitterness appears
- Avoid the hot plate lingering
Frequently asked “drip dilemmas” (quick answers)
“Should I preheat the carafe?”
If your carafe is cold, it can cool the brewed coffee slightly. Not a tragedy, but preheating can help with temperature stability. A quick rinse with hot water is enough.
“How much coffee per cup?”
Ignore “cups” on machines—they’re usually 5 oz cups, not 8 oz. Use ratio instead:
- For 500 ml of water, start with 30 g of coffee
- Scale from there
“Is tap water okay?”
If it tastes good and doesn’t cause scale quickly, yes. If it tastes chlorinated or leaves heavy mineral buildup, filter it.
“Why is my filter collapsing or overflowing?”
Often too fine a grind, too many fines, or a filter mismatch. Go coarser and ensure the correct filter type.
“Why does the first cup taste different from the last?”
Coffee can stratify in the carafe. A gentle swirl after brewing mixes it evenly.
My favorite “start-to-finish” drip routine (copy this and you’ll be 80% there)
Here’s a simple daily routine that gives consistently good drip coffee without turning you into a coffee scientist:
- Put a filter in the basket and rinse it.
- Add 30 g of coffee (medium grind) and level the bed.
- Add 500 g of water to the reservoir.
- Start brewing. If you can, pause after wetting and bloom for 30–45 seconds.
- Finish brewing. Swirl the carafe gently.
- Drink. Smile.
- Rinse everything and keep the machine clean.
Then adjust:
- sour → finer grind
- bitter → coarser grind or longer ratio
- weak → shorter ratio
That’s your dial-in loop.
A small list of drip gear that genuinely helps (only the essentials)
If you’re building a drip setup, you’ll love it long-term. These are the upgrades that return the most joy per dollar:
- A simple scale like the Greater Goods Digital Coffee Scale
- A burr grinder like Baratza Encore
- A solid drip machine like the Bonavita 8-Cup Coffee Maker or the higher-end Technivorm Moccamaster
- Filters that fit your basket, like Melitta #4 Coffee Filters
- Descaler like Dezcal Descaling Powder
If you buy nothing else, buy consistency: a scale and decent grinder change the game.
The “real” secret to great drip coffee (the part people don’t want to hear)
The best drip coffee isn’t about having the fanciest machine. It’s about doing the simple stuff consistently:
- Use a reasonable ratio
- Keep the grind appropriate
- Brew hot enough
- Maintain a sensible brew time
- Keep your equipment clean
- Use water that doesn’t taste weird
When those fundamentals are in place, drip coffee becomes something you can actually look forward to—sweet, balanced, clear, and comforting in a way that doesn’t feel like compromise.