
OneHundredCoffee is reader-supported, and some products displayed may earn us an affiliate commission. Details
Coffee Brewing Basics 101: A Beginner’s Guide to Better Coffee


Coffee brewing basics are really about learning how a few simple variables work together: coffee amount, water amount, grind size, water temperature, brew time, freshness, and technique. Once you understand those pieces, making better coffee at home becomes much less confusing. You stop guessing. You stop blaming the brewer every time a cup tastes off. You begin to understand why one cup tastes sour, another tastes bitter, another tastes weak, and another finally tastes sweet and balanced.
The beautiful thing about coffee is that it can be as simple or as detailed as you want it to be. You can make a perfectly enjoyable cup with a basic drip machine, a French press, a moka pot, an AeroPress, or a simple pour-over dripper. You do not need a café counter full of expensive gear to improve. What you need first is a clear foundation. If you know how extraction works, why grind size matters, how much coffee to use, and when to adjust temperature or brew time, almost every brewing method becomes easier.
As we discussed previously in our published articles about How Grind Size Changes Coffee Flavor, How Brew Time Changes Coffee Flavor, and How to Dial In Coffee Without Wasting Beans, better coffee usually comes from small, thoughtful adjustments—not random changes. If your coffee is sour, you probably need more extraction. If it is bitter, you probably need gentler extraction. If it is weak but balanced, the ratio may be too light. If it is muddy, you may have too many fines, too much agitation, or poor filtration. Once you can read those signs, coffee becomes much more predictable.
For a simple beginner setup, I like starting with a reliable grinder, a scale, fresh whole beans, and one brewing method you actually enjoy using. A burr grinder like the Baratza Encore ESP, a compact manual grinder like the TIMEMORE Chestnut C2, and a scale such as the Hario V60 Drip Scale can improve almost every brew you make. For brewers, the Hario V60 Ceramic Coffee Dripper, AeroPress Original Coffee Maker, Bodum Chambord French Press, Chemex Classic 6-Cup Coffeemaker, and Bialetti Moka Express all teach different but useful lessons about brewing.
Coffee Brewing Basics 101 — At a Glance
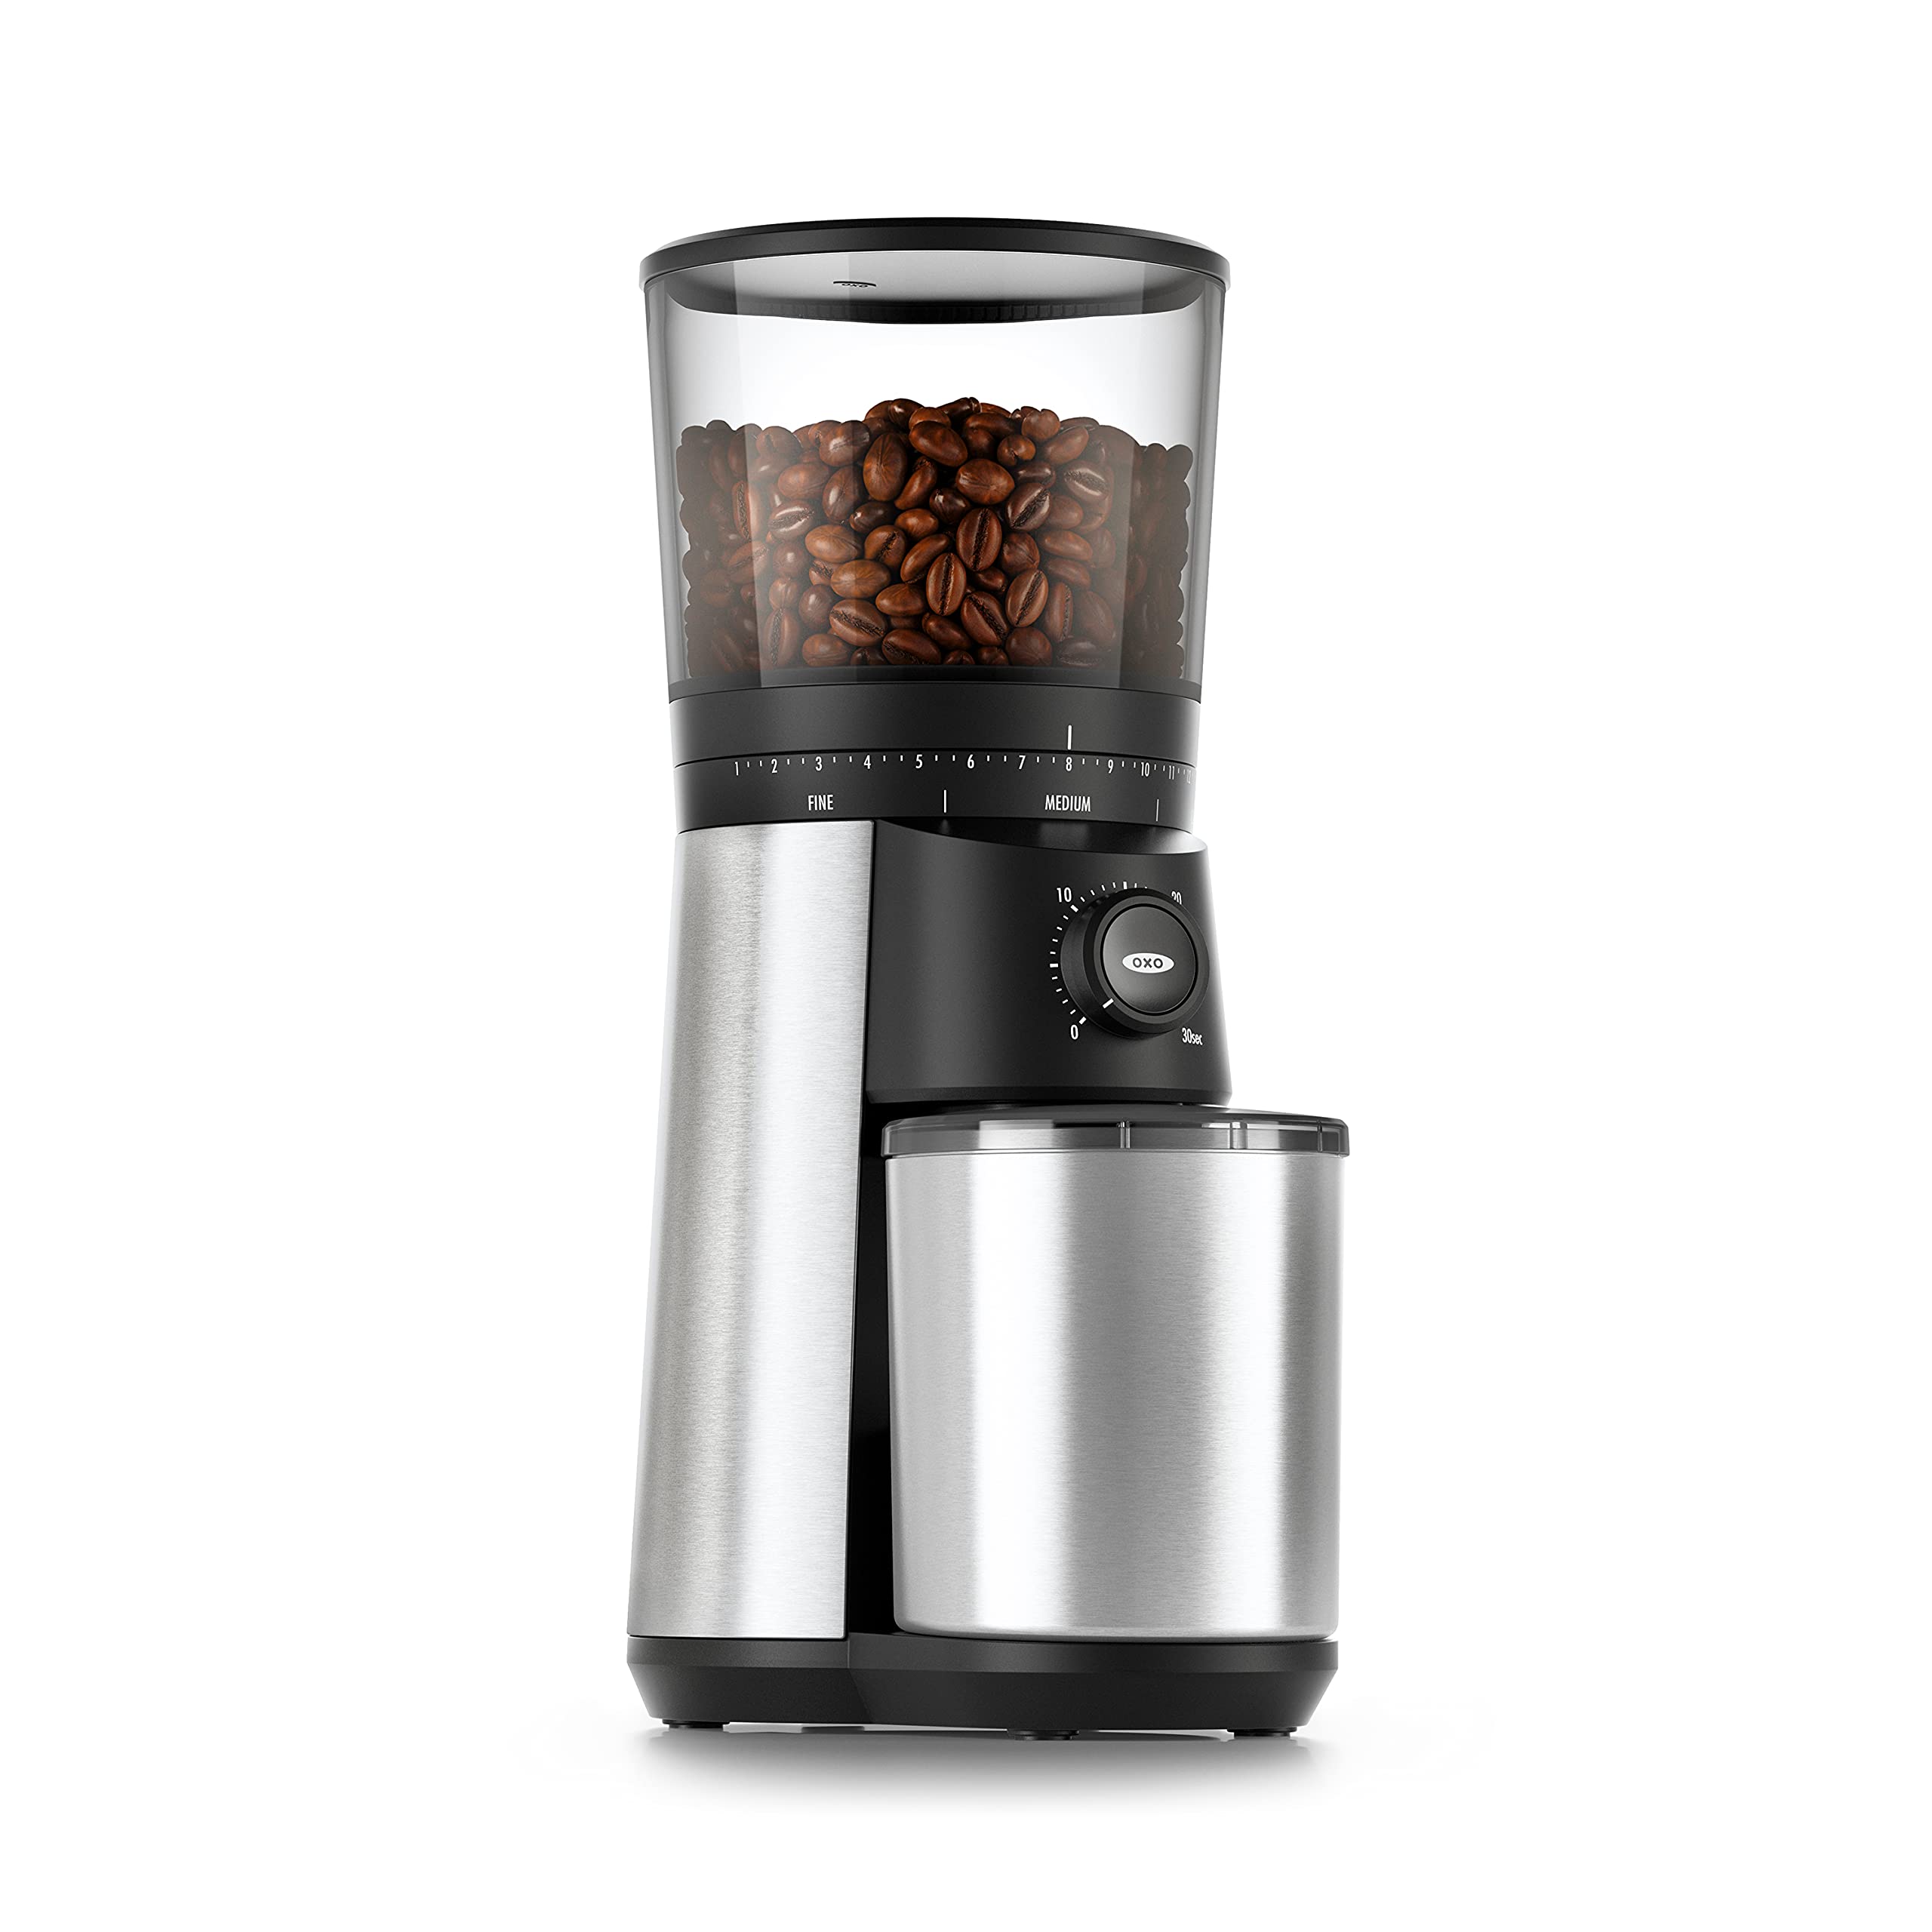
OXO Brew Conical Burr Coffee Grinder
- Conical burr grinding
- 15 grind settings
- Micro-adjustment steps
- 12 oz bean hopper
- One-touch timer
- Strong beginner foundation

Hario V60 Plastic Coffee Dripper — Size 02
- Classic cone brewer
- Spiral interior ribs
- Large single opening
- Flow-controlled brewing
- Lightweight plastic body
- Great brewing teacher

Hario V60 Size 02 Paper Coffee Filters
- Designed for V60 02
- 100-filter pack
- Disposable paper format
- Clean cup profile
- Reduces coffee sediment
- Easy post-brew cleanup

AeroPress Original Coffee Press
- Immersion-pressure brewing
- Fast single-cup workflow
- Wide recipe flexibility
- Compact portable design
- Quick cleanup
- Excellent beginner brewer
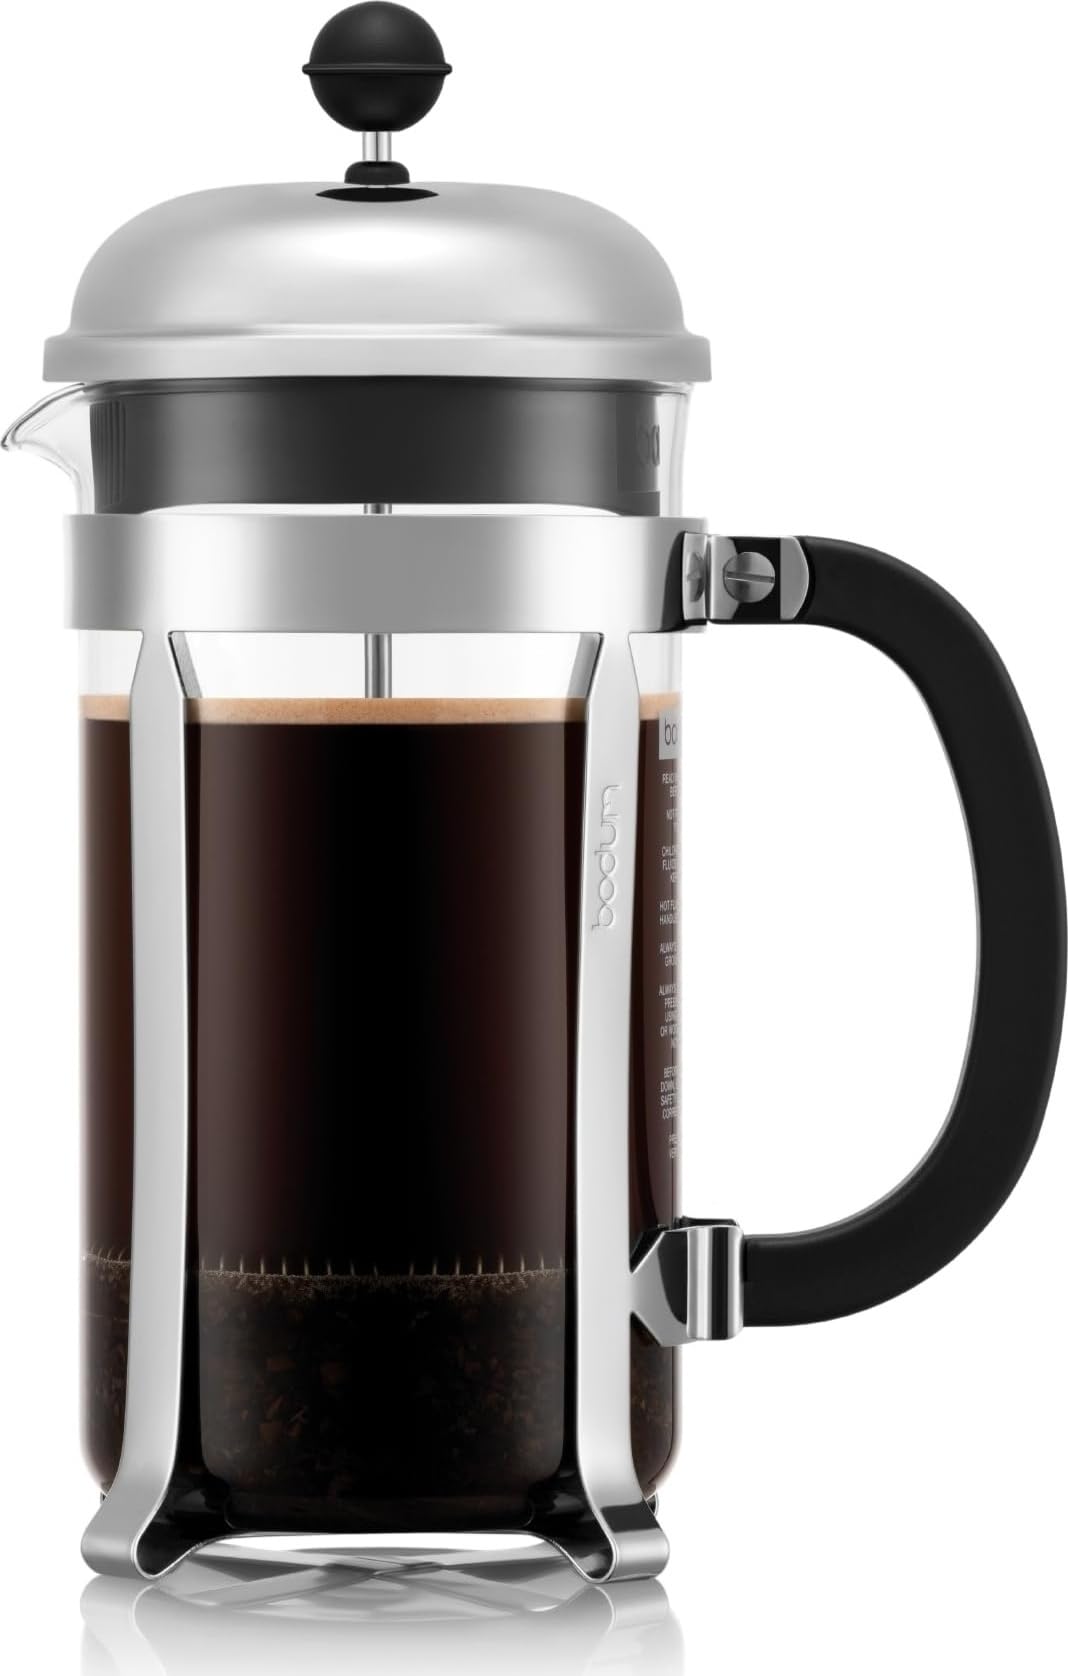
Bodum Chambord 8-Cup French Press
- 34 oz brewing capacity
- Reusable metal filter
- Full-immersion brewing
- Glass carafe
- Rich full-bodied cups
- No paper filters needed

COSORI Smart Electric Gooseneck Kettle
- 0.8 L capacity
- Gooseneck pour control
- Variable temperature
- 104–212°F adjustment
- Keep-warm function
- Useful for pour-over

Greater Goods Digital Coffee Scale
- 0.1 g resolution
- 750 g capacity
- Compact footprint
- Instant tare control
- Multiple measurement units
- Improves brew consistency

Cuisinart DCC-3200 14-Cup Coffee Maker
- 14-cup glass carafe
- Programmable brewing
- Brew-strength control
- 1–4 cup setting
- Adjustable warming plate
- Easy batch-coffee option
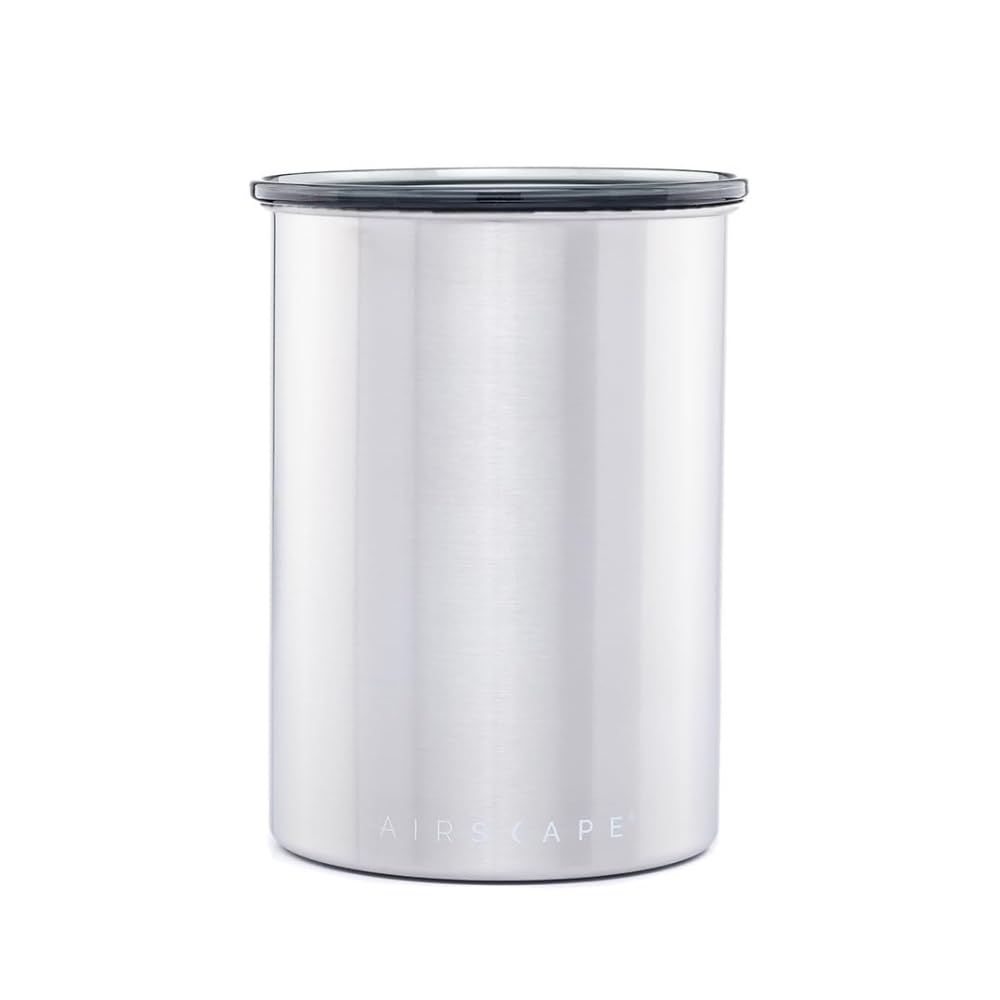
Planetary Design Airscape Coffee Canister
- Inner plunger lid
- Pushes excess air out
- Stainless steel body
- Medium storage size
- Helps protect freshness
- Useful for whole beans

Taylor Waterproof Digital Thermometer
- Digital temperature readout
- Waterproof construction
- Instant-read probe
- Useful for brew water
- Helps repeat temperatures
- Simple low-cost tool
The Quick Answer: Coffee Brewing Basics for Beginners
If you want a simple starting point, use this:
| Brewing Variable | Beginner Starting Point |
|---|---|
| Coffee | Fresh whole beans |
| Grind | Match grind to brew method. |
| Ratio | Start around 1:15 to 1:16 for most hot coffee. |
| Water | Clean, good-tasting filtered water |
| Temperature | Around 195–205°F for most hot brewing |
| Brew time | Match time to method |
| Freshness | Grind just before brewing. |
| Adjustment rule | Change one variable at a time. |
A simple daily recipe for many manual brewers is
| Ingredient | Amount |
|---|---|
| Coffee | 20 g |
| Water | 300–320 g |
| Ratio | 1:15 to 1:16 |
| Grind | Based on Brewer |
| Temperature | Around 200°F |
| Taste goal | Sweet, balanced, clear |
This recipe will not fit every method exactly, but it gives you a very helpful foundation. For pour-over, it works beautifully. For AeroPress, it may need slight adjustment. For a French press, you may use 30 g of coffee and 450 g of water. For drip coffee, you may use around 60 g per liter. For a moka pot and espresso, the structure changes, but the same principles still apply.
Coffee Brewing Is Extraction
The most important coffee brewing idea is extraction. Extraction means water pulling flavor from coffee grounds.
When water touches ground coffee, it dissolves flavor compounds. Some extract quickly. Some take longer. A good cup has enough extraction to taste sweet, aromatic, and complete, but not so much that it tastes bitter, dry, or harsh.
| Extraction Level | Common Taste |
|---|---|
| Under-extracted | Sour, sharp, thin, grassy, hollow |
| Balanced | Sweet, rounded, clear, pleasant |
| Over-extracted | Bitter, dry, harsh, woody, muddy |
This is the heart of brewing. Almost every coffee problem comes back to extraction or concentration.
If your coffee tastes sour, the water probably did not extract enough.
If your coffee tastes bitter and dry, the water probably extracted too much.
If your coffee tastes balanced but weak, extraction may be fine, but the drink is too diluted.
If your coffee tastes muddy, extraction may be uneven, or the cup may contain too many fine particles.
Once you think this way, coffee gets much easier.
Coffee Strength vs. Extraction
Strength and extraction are not the same thing.
Strength is how concentrated the coffee tastes. Extraction is how much flavor was pulled from the grounds. This difference matters because the fix changes depending on the problem.
| Cup Problem | What It Usually Means | Better Fix |
|---|---|---|
| Balanced but weak | Too diluted | Use more coffee or less water. |
| Balanced but too strong | Too concentrated | Add water or use less coffee. |
| Sour and weak | Under-extracted | Grind finer or brew longer. |
| Bitter and strong | Over-extracted and concentrated | Grind coarser or shorten the brew. |
| Bitter but watery | Over-extracted but diluted | Fix extraction, not just the ratio. |
| Hollow | Missing sweetness/body | Improve extraction or strengthen the ratio. |
A common beginner mistake is trying to fix every problem with more coffee. More coffee can fix weak coffee, but it will not automatically fix sour coffee. If the coffee is sour because the grind is too coarse, adding more coffee may make it stronger and still sour. Likewise, adding water to bitter coffee may make it less intense, but it may still taste harsh.
The better question is, is the flavor balanced, or is the extraction wrong?
Coffee-to-Water Ratio: The Foundation of Strength
The coffee-to-water ratio controls how concentrated the cup feels. For most hot-brewed coffee, a good beginner ratio is between 1:15 and 1:16.
That means:
- 1 gram coffee to 15 grams water for a fuller cup
- 1 gram coffee to 16 grams water for a balanced cup
- 1 gram coffee to 17 grams water for a lighter cup
| Coffee | Water at 1:15 | Water at 1:16 | Water at 1:17 |
|---|---|---|---|
| 12 g | 180 g | 192 g | 204 g |
| 15 g | 225 g | 240 g | 255 g |
| 20 g | 300 g | 320 g | 340 g |
| 30 g | 450 g | 480 g | 510 g |
| 40 g | 600 g | 640 g | 680 g |
| 60 g | 900 g | 960 g | 1,020 g |
For most beginners, I recommend starting at 1:16. It is balanced enough to taste clear but not so light that it feels watery.
Here are method-specific starting points:
| Brewing Method | Good Starting Ratio |
|---|---|
| Pour-over | 1:15 to 1:17 |
| Drip coffee | 1:16 to 1:17 |
| French press | 1:14 to 1:16 |
| AeroPress | 1:13 to 1:16 |
| Cold brew concentrate | 1:5 to 1:8 |
| Ready-to-drink cold brew | 1:10 to 1:12 |
| Espresso | Around 1:2 |
| Moka pot | Fill the water below the valve and basket level. |
If your coffee tastes balanced but weak, use more coffee or less water. If it tastes balanced but too strong, add water or use less coffee next time.
Grind Size: The Biggest Flavor Control
Grind size controls how quickly coffee extracts. Finer grounds extract faster because more surface area touches the water. Coarser grounds extract more slowly.
This is why grind size has such a dramatic effect on flavor.
| Grind Too Coarse | Grind Too Fine |
|---|---|
| Sour | Bitter |
| Thin | Dry |
| Weak | Muddy |
| Hollow | Harsh |
| Fast brew | Slow brew |
| Under-extracted | Over-extracted |
A simple grind-size map looks like this:
| Brewing Method | Best Starting Grind |
|---|---|
| Espresso | Fine |
| Moka pot | Fine-medium |
| AeroPress | Medium-fine |
| V60 pour-over | Medium-fine |
| Drip coffee | Medium |
| Kalita Wave | Medium |
| Chemex | Medium-coarse |
| French press | Coarse |
| Cold brew | Coarse |
| Turkish coffee | Extra fine |
The simplest grind adjustment rule is
If coffee tastes sour, grind finer.
If coffee tastes bitter, grind coarser.
That rule is not perfect in every situation, but it works surprisingly often.
A burr grinder makes this easier because it creates more consistent particles than a blade grinder. Blade grinders often make powder and chunks at the same time, which can make coffee taste sour and bitter together.
Water Temperature: How Heat Changes Extraction
Water temperature affects how quickly coffee extracts. Hotter water extracts faster. Cooler water extracts more gently.
For most hot coffee methods, a good starting range is around 195–205°F, or 90–96°C. But the best temperature depends on roast level.
| Roast Level | Good Starting Temperature |
|---|---|
| Light roast | 202–205°F |
| Medium-light | 200–203°F |
| Medium | 195–202°F |
| Medium-dark | 190–198°F |
| Dark roast | 185–195°F |
Light roasts are harder to extract, so they often need hotter water. Dark roasts extract more easily and can become bitter with very hot water, so they often taste smoother with cooler water.
If you do not have a thermometer, use this simple guide:
| Target Style | Simple Method |
|---|---|
| Light roast / hotter brew | Use water just off the boil. |
| Medium roast | Boil and wait 30–60 seconds. |
| Dark roast | Boil and wait 1–2 minutes. |
Water that is too cool can make coffee taste sour, weak, or hollow. Water that is too hot can make coffee taste bitter, dry, or harsh.
Brew Time: How Long Water Touches Coffee
Brew time controls how long water extracts from the coffee grounds. Short brew times tend to extract less. Long brew times tend to extract more.
Each method has its own normal range.
| Brewing Method | Typical Brew Time |
|---|---|
| Espresso | 25–30 seconds |
| Moka pot | About 3–5 minutes total |
| AeroPress | 1:30–3:00 |
| V60 pour-over | 2:30–4:00 |
| Kalita Wave | 3:00–4:30 |
| Chemex | 4:00–6:00 |
| French press | 4:00+ |
| Cold brew | 12–18 hours |
If coffee tastes sour and the brew was fast, extract more by grinding finer or brewing longer. If coffee tastes bitter and the brew is slow, extract less by grinding coarser or shortening the brew.
Brew time should be used as a clue, not a strict law. A 5-minute Chemex can be normal. A 5-minute V60 may be too slow. A 4-minute French press is normal. A 4-minute AeroPress may be too long if the grind is fine.
Taste should always guide the final adjustment.
Freshness: Why Whole Beans Matter
Fresh coffee tastes more aromatic, sweeter, and more alive. Stale coffee can taste flat, papery, dull, woody, hollow, or weak even when your recipe is correct.
Whole beans stay fresh longer than pre-ground coffee because grinding exposes more surface area to oxygen. Once coffee is ground, aroma fades quickly.
| Coffee Condition | Common Flavor |
|---|---|
| Fresh whole beans | Aromatic, sweet, lively |
| Freshly ground | Fuller and clearer |
| Pre-ground | Fades faster |
| Old beans | Flat, dull, papery |
| Poorly stored beans | Stale, woody, hollow |
| Very oily old beans | Bitter and lifeless |
Store coffee in an airtight container away from heat, light, moisture, and strong smells. Do not leave the bag open. Do not store beans beside the stove. Do not keep them in a clear jar in direct sunlight.
For beginners, medium roast whole beans are usually easiest. They have enough sweetness and body without being as hard to extract as light roasts or as bitter-prone as very dark roasts.
Good beginner-friendly bean styles include the following:
| Preference | Bean Style |
|---|---|
| Smooth daily coffee | Medium roast blend |
| More sweetness | Medium roast Colombia/Brazil |
| Bright but balanced | Medium-light washed coffee |
| Milk drinks | Medium-dark chocolatey blend |
| Cold brew | Medium to medium-dark roast |
| Low bitterness | Medium roast Arabica |
Water Quality: The Ingredient People Forget
Coffee is mostly water, so water matters. If your water tastes bad, your coffee will probably taste bad too.
Very hard water can make coffee taste dull, chalky, or muted. Very soft or overly purified water can make coffee taste flat and hollow. Chlorinated water can add harsh or chemical flavors.
| Water Problem | Coffee Flavor |
|---|---|
| Chlorine-heavy water | Harsh or chemical |
| Very hard water | Dull, chalky, muted |
| Very soft water | Flat or hollow |
| Metallic water | Sharp or dirty |
| Good filtered water | Cleaner and sweeter |
You do not need to become a water chemistry expert. Start with water that tastes good when you drink it plain. A basic filter can help if your tap water has chlorine or off-flavors.
If every coffee tastes flat no matter what beans or method you use, water is worth checking.
Bloom: Why the First Pour Matters
Bloom is the first small pour in pour-over brewing. It wets the grounds and allows trapped gas to escape. Fresh coffee releases carbon dioxide when hot water hits it, which causes bubbling or swelling.
A good bloom helps water saturate the grounds evenly.
For pour-over, use 2–3 times the coffee weight in bloom water.
| Coffee Dose | Bloom Water |
|---|---|
| 12 g | 24–36 g |
| 15 g | 30–45 g |
| 20 g | 40–60 g |
| 30 g | 60–90 g |
Wait about 30–45 seconds before continuing the brew.
Bloom water counts as part of the total water. If your recipe uses 320 g total water and you bloom with 50 g, your final scale reading should still be 320 g.
Bloom matters most in pour-over, but the same idea applies loosely to other methods: all the grounds need to get wet. In French press, stir gently at the beginning. In AeroPress, stir enough to saturate the coffee. In cold brew, stir before steeping. In espresso, good distribution helps the puck be wet evenly.
The Main Brewing Methods and What They Teach
Each brewing method teaches a different part of coffee.
Pour-Over
Pour-over teaches grind, flow, pouring, bloom, and clarity. It is excellent if you like clean, bright, aromatic cups.
| Pour-Over Starting Point | Amount |
|---|---|
| Coffee | 20 g |
| Water | 320 g |
| Ratio | 1:16 |
| Grind | Medium-fine |
| Temperature | Around 200°F |
| Brew time | 2:45–3:45 |
If sour, grind finer.
If bitter, grind coarser.
If weak but balanced, use more coffee.
If muddy, reduce fines and agitation.
French Press

The French press teaches immersion brewing, body, steep time, and sediment control. It is great if you like rich, full-bodied coffee.
| French Press Starting Point | Amount |
|---|---|
| Coffee | 30 g |
| Water | 450 g |
| Ratio | 1:15 |
| Grind | Coarse |
| Steep | 4 minutes |
If sour, steep longer or grind slightly finer.
If bitter, grind coarser or steep shorter.
If muddy, use a coarser grind and pour gently.
AeroPress
AeroPress teaches flexibility. You can adjust grind, time, temperature, ratio, and bypass water easily.
| AeroPress Starting Point | Amount |
|---|---|
| Coffee | 16 g |
| Water | 220–240 g |
| Grind | Medium-fine |
| Temperature | 185–200°F |
| Steep | 1:30–2:00 |
If sour, grind finer or steep longer.
If bitter, grind coarser or steep shorter.
If weak, use more coffee or less water.
If too strong, add hot water after pressing.
Moka Pot

A Moka pot teaches heat control and strong coffee brewing. It is ideal for bold coffee and milk drinks.
| Moka Pot Starting Point | Guide |
|---|---|
| Water | Just below the safety valve |
| Coffee | Basket full and level |
| Grind | Fine-medium |
| Heat | Low to medium-low |
| Stop. | Remove at first gurgle. |
If sour, grind finer.
If bitter, lower heat or remove earlier.
If weak, fill the basket properly.
Never tamp the basket.
Drip Coffee
Drip coffee teaches ratio, grind, machine cleanliness, and consistency. It is the easiest daily method for many homes.
| Drip Starting Point | Amount |
|---|---|
| Coffee | 60 g |
| Water | 1 liter |
| Grind | Medium |
| Ratio | Around 1:16.7 |
If weak, use more coffee.
If sour, grind finer.
If bitter, grind coarser or clean the machine.
Espresso
Espresso teaches precision. It is sensitive to dose, grind, yield, time, puck prep, and temperature.
| Espresso Starting Point | Amount |
|---|---|
| Dose | 18 g |
| Yield | 36 g |
| Ratio | 1:2 |
| Time | 25–30 seconds |
| Grind | Fine |
If sour and fast, grind finer.
If bitter and slow, grind coarser.
If sour and bitter together, check puck prep and channeling.
Cold Brew
Cold brew teaches long extraction, concentration, and dilution.
| Cold Brew Concentrate | Amount |
|---|---|
| Coffee | 100 g |
| Water | 800 g |
| Ratio | 1:8 |
| Grind | Coarse |
| Steep | 14–18 hours |
If weak, use a stronger ratio or steep longer.
If bitter or woody, steep less or grind coarser.
If muddy, filter better and do not squeeze the grounds.
How to Fix Common Coffee Problems
Here is the most useful beginner troubleshooting table.
| Coffee Taste | Likely Problem | First Fix |
|---|---|---|
| Sour | Under-extracted | Grind finer. |
| Bitter | Over-extracted | Grind coarser. |
| Weak but balanced | Too diluted | Use more coffee. |
| Strong but balanced | Too concentrated | Add water. |
| Hollow | Missing sweetness/body | Grind a finer or stronger ratio. |
| Muddy | Too many fines/sediment | Grind coarser or filter better. |
| Flat | Stale beans or poor water | Fresher beans / better water |
| Burnt | Too much heat | Lower temperature or heat |
| Watery iced coffee | Ice dilution | Brew stronger first. |
| Harsh espresso | Channeling or over-extraction | Improve puck prep / adjust grind |
The best habit is to change only one variable at a time. If you change grind, ratio, temperature, and brew time all together, you will not know what fixed the cup.
Beginner Brewing Workflow
Here is a simple routine that works for almost any method.
Step 1: Choose One Brewer
Do not learn five methods at once. Pick one method and practice it for a week or two.
Step 2: Use a Baseline Recipe
Start with a known ratio and method. Do not improvise everything.
Step 3: Grind Fresh
Grind just before brewing if possible.
Step 4: Measure Coffee and Water
Use a scale. This is one of the fastest ways to improve.
Step 5: Brew and Taste
Taste it when hot, warm, and slightly cooler. Coffee changes as it cools.
Step 6: Identify the Main Problem
Sour? Bitter? Weak? Muddy? Hollow? Flat?
Step 7: Change One Variable
Adjust grind, ratio, time, or temperature based on the problem.
Step 8: Keep Simple Notes
You do not need a full spreadsheet. Just write what you changed and how it tasted.
A Simple Beginner Brew Log
Use something like this:
| Brew | Coffee | Method | Ratio | Grind | Time | Taste | Next Change |
|---|---|---|---|---|---|---|---|
| 1 | Medium roast | V60 | 1:16 | Medium-fine | 2:30 | Sour | Grind finer. |
| 2 | Same | V60 | 1:16 | Finer | 3:05 | Better | Keep |
| 3 | Same | V60 | 1:15.5 | Same | 3:10 | Fuller | Favorite |
A tiny note like this can save a lot of beans because you stop repeating mistakes.
Best Beginner Gear for Coffee Brewing Basics
| Tool | Suggested Option | Why It Helps |
|---|---|---|
| Burr grinder | Baratza Encore ESP | Better grind control |
| Manual grinder | TIMEMORE Chestnut C2 | Compact and consistent |
| Scale | Hario V60 Drip Scale | Accurate ratio and timing |
| Kettle | Fellow Stagg EKG | Temperature and pouring control |
| Pour-over brewer | Hario V60 Ceramic Coffee Dripper | Teaches extraction clearly |
| Immersion brewer | Bodum Chambord French Press | Rich, full-bodied coffee |
| Flexible brewer | AeroPress Original Coffee Maker | Easy recipe experiments |
| Stovetop brewer | Bialetti Moka Express | Strong moka coffee |
The two most important beginner upgrades are usually a scale and a burr grinder. A new brewer can be fun, but better measuring and better grinding improve almost every method.
My Personal Coffee Brewing Basics Routine
If I were teaching someone from the beginning, I would not start with advanced recipes. I would start with one coffee, one brewer, one grinder setting, and one ratio.
For pour-over, I would brew 20 g of coffee with 320 g of water.
For a French press, I would brew 30 g of coffee with 450 g of water.
For an AeroPress, I would brew 16 g of coffee with 240 g of water.
For drip coffee, I would use around 60 g per liter.
For a Moka pot, I would fill the basket level and brew gently.
Then I would taste the cup and ask one question: What is the main problem?
If it is sour, I extract more.
If it is bitter, I extract less.
If it is weak but balanced, I strengthen the ratio.
If it is muddy, I clean up the grind and filtration.
If it is hollow, I build more sweetness and body.
If it is flat, I check freshness and water.
That simple habit matters more than any fancy recipe.
Final Thoughts: Better Coffee Starts with the Basics
Coffee brewing basics come down to a few core ideas. Use fresh whole beans. Grind them properly for your brew method. Measure your coffee and water. Start with a sensible ratio. Use the right water temperature for the roast. Brew long enough to extract sweetness, but not so long that bitterness dominates. Wet all the grounds evenly. Taste the cup before changing anything. Then adjust one variable at a time.
You do not need to master every brewing method at once. Pick one method, learn how it behaves, and use your taste as a guide. Sour coffee needs more extraction. Bitter coffee needs gentler extraction. Weak coffee needs a better ratio or more extraction. Muddy coffee needs cleaner grinding and filtration. Hollow coffee needs more sweetness, body, or freshness.
Once these basics click, coffee becomes less random. Every cup gives you feedback. Every adjustment has a reason. And slowly, your home coffee becomes smoother, sweeter, clearer, and much more personal.
FAQ: Coffee Brewing Basics 101
What are the most important coffee brewing basics?
The most important basics are fresh beans, correct grind size, good coffee-to-water ratio, clean water, proper water temperature, suitable brew time, and changing one variable at a time.
What is the best coffee-to-water ratio for beginners?
A good beginner ratio for most hot-brewed coffee is 1:15 to 1:16. For example, use 20 g coffee with 300–320 g water.
What grind size should I use for coffee?
It depends on the method. Espresso needs a fine grind; a moka pot needs a fine-medium grind; pour-over and AeroPress usually need medium-fine; drip coffee needs medium; and a French press or cold brew needs a coarse grind.
Why does my coffee taste sour?
Sour coffee usually means under-extraction. Grind finer, brew longer, use hotter water, or improve saturation.
Why does my coffee taste bitter?
Bitter coffee usually means over-extraction, too much heat, too fine a grind, too long a brew time, or dirty equipment. Grind coarser, lower the temperature, shorten brewing, or clean your brewer.
Why does my coffee taste weak?
Weak coffee may mean the ratio is too light, the grind is too coarse, the brew time is too short, the water is too cool, or the beans are stale.
Why does my coffee taste muddy?
Muddy coffee usually comes from too many fines, a grind that is too fine, poor filtration, too much agitation, a long brew time, or dirty equipment.
Is a scale necessary for better coffee?
A scale is not strictly required, but it helps a lot. It makes your coffee-to-water ratio repeatable and removes guesswork.
Is a burr grinder better than a blade grinder?
Yes. A burr grinder gives more consistent particles, which leads to better extraction and cleaner flavor. Blade grinders create uneven powder and chunks.
What is the easiest brewing method for beginners?
AeroPress, French press, and drip coffee are very beginner-friendly. Pour-over teaches more control but takes more practice. Moka pot is simple but needs careful heat management.


