The Easiest way to Steam and Froth Milk with a Steam Wand
OneHundredCoffee is reader-supported, and some products displayed may earn us an affiliate commission. Details
Any liquid can be steamed, according to general liquid facts, although milk’s ability to form a frothy layer depends on its protein and fat content. Because fat adds flavor and taste, whole milk is typically used in beverages in Italy. You can use any type of milk you choose as long as it’s the one you prefer. While skim milk makes foam the fastest, 1% milk alone can make basic, satisfactory outcomes with dry, dry foam. Standard medium milk for the espresso drinks provided in hotels and restaurants should be 2%, as it contains enough milk fat to improve the flavor of the beverage.
General Tips and Steps for Making the Froth
There are a few inexpensive ways to steam and froth milk, from using a French press for coffee to heating milk in a saucepan with a flexible, loose-wired whisk in your kitchen. The following equipment is recommended for common steaming or frothing techniques:
A frothing pitcher or a 2-cup (about 500 ml) stainless steel container. A cooking thermometer that reads up to about 103 °C (it might be digital or a needle).

Who is this for?
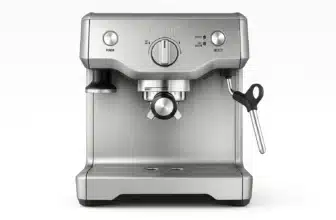
This steam wand is for espresso enthusiasts upgrading from basic frothers. Designed for the Rancilio Silvia V1 and other compatible machines, it delivers silky microfoam for lattes and cappuccinos. Ideal for home baristas seeking professional-grade performance in milk texturing, it’s the perfect accessory for elevating your espresso routine.Optional milk frothing equipment, such as a stovetop steamer, can steam milk and create excellent foam. A superb steaming jug or a pitcher with a pour spout on the lip of the jug is required in this case if you also want to pour latte art.
Some more tips to be a professional at frothing
Instead of using the conventionally advised vinegar mixed water, we always utilize and advise soaking the steam wand in hot, severely salted water. The simple explanation for this is that hot salt water dissolves the calcium-hardened milk deposits that frequently clog the steam wand and can also cause some mechanical issues if the milk buildup persists.
Just before starting to froth the milk
To avoid any potential bacterial growth, ensure all the equipment has been well cleansed and washed before starting. Please take the time to properly study the supplied instructions and user manual before using any manufacturer’s home espresso machine. Additionally, make sure the milk and the pitcher used for frothing are both very cold. The preparation of the milk right before brewing the espresso is another crucial step that must be taken to guarantee that the finished beverage is consumed at its hottest possible temperature.
Now, How to Froth Milk Using a Steam Wand

180 ml of milk is used in our method of frothing to make two cups of cappuccino. First, pour one-third of the milk for frothing into the stainless steel frothing pitcher. Next, place a thermometer in the pitcher for cooking. Place the pitcher under the steam wand or jet while holding it by the handle. Set the steam wand’s tip so it is just below the milk’s surface. The steam valve should now be fully opened. Move the nozzle further into the liquid and reduce the steam a little if the milk surface becomes violently turbulent and large bubbles start to appear.

Who is this for?
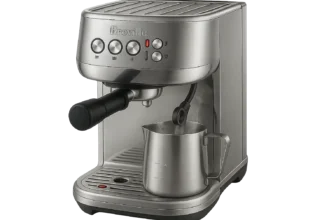
This steam wand tip is designed for baristas and espresso hobbyists seeking enhanced microfoam control. Compatible with Rancilio Silvia and similar machines, it allows more precise steaming and texture creation. Ideal for latte art or smoother cappuccinos, it’s a simple upgrade with a big impact for serious home coffee makers.The milk should be aerated until it has a satiny, velvety feel. You can correct foaming by following the directions provided by the sounds you hear. It should be noted that the sound is inappropriate and inaccurate if it sounds like you are blowing bubbles through a straw. You’ll discover that this foam will quickly deflate, resembling a bubble bath. The sound indicates that you don’t have enough steam pressure and that the steam wand isn’t inserted into the milk deeply enough. The sound of right-way: The Correct sound is a serious, deep rumbling sound. The volume of the milk ought to be rising as well. Milk should be frothed until it has doubled in volume.
When the temperature reaches 55°C, turn off the steam. After you take the wand out of the milk, the temperature will continue to climb. 70°C is the optimum temperature to be attained. Now use a hot, clean cloth to thoroughly wipe the nozzle. Turn on the steam valve to flush and clear up any milk in the wand once your hands are secure. Never attempt to froth milk. For effective outcomes, there is too much condensed water present. Never heat milk beyond 70°C because doing so may cause it to boil, which will make it less sweet and possibly even taste burnt.
Then you know how to Steam and Froth Milk using a steam wand.

How to Steam and Froth Milk Using a Steam Wand (The Complete)
If you’ve ever watched a barista transform a pitcher of cold milk into velvety microfoam and thought, “How on earth did they do that?”, you’re in the right place. This is your one-stop guide to steaming and frothing milk with a steam wand—without stuffy jargon, without magic tricks, and without assuming you already work behind a coffee bar. I’ll walk you through what to buy (and what not to), how to hold the pitcher, where exactly to place the tip, what temperatures to aim for, and how to fix the most common “why does mine look like bubbly dish soap?” problems.
Along the way, I’ll share what I learned from real practice: the little wrist moves, the sounds you actually want to hear (and the ones that mean “stop!”), and the way different milks behave, so you can finally pour a heart that looks like a heart, not a ghost. Bookmark this guide and come back to it—mastery is repetition with feedback, and this article is designed to be that reliable feedback.

Who is this for?
This steam wand is perfect for espresso lovers looking to upgrade their Rancilio Silvia Version M or similar machines. It’s built for smooth microfoam production and greater steam control, making it ideal for home baristas passionate about creating creamy lattes or cappuccinos with precision and professional texture quality.What You’re Trying to Make: Microfoam (And Why It Matters)
Steaming milk isn’t just about making it hot. It’s about transforming the liquid’s texture so that the milk becomes microfoam: a glossy, satin-smooth emulsion of tiny, tiny bubbles suspended in milk. When done right, microfoam has almost no visible surface bubbles. It swirls like wet paint, clings to espresso, and tastes naturally sweet because controlled heat brings out lactose’s perceived sweetness without scorching proteins.
Why microfoam matters:
- It enhances mouthfeel: think silk, not bath foam.
- It integrates with espresso, supporting latte art and flavor balance.
- It’s sweeter at the same milk volume, so you often use less sugar.
The magic triangle behind microfoam is air, heat, and motion:
- Air introduces micro-bubbles (the “stretching” phase).
- Heat sets the proteins so the foam holds together (but not too hot).
- Motion (the whirlpool) evens out bubble size and polishes texture.
Get those three right, and the rest feels almost easy.
What You Need (and What Actually Helps)
You don’t need a commercial café setup to make beautiful milk. You do need a few basics that make learning faster and more forgiving.
- A steam wand with reliable pressure. Entry-level home machines can do it, but stronger boilers make it easier. If your wand has multiple holes, that increases steam volume; if it’s a single-hole tip, you’ll have more control at slower speeds.
- A stainless steel milk pitcher, 12 oz (350 ml), is perfect for a single cappuccino/flat white; 20 oz (600 ml) for two drinks. A sharp spout helps with latte art.
- A thermometer (if you’re new). You’ll feel the temperature by hand later, but early on, a thermometer teaches your fingers what 55–65 °C (130–149 °F) actually feels like.
- Cold, fresh milk. The colder the milk when you start, the longer you have to stretch and refine before you hit your target temperature.
- A microfiber towel (dry) and a damp cloth. Clean the wand immediately after steaming; dried milk is stubborn.
Pro tip many beginners miss: consistency is your best friend. Use the same pitcher and the same volume of milk while practicing so you can repeat success.
The Right Milk for the Right Drink
Different milk choices change your texture, sweetness, and pour behavior. If you’re after a classic latte experience, whole dairy milk is the easiest canvas. But alternatives can absolutely work (and taste great) when you know their quirks.
- Whole dairy milk: Most forgiving, sweetest profile, stable microfoam. Great for lattes and flat whites.
- 2%/semi-skim: Less fat brings a lighter body; still foams well. Slightly less silky than whole milk but still excellent.
- Skim: Foams “big” quickly and can turn dry or meringue-like; watch your stretch time to keep it creamy.
- Oat (barista-formulated): Very friendly for latte art; creamy sweetness; heats quickly—don’t overshoot temperature.
- Almond: Can produce usable foam; tends to be thinner and less stable; best for lighter foam styles.
- Soy (barista-formulated): Good foam potential, but can split if overheated. Keep temps tight.
- Coconut: Aromatic; often thinner foam; better for capp-style than flat white.
Target Temperatures and What They Taste Like
You’ll hear different numbers from different baristas, but these ranges are reliable and practical. Focus on what the drink feels and tastes like, not just the thermometer.
- Cappuccino: 55–60 °C (130–140 °F): More aeration, “drier” foam, brighter sweetness.
- Latte / Flat White: 60–65 °C (140–149 °F): Satiny microfoam with silky mouthfeel and balanced sweetness.
- Hot Chocolate / Mocha: 60–68 °C (140–154 °F): A touch hotter to keep cocoa warm, but don’t scorch.
Above ~70 °C (158 °F), milk develops a cooked flavor and loses that gloss. Once you’ve nailed texture, you can ditch the thermometer and “feel” it: the pitcher becomes just too hot to hold for more than a second or two—pull the wand right there.
The Two Phases: Stretching and Texturing
Think of steaming in two precise phases. If you rush or combine them chaotically, you’ll get big bubbles and an inconsistent texture.
- Stretching (introducing air)
Place the wand’s tip slightly off-center and just kiss the milk surface. You’ll hear a gentle paper-tearing whisper—tss-tss-tss—not a roaring blast or squeal. This is when you add a tiny amount of air to grow the milk volume just enough. For a latte/flat white, this might be 3–6 seconds; for a cappuccino, a little longer. - Texturing (polishing the microfoam)
Once you’ve added enough air, bury the tip just below the surface and set the whirlpool: the milk should spin smoothly around the pitcher. This motion breaks larger bubbles, evens out the foam, and creates that glossy, paint-like texture.
Stop the steam when the pitcher hits your desired temperature, turn off the steam before removing the wand (this prevents splatter), then wipe and purge the wand immediately.
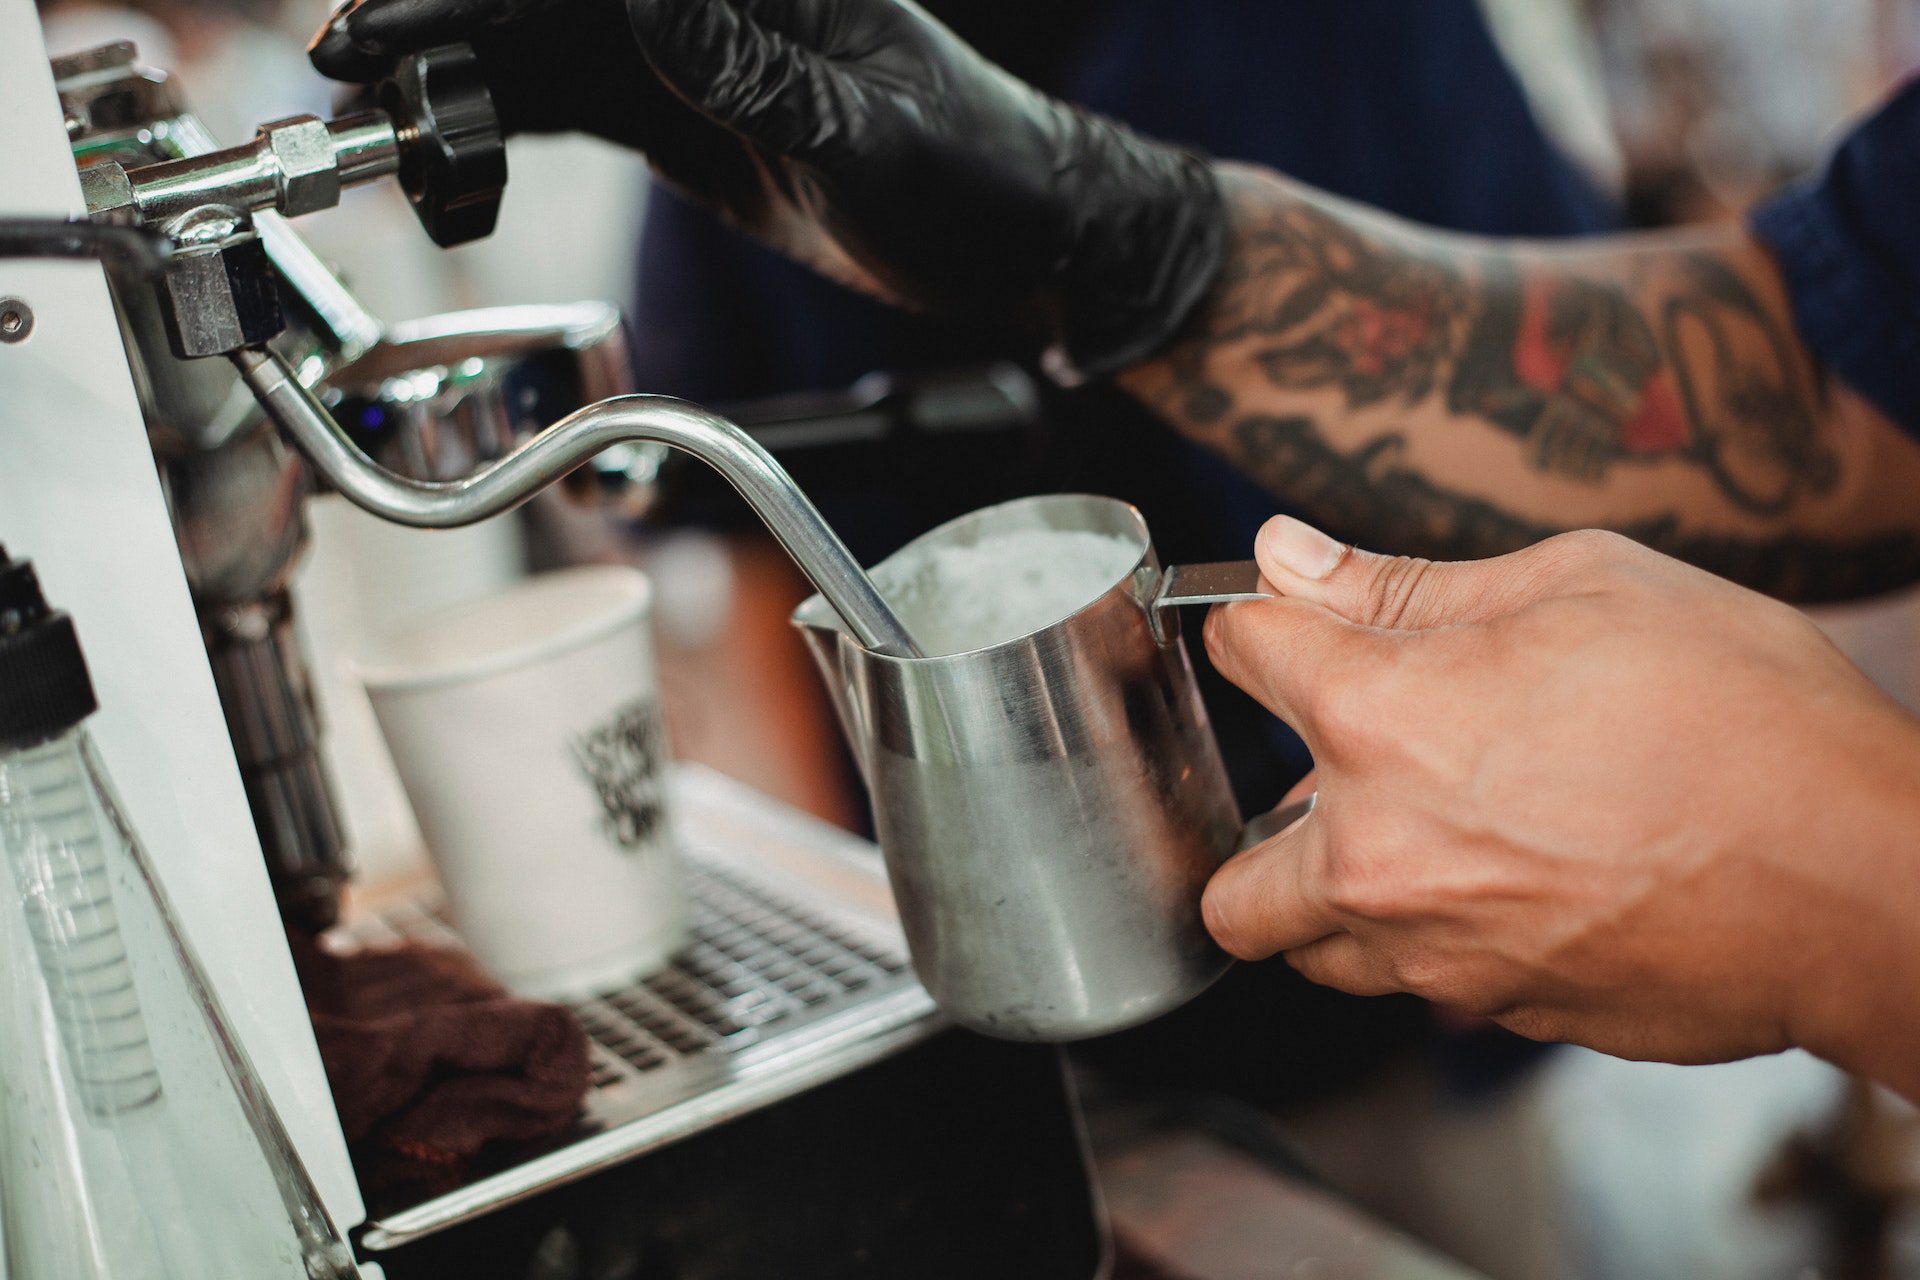
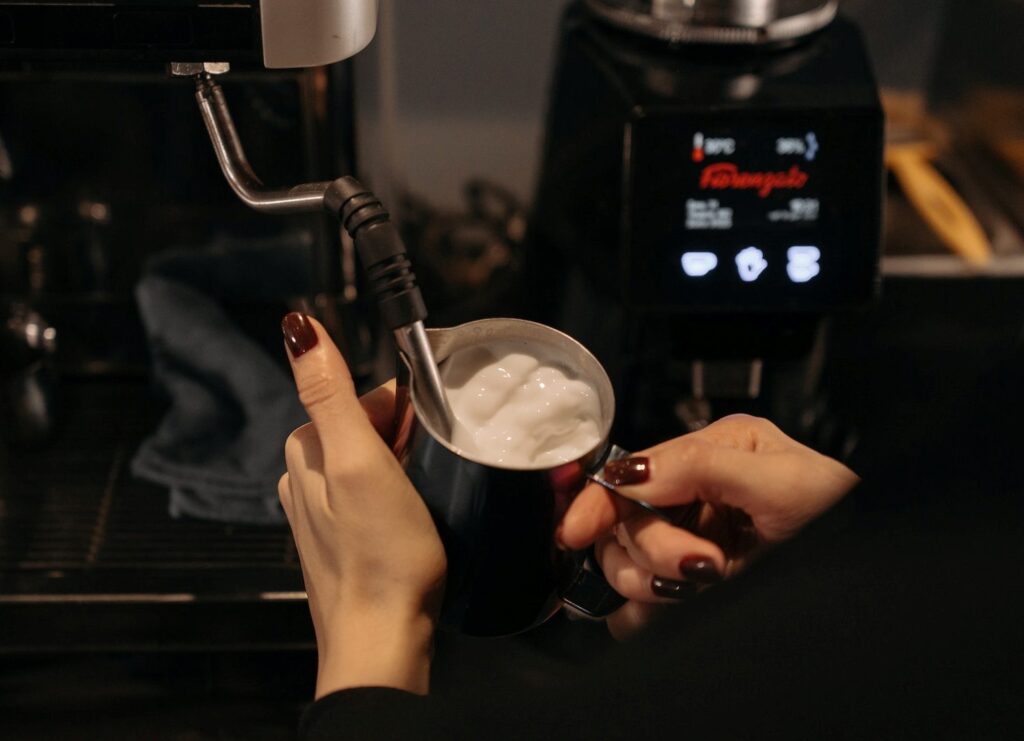
Hand Position, Pitcher Angle, and Wand Depth (The “Feel”)
Pitcher in your dominant hand. Your other hand rests lightly on the bottom side of the pitcher for heat feedback.
- Tip depth: During stretching, the tip is just at the surface—if you can’t hear the whisper, you’re too deep; if you hear loud slurping, you’re too shallow. During texturing, submerge the tip just under the surface to avoid adding more air.
- Angle: Pitcher tipped slightly so the wand sits off-center and encourages a whirlpool. You don’t want chaotic splashing; you want a smooth, circular roll.
- Grip: Relaxed. Tiny micro-adjustments with your fingers make the biggest difference. Think finesse, not force.
Step-by-Step: Your First Perfect Latte Milk
- Purge the steam wand for a second to blow out condensation.
- Fill the pitcher with cold milk to just below the spout base (about one finger-width).
- Place the tip at the surface, off-center, at a slight angle.
- Start the steam and listen for the soft paper-tear whisper. Hold that for 3–6 seconds to stretch.
- Lower the pitcher slightly as the milk expands to keep the tip at the same relative surface position.
- Transition to texturing by lifting the pitcher so the tip sits just beneath the surface. Set the whirlpool—smooth, even spin.
- Heat to target (use a thermometer or feel).
- Turn off the steam before removing the wand.
- Wipe and purge the wand immediately.
- Tap and swirl the pitcher to pop micro-bubbles and re-polish the surface.
- Pour promptly. Freshly steamed milk is at its best right now.
The Simple Science You’ll Feel in Your Hands
Milk proteins (primarily casein and whey) stabilize bubbles when heated gently. Fats add body and gloss. When you introduce air at the surface, you create millions of tiny bubbles. The whirlpool then helps shear larger bubbles into micro-bubbles and distributes them evenly. Heat unlocks sweetness and “sets” the structure; go too hot and you denature proteins past the point of pleasant texture.
That’s the science—your hands will learn it faster than your brain. The sound of the whisper, the look of the surface, and the rising temperature will become intuition as you repeat this process.
Home Machines vs. Café Machines (and How to Adapt)
- Single-boiler home machines may have gentler steam. This is actually an advantage when you’re learning because it gives you more time in each phase. Be patient; your stretching will take a few seconds longer, and your whirlpool will be slower.
- Prosumer dual-boiler machines produce powerful, dry steam. Your stretching window is shorter; micro-adjustments matter more.
- Commercial wands demand confident moves. A fraction of a second too long in stretching can turn your latte into a cappuccino.
No matter the machine, the fundamentals (stretch a little, texture thoroughly, hit the temperature, pour) are identical. Adjust timing and angle, not the core technique.
How Different Milks Behave (and How to Tame Them)
- Whole milk loves you back. Stretch briefly, texture fully, and enjoy the gloss.
- Skim introduces air very fast. Reduce your stretching time and focus on polishing to avoid dry foam.
- Oat (barista) heats quickly and can overshoot. Stretch very briefly, then stay disciplined with temperature.
- Soy (barista) profits from a gentle touch—keep temps in the lower end of your range and texture thoroughly.
- Almond is thin; aim for smaller volumes and tighter pours to preserve definition in art.
- Coconut is aromatic but lean; better suited to cappuccino-style foam than latte-style paint.
Your New Best Friend: Tuning by Sound
- The right sound: soft, rhythmic paper-tearing (short pulses) during stretching; almost silent during texturing.
- Wrong sounds: high-pitched squeal (too little air and wand too deep), loud slurp (tip too high), jet-engine roar (too aggressive; likely splashing).
When in doubt, pause, reposition the tip a hair deeper or shallower, and try again. Small moves change everything.
Latte Art Starts in the Pitcher, Not the Cup
If your foam is thin and glossy, you can pour art. If it’s bubbly and dull, no amount of wrist wizardry will fix it. Before practicing hearts or tulips, aim for consistent texture: the milk should look like wet paint when you swirl it—unbroken surface, gleaming sheen.
When you pour:
- Start higher to integrate milk with espresso (thin stream).
- Drop the pitcher close to the surface when you want the white to “sit” on top (for the heart/rosetta).
- Finish by lifting slightly and cutting through.
Don’t chase complexity early. A clean circle and a simple heart teach you 90% of what you need for everything else.
Common Problems (and How to Fix Them)
Big bubbles on top
You stretched too aggressively or too long. Next time, shorten the stretch window and reduce how much the tip breaks the surface. After steaming, try tapping the pitcher on the counter and swirling to integrate—the immediate fix often works if bubbles are not enormous.
Thin, watery milk
You didn’t add enough air during stretching. Let the tip kiss the surface a bit longer next time. Your milk volume should increase slightly before you dive into texturing.
Dry, meringue-like foam
You either overheated or aerated too much. Aim for a lower final temperature and a shorter stretch. Focus on establishing a whirlpool sooner to polish the texture.
Sour or “cooked” taste
Temperature overshoot. Pull the steam earlier. If you’re using a thermometer, stop at ~60–62 °C (140–144 °F) and feel the difference.
No whirlpool motion
Your tip placement is too centered or too deep. Shift the pitcher to put the wand slightly off-center and shallower to initiate spin.
Milk splits or looks grainy (especially with soy)
Too hot or too much air, too fast. Keep your temps tighter (55–60 °C / 130–140 °F) and introduce air more gently.
Comparison Table: Milk Styles, Target Temps, Texture, and Best Uses
| Milk Type | Target Temp (°C/°F) | Texture Goal | Flavor/Sweetness | Best Suited Drinks |
|---|---|---|---|---|
| Whole Dairy | 60–65 / 140–149 | Silky, glossy microfoam | Naturally sweetest, rich | Latte, Flat White, Cappuccino |
| 2% / Semi-Skim | 58–63 / 136–145 | Light-silky | Balanced sweetness | Latte, Flat White |
| Skim | 55–60 / 130–140 | Oat-sweet; watch the heat | Bright but less creamy | Cappuccino |
| Oat (Barista) | 55–60 / 130–140 | Creamy, stable | Oat-sweet; watch heat | Latte, Flat White |
| Soy (Barista) | 55–60 / 130–140 | Smooth if gentle | Neutral to nutty | Latte, Cappuccino |
| Almond | 55–58 / 130–136 | Thinner foam | Nutty, light | Cappuccino, Cortado |
| Coconut | 55–58 / 130–136 | Light, aromatic | Coconut-forward | Cappuccino, Mocha |
Comparison Table: Drink Styles by Texture and Foam Depth
| Drink | Foam Depth | Mouthfeel | Espresso Ratio Guidance | Notes for Pouring |
|---|---|---|---|---|
| Flat White | Very thin, paint-like | Dense and silky | ~1:3 espresso to milk | Minimal stretch, heavy polish; pour low and slow |
| Latte | Thin-to-medium, glossy | Silky, creamy | ~1:4–5 espresso to milk | Short stretch, long texture; heart/tulip friendly |
| Cappuccino | Thick, airy microfoam | Light and buoyant | ~1:1:1 espresso:milk:foam | Longer stretch; spoonable top if classic style |
| Cortado | Barely textured | Smooth but thin | ~1:1–1:2 | Keep air minimal; prioritize integration |
The Cleaning Ritual That Protects Flavor (and Your Wand)
Milk residue builds up fast and turns rancid. It also clogs vents and ruins steam performance. After every pitcher:
- Turn the steam off, remove the wand.
- Immediately wipe with a damp cloth.
- Purge for a second to clear milk from the tip.
- End-of-day (or session) soak the tip in warm water if buildup begins.
Clean gear = better flavor and consistent performance.
Practice Plan (7 Short Sessions That Change Everything)
Session 1–2: Use water with a drop of dish soap to learn tip position, sound, and whirlpool. This simulates milk texture with zero waste.
Session 3–4: Steam dairy milk to 55–60 °C (130–140 °F). Focus on stretching time: three seconds for latte, five for cappuccino. Stop early. Feel the pitcher’s heat with your hand.
Session 5: Aim for gloss. Spend more time texturing. Your goal is an unbroken, paint-like surface after a swirl.
Session 6: Pour simple shapes into water-tamped espresso (or a spent puck with a splash of water). Practice the high-then-low pour pattern.
Session 7: Try a second milk type (oat barista or 2%). Learn how your technique tweaks with different proteins and fats.
Every session, keep your pitcher volume identical (mark a line inside if needed). Consistency builds muscle memory.
Troubleshooting Table: Symptom → Likely Cause → Quick Fix
| Problem | Likely Cause | Quick Fix |
|---|---|---|
| Big bubbles | Tip too high; stretched too long | Lower tip slightly; shorten stretch; tap and swirl |
| Scream/squeal | Tip too deep; not enough surface air | Move tip up to kiss surface; listen for soft whisper |
| No whirlpool | Tip dead center or too deep | Shift off-center; shallow enough to set spin |
| Dry foam | Over-stretched; overheated | Add less air; stop at 60–65 °C; polish longer |
| Flat, thin milk | Didn’t stretch at all | Add air for 2–4 seconds next time |
| Grainy or split alt milk | Too hot; aggressive stretch | Lower temp to 55–58 °C; gentle, brief stretching |
Equipment Upgrades That Make Learning Easier
If you’re struggling, sometimes a small tool change unlocks progress:
- Sharp-spout pitcher: Improves control when pouring art.
- Thermometer: Trains your hand to feel the right stop point.
- Single-hole tip: Slower steam can be easier to manage on home machines.
- Mirror by your machine: Lets you see the tip position while steaming. It’s not vanity, it’s precision.
Best Selections Tools That Actually Help
Rattleware Latte Art Pitcher (12 oz)
If your pours look like blobs, a better spout is the cheapest, most dramatic fix. Rattleware’s 12-ounce pitcher is a barista staple for a reason: its sharper spout helps you place white exactly where you want it, and the weight feels secure without being heavy. Start with 6–7 ounces of milk in this pitcher and practice hearts; you’ll feel your control jump in a single afternoon.
Motta Europa Milk Frothing Pitcher (14 oz)
Motta’s Europa pitcher is beautifully built, with a profile that encourages a natural whirlpool. The balance between width and height is forgiving for new steamers, and the steel finish cleans up fast. If you value long-term durability and consistency, this is an investment you’ll use for years, from your first tulip to your fiftieth.
Rhino Coffee Gear Digital Thermometer Clip
Learning to stop at the right temperature is the fastest path to better flavor. Rhino’s digital clip-on thermometer is small, quick, and legible, so you can glance down without losing your tip position. After a week with it, your hands will know the feel of perfect temp, and you’ll start steaming by touch alone.
Fellow Eddy Steaming Pitcher (12 oz)
The Eddy’s fluted spout and smart handle design give you fine-grained control while pouring intricate shapes. The body is slightly taller and narrower than some pitchers, so the whirlpool is tight and strong—even on gentler home wands. If latte art is your top goal, this pitcher is a joy.
Espro Toroid Pitcher (12 oz)
The Toroid has a distinctive shape that “self-starts” a whirlpool. For many beginners, that means fewer variables to manage at once: you set your tip depth, start steam, and the pitcher geometry encourages the rolling motion you want. It’s especially helpful on small home machines where steam is modest and positioning tolerance is tighter.
(No links included by request. Choose one pitcher and one thermometer to begin; keep everything else the same while you practice.)
Pouring: The Three-Move Routine You’ll Use Forever
- Integrate: Start high (5–8 cm), thin stream, center of the cup—mix milk with crema so the drink isn’t stratified.
- Paint: Drop the pitcher lip close to the surface; the white begins to sit on top. Move the pitcher side to side gently to widen the shape if you want.
- Finish: Lift slightly and “cut” through the shape to sharpen the heart or rosetta.
If your art disappears into the drink, your milk is too thin. If it sits as a thick island, you stretched too much air. Adjust in tiny amounts next time.
Temperature Without a Thermometer (Learning the Feel)
Your hand will become a more reliable guide than any gadget if you practice:
- Cold-cold → lukewarm (you barely feel heat)
- Warm (you start to feel it) → Hot (the moment your hand wants to let go)
- Stop just before it becomes too hot to keep your hand on the pitcher for more than a second
Try this with a thermometer for a week and you’ll map the sensation to 55–65 °C automatically.
A Note on Safety (and Sanity)
Steam is serious business. Always purge away from your hand, never point the wand at yourself or someone else, and turn the steam off before you pull the pitcher off the wand. If milk splatters, you either removed the pitcher early or your tip was sucking air at shutdown. Practice that off-switch timing; it’s half skill, half habit.
How to Work With Weak Steam Pressure
Some compact home machines sputter or feel timid. You can still make great milk—adjust expectations and technique:
- Use a smaller pitcher (12 oz) with less milk to match the steam capacity.
- Spend a beat longer in stretching and a beat longer in texturing; be patient setting the whirlpool.
- If your wand has a rubbery sleeve, don’t choke up on the tip. You want the metal portion in the milk, not the sleeve.
If your machine struggles to get milk above 55–58 °C, consider steaming a smaller volume or giving the boiler a 10–15 second breather between shots and steaming so it can recover.
Espresso Integration: Why Your Shot Matters
Great milk can’t fix a poor shot. If your crema is pallid and thin, your latte art contrast will suffer. If your espresso tastes sour or bitter, the sweetest milk in the world won’t balance it properly. Dial in your espresso to a rich, syrupy shot with persistent crema. Then your milk and art will shine.
Seasonal Drinks, Same Technique
- Mocha: Steam milk to the higher end of your range (62–65 °C) to keep cocoa warm and integrated.
- Chai latte: Chai concentrate can “thin” milk texture slightly. Add a touch less air in stretching and rely on texturing for polish.
- Iced “steamed” milk? You can cold-foam milk with a wand by introducing the briefest air and keeping the pitcher in an ice bath—but a standalone frother is usually better for cold foam.
Advanced Tips Once You’ve Got the Basics
- Tip swap: If your wand allows different tips, try a single-hole tip for control or a three/four-hole tip for speed once you’re confident.
- Milk rotation: Fresher milk foams better. If you’re practicing a lot, buy smaller cartons more frequently.
- Spout discipline: When you swirl and see little pinholes, keep swirling until they disappear before pouring. The difference in your art is immediate.
What Practice Feels Like (A Realistic Progression)
Day 1: You’ll get some drinkable foam, but it may be bubbly or flat. That’s normal.
Day 3: You’ll start hearing the right whisper and seeing the surface turn shimmery.
Day 7: Your milk will feel like paint 2–3 times out of 5. A heart will appear.
Day 14: You’ll catch yourself adjusting depth instinctively. Your first tulip shows up.
Day 30: Your friends assume you’ve secretly been moonlighting at a café.
Practice isn’t punishment—it’s a rhythm. One small tweak per session beats ten changes at once.
Frequently Asked (and Honestly Answered)
Can I re-steam milk?
Technically, you can, but flavor and texture suffer. For best results, steam fresh each time. If you must, keep re-steaming to a minimum and accept that gloss and sweetness drop fast.
Why does my foam collapse after a minute?
Too hot or too little texturing. Hit a lower temp and build a stronger whirlpool to homogenize bubbles.
Is a thermometer cheating?
It’s training wheels. Use it until your hands know the stop point. Professionals “feel” it because they were trained that way.
Do I need barista versions of alt milks?
They help a lot. The formulations are designed to stabilize foam at typical café temperatures.
A Simple At-Home Routine You Can Stick To
- Pick one pitcher and one milk.
- Practice one drink style (latte or capp) for a week.
- Use a thermometer for the first 10–15 pitchers.
- Pour one shape (the heart).
- Clean the wand like it’s part of the shot—because it is.
That’s it. Keep everything else constant and watch your consistency climb.
If You’re Struggling, Try This Diagnostic Drill
Steam milk to 35–40 °C (95–104 °F), then stop and check texture. If it’s already bubbly, your stretching is too aggressive. Reset, and introduce air even more gently and briefly. Then re-steam the same milk to 55–60 °C just to practice setting a whirlpool without adding more air. This isolates each phase so your hands learn them separately.
A Word on Humility (From My Own Early Pours)
I remember the frustration of big, shiny bubbles grinning up at me after what felt like the perfect run. The reality? My tip was 2–3 millimeters too high during stretching. That’s all it took. The fix was not “try harder,” it was “try smaller.” Tiny, almost invisible adjustments compound. The day I finally saw a clean heart settle on the crema, all those misses suddenly felt like stepping stones rather than failures.
You’re closer than you think.
Your Personal Steaming Checklist
Even though we’re favoring paragraphs over bullet points, it helps to mentally walk through a consistent routine every single time. Purge. Fill cold milk to the same line. Tip just kissing the surface. Whisper. Stretch for only a few seconds. Submerge and set the whirlpool. Stop at the temperature. Wipe and purge. Tap, swirl, pour. When you can recite this in your sleep, your hands will follow.
Final Thoughts: Make the Milk You Want to Drink
Steaming and frothing milk with a steam wand isn’t mysterious—it’s muscle memory wrapped around good habits. Keep your variables stable, embrace small adjustments, and permit yourself to be a beginner for as long as it takes. Latte art is a fun milestone, but the real prize is a cup that tastes better and feels better because you made it that way.
The foam you’re chasing is closer than it looks. Put milk in the pitcher. Purge. Listen for that gentle whisper. Let the whirlpool do the heavy lifting. Stop at the sweet spot. Swirl until it’s paint. Then pour, smile, and enjoy what you’ve learned—one silky cup at a time.