Espresso with Any Beans: Grind, Dose, and Brew Tips at Home

One Hundred Coffee is reader-supported, and some products displayed may earn us an affiliate commission. Details
Understanding The Basics of Espresso Brewing
Brewing a delicious espresso is an art form that requires a solid understanding of the basics. Firstly, ensure you have fresh coffee beans that have been recently roasted and ground to a fine consistency. Preheat your espresso machine and ensure it reaches the optimal brewing temperature, typically between 195-205°F (90-96°C). The right water pressure is crucial; aim for around 9 bars to extract the rich flavors and oils from the coffee grounds.

Who is this for?
Ideal for coffee drinkers who want great café-level results at home, this book covers brewing methods, gear, beans, and expert tips. Whether you’re using a French press, pour-over, or espresso machine, it helps beginners and enthusiasts master coffee-making without intimidation, ensuring a delicious cup every time.Next, pay attention to dosing and tamping. Use a scale to measure your dose accurately, aiming for about 18-20 grams of coffee per double shot. Tap the grounds firmly and evenly to create an even extraction. Timing is also key; aim for a total brew time of around 25-30 seconds. Lastly, experiment with different variables such as grind size, water temperature, and extraction time to achieve your desired flavor profile.
Gear needed for Brewing Espresso with Any Coffee Beans
| Image | Product | Features | Price |
|---|---|---|---|
|
Must-Have Accuracy

|
0.1g precision + timer
|
Price on Amazon | |
|
Best Consistency Tool

|
Spring-loaded leveling tamp
|
Price on Amazon | |
|
Best Anti-Channeling

|
Clump-breaking needle distribution
|
Price on Amazon | |
|
Cleanest Workflow

|
Magnetic ring prevents spills
|
Price on Amazon | |
|
Cleaner Grouphead

|
Screen improves water dispersion
|
Price on Amazon | |
|
Best Cleanup Tool

|
Quiet, tidy puck disposal
|
Price on Amazon | |
|
Latte Art Starter

|
Spout for controlled pouring
|
Price on Amazon | |
|
Best Milk Control

|
Clip-on dial temp reading
|
Price on Amazon | |
|
Best Shot Measuring

|
Marked lines for dialing-in
|
Price on Amazon | |
|
Best Maintenance Pick
|
Removes oils + backflush clean
|
Price on Amazon |
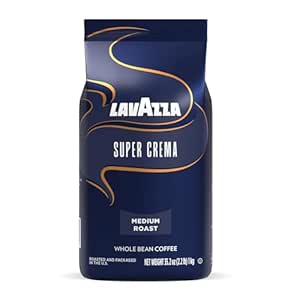
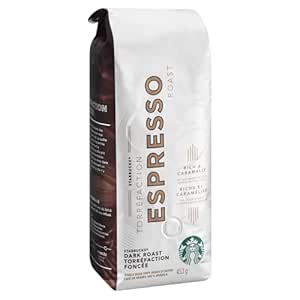
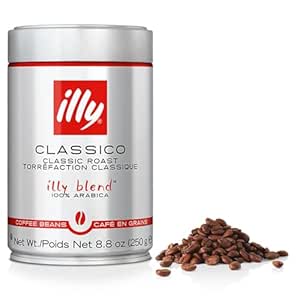
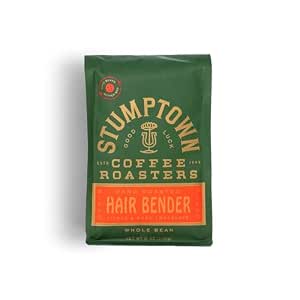
Selecting The Right Coffee Beans For Espresso
When it comes to brewing delicious espresso, choosing the right coffee beans is crucial. While any type of coffee bean can be used for espresso, certain beans are better suited to bring out the rich flavors and aromas that define a perfect shot. Firstly, opt for a medium to dark roast, as these beans tend to have more body and intensity, which are essential in espresso.
Look for beans that are specifically labeled as suitable for espresso or have tasting notes such as chocolate, caramel, or nutty flavors. Next, consider the origin of the coffee beans. Beans from regions like Brazil, Colombia, or Ethiopia often possess unique characteristics that complement the espresso extraction process. Brazilian beans offer a smooth and nutty profile, while Colombian ones provide bright acidity and fruity notes.
Best Espresso Coffee Beans — At a Glance
| Image | Product | Features | Price |
|---|---|---|---|
|
Best Seller Espresso
|
Creamy, balanced crema
|
Price on Amazon | |
|
Best Dark Roast
|
Bold, caramelly profile
|
Price on Amazon | |
|
Best Crema Builder

|
Crafted for crema
|
Price on Amazon | |
|
Best Smooth Classic
|
Balanced Italian profile
|
Price on Amazon | |
|
Best Bold Arabica

|
Deep cocoa intensity
|
Price on Amazon | |
|
Best Specialty Espresso

|
Sweet, syrupy blend
|
Price on Amazon | |
|
Best Chocolatey Shots

|
Full-bodied, sweet espresso
|
Price on Amazon | |
|
Best Crowd-Pleaser
|
Complex, balanced blend
|
Price on Amazon | |
|
Best Italian Blend

|
Cocoa + pepper notes
|
Price on Amazon | |
|
Best Barista-Style Bag

|
Full-bodied crema focus
|
Price on Amazon |
Lastly, consider whether you prefer single-origin or blended coffee beans.
Mastering The Art Of Grinding And Tamping

When it comes to brewing delicious espresso, the importance of grinding and tamping cannot be overstated. The consistency and fineness of your coffee grounds play a crucial role in extracting the perfect flavors from any coffee bean. Start by investing in a high-quality burr grinder, which ensures a consistent grind size. Experiment with different grind settings to find the ideal one for your taste preferences.
Once you have ground your coffee, proper tamping is essential for an even extraction. Use a tamper that fits snugly inside your portafilter basket and apply gentle, even pressure. Avoid pressing too hard or unevenly, as this can lead to channeling and inconsistent extraction.
Remember that practice makes perfect when it comes to mastering these skills. Take time to experiment with different grind sizes and tamping techniques until you achieve a balanced and flavorful espresso shot that showcases the unique qualities of your chosen coffee beans.
Techniques For Extracting Perfect Espresso Shots

If you’ve ever taken a sip of espresso that made your eyes widen and your heart skip a beat (in the best way possible), then you know what we’re chasing here. That silky crema. That deep, rich aroma. The balance of sweetness, acidity, and bitterness dances on your tongue.
Pulling the perfect espresso shot isn’t just a skill — it’s a journey. Whether you’re using a high-end machine or a beginner-friendly model like the Neretva 15 or 20-Bar Espresso Machine, this guide will walk you through every step of the process with real-world tips and a personal perspective. Because espresso isn’t just coffee; it’s an experience.
Start With Fresh, Quality Coffee Beans

Let’s start with the soul of every espresso shot: the beans.
Choose the Right Beans
Not all beans are created equal for espresso. While you can use any coffee beans, those labeled “espresso” are usually roasted slightly darker and offer a more robust, balanced profile ideal for pressure extraction.
- Medium-dark to dark roasts: These bring out deep chocolatey, nutty, or caramel notes — classic in espresso.
- Freshness matters: Look for a roast date, not just an expiration date. Ideally, you want to use beans within 2 to 4 weeks of roasting.
Grind Fresh — Every Time
Pre-ground coffee stales quickly. Invest in a good burr grinder and grind just before brewing.
- Espresso grind = fine but not powdery
- A consistent grind helps with even extraction. Avoid blade grinders that produce inconsistent particle sizes.
Dialing In Espresso
The “Tiny Tweaks, Huge Rewards” Part (Grind, Dose, Distribution, Tamp, Heat, Pull, Taste… and Staying Clean)

If espresso ever made you feel like you’re one variable away from perfection… you’re not imagining it. Espresso is basically a short, intense conversation between water and coffee, and every little detail changes the tone. The good news is you don’t need a lab coat or barista superpowers. You just need a simple routine, a repeatable starting point, and the confidence to adjust one thing at a time.
This is the part of espresso where your shots go from “why is this sour?” to “oh wow… that’s actually sweet.” And it starts with the one knob most people underuse.
Grind size is your steering wheel (and it matters more than anything)
Grind size is the #1 lever home baristas should learn to touch without fear. Not because it’s complicated—because it’s powerful. If you change nothing else (not your beans, not your machine, not your fancy accessories), grind size alone can take the same coffee from sharp and sour to syrupy and balanced.
Here’s what’s happening behind the scenes: espresso is a controlled traffic jam. Water wants to rush through. Coffee particles slow it down. The grind is what decides how fast the water can travel—and how much flavor it can pick up while it’s passing through.
If your grind is too coarse, water flies through like it’s late for work. The shot finishes quickly, tastes thin, and often hits you with that lemony “under-extracted” sourness.
If your grind is too fine, water struggles, pressure builds, flow gets choked, and the shot drags on. Now you’re in bitter territory—burnt edges, dry finish, and that “why does this taste like charcoal?” moment.
This is why having a grinder that can make tiny, precise adjustments is such a game-changer. If you’re using something built for espresso-friendly dialing, like the Baratza Encore ESP, you’ll notice you can actually steer the shot instead of just hoping it behaves.
The simple timing target that keeps you sane
Let’s not overcomplicate the early stage. In real home-kitchen life, you want a benchmark that’s easy to repeat.
A classic starting goal is a shot that runs about 25–30 seconds from pump start, and yes—include pre-infusion if your machine does it automatically. That window tends to land you in the “balanced extraction” neighborhood. Not always perfect, but close enough that your next adjustment is obvious.
Now here’s the part I want you to treat like a friendly game:
- If the shot runs fast and watery, go finer.
- If the shot runs slow and bitter, go coarser.
That’s it. One move. Re-test. Don’t change five things and then stare at the cup as if it owes you answers.
And if you want this to feel less like guessing and more like control, weighing your output makes everything click. A simple espresso scale turns “eh, that looked about right” into “yep, that was exactly right.” Something like the TIMEMORE Black Mirror Basic 2 makes dialing in feel strangely calm—because you finally have numbers that don’t argue with you.
Dose consistency: the quiet difference between “random” and “repeatable.”
Okay—let’s say you nailed a grind setting that gives you great timing. If your dose (how many grams of coffee you put in) changes from shot to shot, you’re basically starting a new experiment every time.
Think of dose like the “amount of resistance” you’re building into the puck. More coffee can slow flow, less coffee can speed it up, and either can throw off extraction even when the grind is right.
A really common home barista sweet spot is pulling doubles, and living around 16–18g in the basket. It’s not a strict law, but it’s a solid range where espresso tends to behave nicely.
And here’s the secret: dose doesn’t just affect strength. It changes how water flows through the coffee bed. Two grams can absolutely be the difference between a syrupy shot and a channeling disaster.
This is why weighing your dose and your espresso output makes the whole process feel “locked in,” not chaotic. The moment you start repeating the same dose, the espresso starts teaching you faster.
Distribution: where most shots secretly go wrong

You can have the “perfect” grind and the “perfect” dose and still pull a shot that tastes weirdly hollow. That’s usually distribution.
Distribution is how evenly your grounds sit in the portafilter before you tamp. If you’ve got clumps, pockets, or one side denser than the other, water will do what water always does: take the easiest path. That’s called channeling—water carving a little shortcut through the puck—so some coffee gets over-extracted while the rest barely gets touched.
And channeling is sneaky because you can still get crema. You can still get a decent-looking stream. But the flavor gives it away: sharp up front, bitter at the end, and kind of confused in the middle.
If you want one simple habit that dramatically reduces channeling, it’s this: break up clumps and level the bed before tamping. A tool that makes this easy (and honestly kinda satisfying) is a WDT tool—those thin needles that stir and fluff grounds so everything sits evenly. Something like the Normcore WDT Tool turns your puck prep from “hope” into “structure.”
And if you’re tired of grounds exploding over the rim while you’re dosing (we’ve all lived that mess), a dosing funnel is the simplest quality-of-life upgrade on earth. The Normcore Magnetic Dosing Funnel basically keeps your coffee where it belongs, which means your dose stays accurate—and your counter doesn’t look like a coffee crime scene.
Tamping: less drama, more level

Tamping is one of those things people treat like a strength test, but it’s not. You’re not trying to crush the coffee into a diamond. You’re trying to create a level, even puck, so water flows through it uniformly.
Here’s the tamping mindset that actually works:
- Level matters more than force.
- Consistency matters more than intensity.
Yes, people talk about “30 pounds of pressure,” but what you really need is “firm and repeatable.” If your tamp is tilted, you can tamp with the force of a superhero and still get uneven extraction.
One of the easiest ways to make tamping consistent—especially when you’re still building muscle memory—is using a spring-loaded tamper that naturally guides you into a flat, even press. The Normcore V4 Spring-Loaded Tamper is popular for a reason: it helps you tamp like the calm, steady version of yourself even before your hands learn the routine.
And a quick, friendly warning: that little polishing twist some people do at the end? Skip it. It can create tiny fractures or disturb the surface—micro stuff you can’t see—but espresso notices. Espresso always notices.
Preheating: the hidden “sweetness switch.”
Espresso is incredibly sensitive to temperature. If your portafilter is cold, your cup is cold, and your machine is barely warmed up, you’re basically inviting sourness.
Cold metal steals heat from the brewing water fast. That heat loss changes extraction immediately—especially in the first seconds of the shot, where the flavor foundation is being built.
The simple habit: preheat everything that touches espresso.
Run hot water through the grouphead, warm the portafilter, and preheat your cup. Give your machine a real warm-up (often 10–15 minutes, sometimes more depending on the machine). You’re not being fussy—you’re giving espresso the conditions it needs to taste sweet instead of sharp.
And this is one of those “you’ll feel it instantly” upgrades. Hot espresso tends to taste rounder and smoother. Cold espresso tends to taste flat, sour, and oddly thin—like it lost its personality.
Pulling the shot: a clean ratio and a clear stopping point

Now the moment of truth—but let’s make it friendly, not stressful.
A great starting ratio for many coffees is 1:2.
That means: if you dose 18g in, you’re aiming for about 36g out in the cup. You can adjust later depending on your beans and taste, but this is a clean base that’s easy to measure and easy to repeat.
Here’s what you’re watching for when the shot runs:
- The first drops typically appear after a short pause (often around 6–8 seconds, give or take).
- The flow should look steady—like warm honey, not like fast water.
- As the shot nears the end, it’ll start to go blond (turn pale). That’s your “stop before it gets watery” cue.
This is where a scale shines again. When you stop by weight instead of guessing by color alone, your results stabilize fast. A scale turns this into a simple routine instead of a vibe check.
Crema and taste: the feedback loop that makes you better fast
Crema is lovely, but it’s not a scoreboard. It’s a clue. Thick crema can mean freshness and good pressure, but taste is the real truth-teller.
When you sip, ask one simple question: Is it balanced?
- If it’s sour and thin, you’re under-extracting. Usually: grind finer, increase time slightly, or adjust ratio.
- If it’s bitter and drying, you’re over-extracting. Usually: grind coarser, shorten time slightly, or stop earlier.
- If it’s sweet, syrupy, and clear, you’re in the zone. That’s the “espresso sings” moment.
And here’s the part people don’t say enough: espresso gives you instant feedback. You don’t have to wait a week to know if your tweak worked. You know in one sip. That’s why dialing in becomes addictive in the best way.
A quick “symptom → fix” guide (so you’re not guessing)
| What you taste/see | Most likely issue | The friendliest first tweak |
|---|---|---|
| Sour, sharp, thin | Under-extracted | Grind a bit finer OR extend shot slightly |
| Bitter, harsh, dry finish | Over-extracted | Grind a bit coarser OR stop shot earlier |
| Fast flow, watery body | Coarser grind, check the basket dose | Finer grind, check dose consistency |
| Slow drip, choking | Too fine / too much resistance | Coarser grind, check basket dose |
| Spraying, uneven stream | Channeling | Improve distribution (WDT), level tamp |
The “clean equipment” detail that quietly makes your espresso taste better
Now let’s talk about the thing that ruins great espresso while you’re busy chasing perfect ratios: old coffee oils.
Coffee oils build up in grinders, baskets, portafilters, and containers. Over time, they go stale, and stale oils can make even fresh beans taste dull or rancid. So yes—espresso is about dialing in, but it’s also about not letting yesterday’s residue crash today’s shot.
If you store beans in a container that’s annoying to clean, you’ll avoid cleaning it. And then your coffee slowly picks up that “old” flavor you can’t quite explain. A container that’s easy to take apart and wipe down is your friend. Something like the Airscape Coffee Canister is popular because it keeps beans fresher and doesn’t turn cleaning into a whole weekend project.
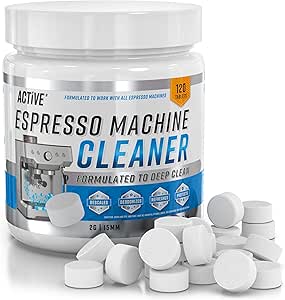
And for espresso machines and accessories, having a proper cleaner on hand makes routine maintenance effortless instead of “ugh, I’ll do it later.” A classic is Cafiza Espresso Machine Cleaner—the kind of thing you don’t think about until you use it once and realize your machine has been quietly collecting flavor-killers.
The real secret: change one thing, then let the cup answer you
If I could sit next to you while you dial in, I’d keep repeating one sentence: don’t change everything at once.
Espresso rewards simple experiments.
Pick a baseline:
- Same dose
- Same ratio
- Same timing target
- Same workflow
Then adjust:
- Grind finer or coarser by a small step
- Taste
- Adjust again
That’s how you learn fast. That’s how you stop wasting beans. And that’s how your “espresso routine” becomes something you can do half-asleep and still get a gorgeous shot.
Because once your grind is close, your dose is consistent, your puck prep is tidy, and your equipment is warm… espresso stops feeling moody. It starts feeling like a skill you actually own.
And honestly? That’s when it becomes fun. Like, wake-up-excited fun.
Frothing Milk (Optional But Delicious)
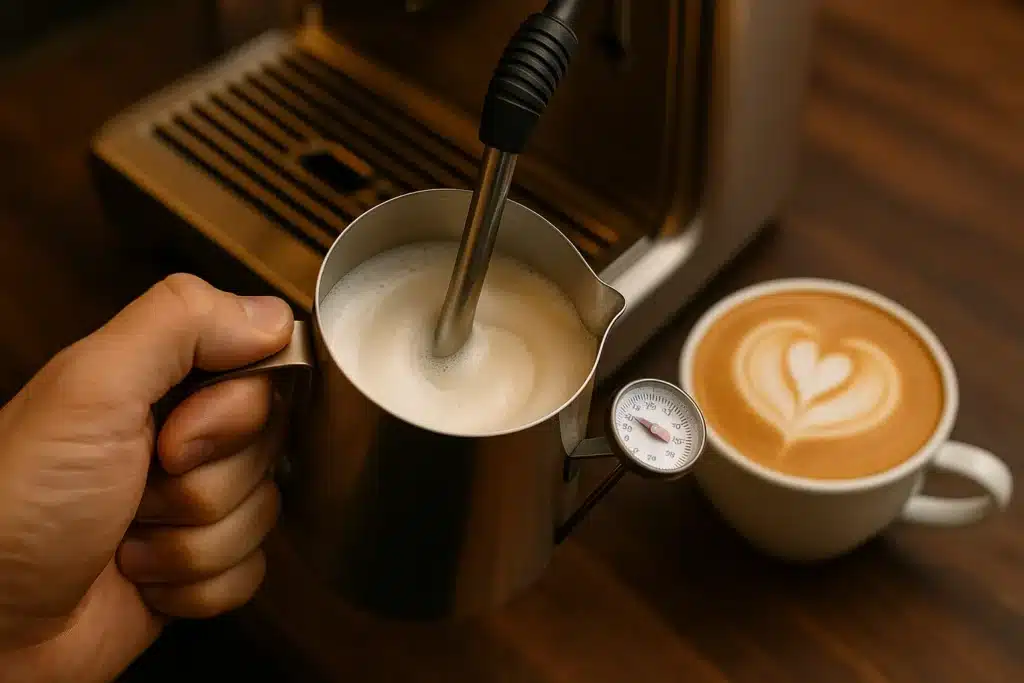
If you’re making a milk-based drink like a latte or cappuccino, steaming milk is a whole craft of its own.
Steam Wand Basics
- Use cold milk and a clean stainless steel pitcher.
- Start with the wand just below the surface to create microfoam (you’ll hear a slight hissing).
- Then lower the wand deeper to heat the milk to ~140-150°F.
Texture Goals:
- Lattes: Smooth, silky, paint-like milk.
- Cappuccinos: Light, airy foam.
Tip: Tap and swirl the pitcher to remove bubbles before pouring.
Clean as You Go
Good espresso is only possible with a clean machine. Residual oils and milk can ruin your next drink fast.
- Rinse your portafilter after every use.
- Purge the steam wand before and after frothing.
- Backflush your machine weekly (if compatible).
Trust me, your future espresso shots will thank you.
Keep Tweaking and Tasting
Perfecting espresso is a process of trial and error. Every variable — bean, humidity, water, grind, tamp — affects the shot.
Don’t get frustrated. Take notes. Adjust one thing at a time and taste the results.
My Favorite Tracking Tips:
- Keep a small notebook or use apps like Brew Ratio or Bean Conqueror.
- Write down the bean type, grind size, dose, shot time, yield, and your tasting notes.
Over time, you’ll build an intuition for what makes your perfect cup.
Bonus: Espresso Troubleshooting Guide
| Problem | Likely Cause | The shot is too slow |
|---|---|---|
| The shot is too slow | Grind too coarse | Grind finer |
| Shot is too slow | Grind too fine / overdosed | Grind coarser / reduce dose |
| Sour taste | Under-extracted | Grind finer / increase time |
| Bitter taste | Over-extracted | Grind coarser / decrease time |
| No crema | Stale beans / poor tamp | Use fresh beans / tamp evenly |
Final Thoughts: Your Espresso Journey Starts Now
Learning to extract the perfect espresso shot at home is part science, part art, and part self-discovery. Some mornings you’ll nail it. Others, you’ll scratch your head. But every single shot teaches you something.
So be curious. Be playful. Taste everything. And celebrate the small wins — that perfect shot with the thick crema, the rich body, the silky milk.