The Ultimate Guide to Buying the Best Coffee Roaster
One Hundred Coffee is reader-supported, and some products displayed may earn us an affiliate commission. Details
Choosing the Best Coffee Roaster
The Well-Equipped Home Roasting Kit. The following tools and implements should be part of any home roasting kit:
You’ll need a home roaster to roast your beans. There are several alternatives, including a manual home coffee roaster with a crank, an air popcorn popper, and a consumer electric drum or electric fluid air roaster.
Our Best Reviewed Coffee Roasters at A Glance
| Image | Product | Features | Price |
|---|---|---|---|
Best Home Coffee Roaster  |
| Price on Amazon | |
Best Roasting Starter Bundle  | Coffee Roaster Bundle SR800 – with a Digital Pour Over Scale |
| Price on Amazon |
Best Durable  |
| Price on Amazon | |
Best Design  |
| Price on Amazon |
Green whole bean coffee to roast in the roasting log, enter the time, temperature, and number and kind of beans utilized. Once you’ve found the perfect coffee flavor, you’ll want to replicate it.

Who is this for?
Designed for aspiring roasters and seasoned hobbyists, this handbook walks you through every stage of roasting coffee beans—from selecting the right green beans to perfecting your roast profile. It’s practical, approachable, and packed with professional techniques to help you roast confidently at home or in a small-batch setup.A thermometer is used to determine the temperature of the beans. Purchase a digital thermometer with a quick read or one with a thin, flexible probe that is connected to a digital console. The tip of the thermometer must be able to reach the center of the roasting beans. Inserting a thermometer is reserved for experienced roasters. To weigh your food, use a digital kitchen scale. Then use the quantity recommended in the instructions for your electric model. Use a dry measuring cup. To correctly track how long the beans have been roasting.
A set of stainless steel colanders for chilling hot roasted beans.Containers with tight-fitting covers to keep the valuable beans fresh. Mason jars are ideal.
A strong heating source, such as a cooktop or electric hot plate, to handle hot beans safely; wear heat-resistant gloves.
A fire extinguisher, as cooking fires do occur.
Getting Started with Home Roasting
You will require a nice facility if you want to roast at home. Think about the following:
Enough Space
Choose a location where you can stretch out. Roasting necessitates a quick response. You don’t want to be hunting for your equipment when the beans are ready to finish.
Appropriate Cleanup
It is also a consideration. During roasting, beans shed their skins, known as chaff. Some beans contain relatively little, whereas others have a large amount. Choose an area that is simple to sweep or vacuum.
Yield

When you manufacture the required batch capacity, every coffee roaster produces the finest coffee. In other words, strictly adhere to the batch capability instructions. Don’t go above or under. If you want to try different coffees, invest in a tiny roaster, such as those made by Hearthware. They are simple, capable devices that emit less smoke than bigger equipment.
Aroma

Smoke and scent are always present in home roasting. In the marketing literature for home roasters, roasting coffee is compared to making bread. That’s not the case. The early stages of roasting smell unpleasant, while the later phases are smoky. Except for the Nesco, all roasters produce enough smoke to necessitate ventilation near the roasting area. Hearthware manufactures a vent that is quite simple to adapt and install in your home. Some home roasters set up their roasting chamber to feed a bathroom vent, while others open a window and drape the vent outside. That may work, but it isn’t ideal. A garage is another possibility. Garages, on the other hand, may turn chilly in the winter and scorching in the summer in many areas.
Weather
Even if you roast inside, you may discover that the weather and the environment have an impact on your coffee. You will become weather-aware, much like bakers. And I enjoy your coffee. You will become weather-aware, much like bakers. And, like your professional colleagues, you’ll learn to adapt. Home roasting equipment is notoriously temperature-sensitive. If the temperature lowers, an average coffee brewer will still heat water effectively. Not a home roasting machine. If the temperature becomes too chilly, the coffee roaster will not heat up correctly. This implies you might not be able to grill outside in January. Humidity has a deleterious impact on home roasters as well, but in a subtler way. Your home roaster should still operate if the humidity increases, but it’s important to keep in mind.
Voltage
Did you know that the voltage in your home varies between 110 and 135 volts? If you’re anything like me, you probably don’t care. But now you have a reason to be concerned. This variation may be insignificant to most of your equipment, but it might be the difference between hitting first crack and getting your roast correct or spoiling your roast and throwing it (likely into the compost heap).
QUICKLY END THE ROAST
Some roasting continues for hours or even days after the roasting procedure is completed. Experience will teach you whether to terminate the roast slightly early to meet this impact. Some roasters appear to roast darker, and then the beans lighten after roasting. How do you know what will happen? You’ll only find out via trial and error.
Playing with Fire Can Be Dangerous: A Roasting Safety Guide
While roasting is enjoyable, bear in mind that beans cook at incredibly high temperatures. Fires are a major issue in the sector. Roasting fires can still be found in commercial roasting plants, where the technology is at least as tough as the best household units. Always keep a fire extinguisher nearby. When using a thermometer to measure interior bean temperatures, keep in mind that these temperatures are difficult to measure correctly. Always err on the side of caution, especially with darker roasts, which can catch fire more quickly.
What types of coffee roasters are currently used?
There is extremely fine electric home-roasting equipment available nowadays, but for “back to basics” roasting, simply use a skillet on the stovetop or in the oven. The physical processes for these latter methods are similarly straightforward: first, the raw green coffee beans must be kept moving at temperatures of at least 200 °C, and second, they must be cooled precisely to the required degree of roast.
1. Stovetop Roasting
Coffee is roasted in an open or closed pan, or put on a gas stove burner in a stovetop roaster. To properly disperse the beans during roasting, the individual roasting the beans manually stirs using a crank handle.
This method necessitates direct contact between the surface of the pan and the beans. Stovetop roasting makes use of what you already have on hand: a heat source. A perforated oven pan is used in a version of this procedure.
The Advantages of a Stovetop Coffee Roaster
• There is no noise. The only sounds are from the stove, the crank, and the cracking beans, making it simple to distinguish between the subtle initial crack and the rapid second crack.
• A lengthy roasting time. Stovetop roasters, like drum roasters, have a long roast cycle (perhaps the longest of all coffee roasters), lasting up to twenty minutes. This provides you with a decent window and margin to stop the roast at the perfect bean doneness.
The disadvantages of a stovetop roaster
• Flame supposition. What level do you put the burner’s flame to? It requires a lot of trial and error. Keep track of how long it takes to complete a full cycle of roasting (anywhere from twelve to twenty minutes). Cooling time, which is not part of the roast cycle, is not included.
• complex Flavor. Longer roasts provide more nuanced coffee. The stovetop roaster performs this function as well as, if not better than, any other household approach.
•Increase the speed. How quickly do you spin the crank? The issue is to select a pace that enables enough contact between the beans and the hot pan bottom while keeping all of the beans moving. If you get burned beans or if the ends of the beans become black from too much heated surface contact, you’ll know it’s time to crank faster.
• Inability to check the doneness of the beans. Stovetop roasters need you to open the top to check on your beans, which also doubles as a means of letting steam and heat escape. Even with the hatch open, it’s difficult to see the beans, so determining when to end roasting requires trial and error.
• There is a risk of a bland flavor. While stovetop roasters allow for the development of complexity, they also raise the danger of producing coffee that tastes flat. This occurs after roasting beans at a low temperature for an extended period of time.
User guide for Stovetop Roasting
• Remove the roast from the oven just before the beans are done to your liking. This takes experience, but it’s well worth it because coffee beans continue to roast for at least a minute after cooling.
• Tear a roasted bean apart. Reduce the roasting heat if the interior is lighter than the exterior. Increase the roasting temperature if the inside is darker than the outside.
• Remove the chaff from the beans while they are cooling. Unfortunately, chaff may be a nuisance. To keep things from becoming too dirty, consider chilling the beans outside or over a sink. To keep the mess to a minimum, consider chilling the beans outside or over a sink.
• Roast beans for more than ten minutes but less than twenty minutes to enhance flavor development and complexity, and keep them from falling flat.
How to use a stovetop coffee roaster?
1. Center the chilled roasting pan over the fire on the stovetop. Using your digital scale, weigh the green coffee beans based on the amount the manufacturer has decided the roaster can handle.
2. Pour the beans into the roaster through the pan’s open top gate. Then, quickly turn the crank to disperse the beans evenly. Set the burner to medium heat. Start the timer by gently and steadily turning the crank.
3. The beans will start popping after 3 to 8 minutes, signifying the commencement of the first crack stage. Record the time in your roasting diary and pay special attention to the beans. After a few minutes, all of the beans will have popped, and there will be a brief stillness. A minute or two later, a new, quicker crackling sound will begin, similar to logs on a fireplace. It is frequently accompanied by hissing. Open the hatch and inspect the beans at this point. Take note of their color and the hour.
4. Use the color of the beans to identify when they are finished. Put on the heat-resistant gloves. When the beans are done to your liking, open the hatch and immediately pour them into a single heat-safe colander.
5. Transfer the hot beans from one colander to another until they are cool enough to touch (about 7 minutes). Because this action loosens the chaff, it floats about. Blow the chaff away from the beans as you toss them to remove as much as possible.
6. When the beans are cold enough to touch, place them in the mason jar. Allow the jar to sit open and exposed to air for several hours. Before the end of the day, close the jar. Keep the jar closed overnight.
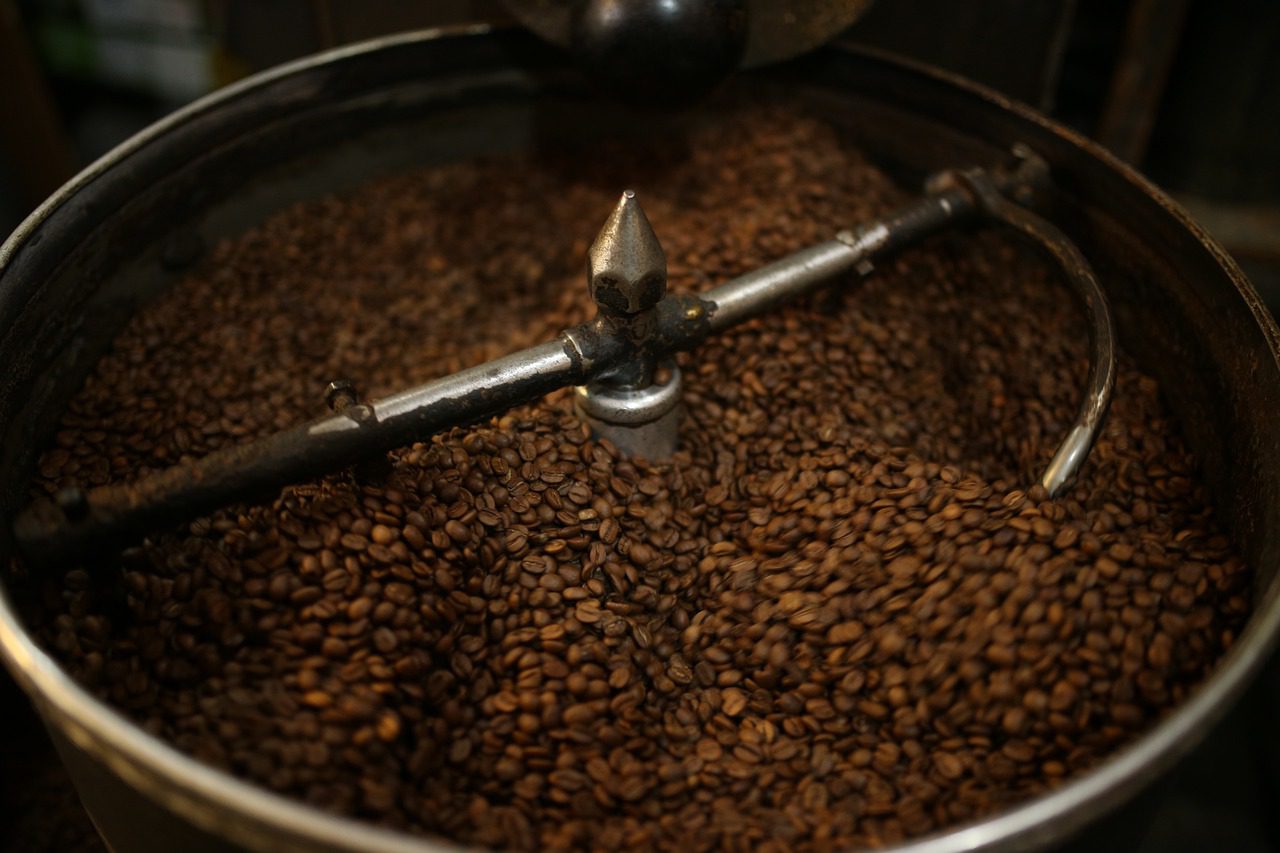
2. Drum Roasting
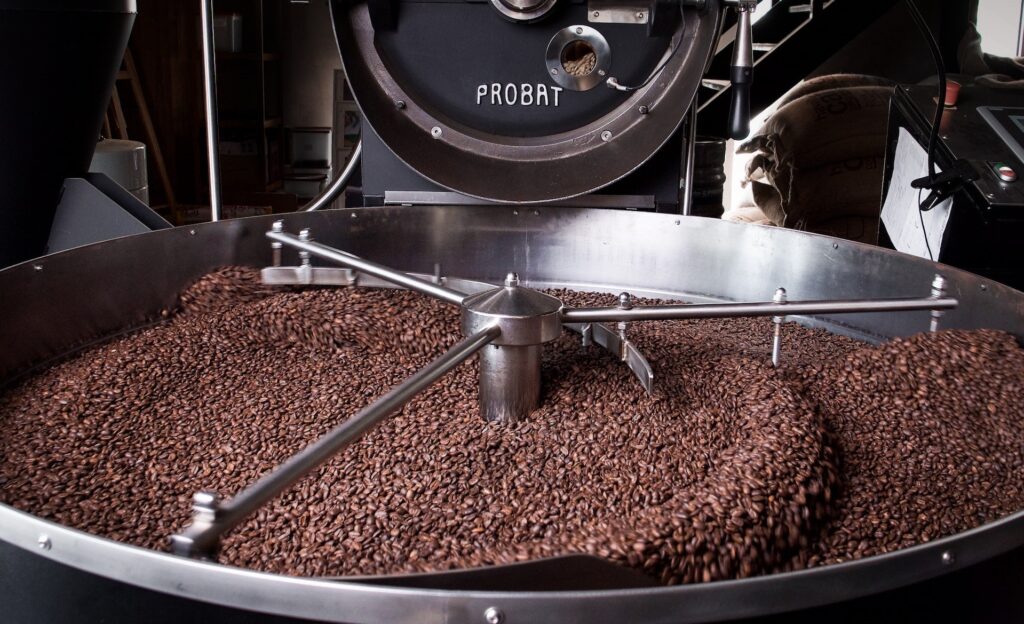
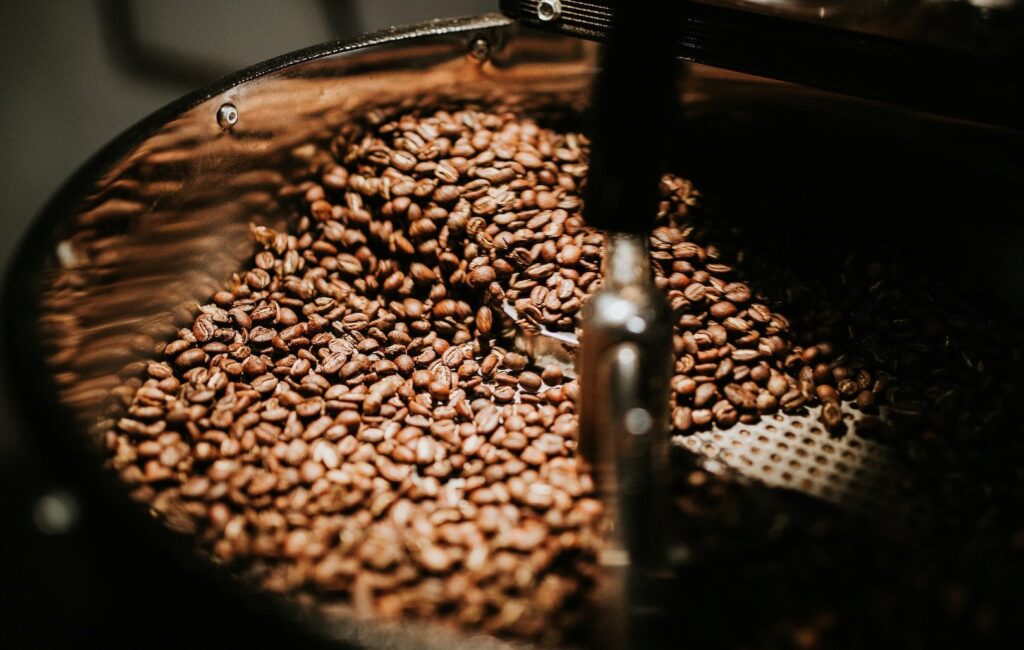
A perforated cylinder holds the beans, which are cooked from below by radiant heat in drum roasting. The cylinder spins continually to uniformly transmit radiant heat underneath. The cylinder rotates regularly to deliver heat equally throughout the beans. Furthermore, a continuous stream of hot air streams through the middle of the cylinder, producing a heating environment similar to that of a convection oven and encouraging a consistent, even roast. The bulk of commercial enterprises roast their coffee in drums.
Drum roasters are now available. Drum roasters operate quietly and slowly, mimicking the typical flavor development of a commercial coffee roaster in smaller home quantities. This Behmor drum roaster’s perforated cylinder continually spins to uniformly distribute heat throughout the beans.
Advantages of Drum Roasters
• A lengthy roasting time. Drum roasters typically take fifteen to twenty minutes to cook. This is nice in general, but it can be stressful attempting to click the cooling cycle button at precisely the right time. Drum roasters generally roast a half-pound of coffee, which many coffee consumers believe to be exactly the correct quantity.
• Developed, nuanced flavor. More generous hobbyists roast extras for friends, thus raising their social standing. Many people in the coffee business feel that drum roasters provide a high level of taste complexity. It is unclear if this is related to longer roast periods or a different sort of heat as compared to fluid-air roasting. More taste testing is required.
• There is no noise. Most drum roasters are incredibly quiet, allowing the roast master to hear the small difference between the first and second cracks.
Drum roaster disadvantages
• Poor visibility. Many drum roasters do not enable you to watch the beans roast. This is a significant disadvantage. Tryers are catchers on commercial drum roasters that allow the roast master to remove bean samples to assess their doneness. However, most consumer drum machines lack this capability, limiting you to hearing and smelling.
• Cooling gradually. The freshly roasted beans are often dumped onto a turntable using drum roasters. Most home machines lack forced air conditioning, whereas commercial machines do. Rapid cooling guarantees that your beans cease roasting when you want them to. The majority of experts agree that quick chilling improves taste.
Using the guide of Drum Roasting
•If your home drum coffee roaster does not include in-cylinder cooling, gently dump cooked beans into a colander after roasting with oven mitts or heat-safe gloves. Then strain them through a second colander. To chill the beans, repeat the back-and-forth process. Some expert home roasters prefer this approach to in-machine cooling since it is speedier and hence better at stopping the roasting process.
• One roaster even dismantled his backyard barbecue and hired a local sheet metal craftsman to create a custom perforated metal drum meant to rotate with a rotisserie attachment. His grill roaster has become so popular that he’s become a regular at his local farmers’ markets.
• If the roaster has pre-programmed cycles, select one that will likely roast darker than you want. A cycle may always be stopped in the midst.
How to use a drum coffee roaster?
1. Using your digital scale, weigh out the appropriate number of green beans and pour them into the open end of the cylinder. Shake the cylinder gently to spread the beans evenly.
2. Insert the drum into the machine’s track to ensure appropriate rotation. Begin the drum roaster. Unless otherwise specified by the manufacturer, always start with a cool machine.
3. Wait for the popping sound to indicate the start of the first crack stage. After the beans have finished popping, there will be a little stillness before the beans begin their second crack, a quicker sound evocative of crackling fireplace logs. Start the cooling cycle at any time from here.
4. Put on your heat-resistant gloves. When the cooling cycle is complete, open and empty the chaff collection.
5. Remove the drum from the machine with care and pour the beans into a glass jar for storing. Blow any residual chaff out of the machine after each roast.
3. Fluid-Air Roasting

Beans are roasted in this process, which was created in the mid-1900s, by floating on a bed of heated air. Its commercial forerunner was the Jabez-Burns Thermal drum roaster, which used a stream of heated fluid air fired through the middle of the drum to achieve comparable effects. Hot air raises the unroasted beans till they float in the fluid-air roasting process; the suspension of the beans promotes equal roasting. The method is similar to that of an electric popcorn popper, and it can even be done using a popcorn popper. The loudness of the circulating air frequently hides the important popping sounds, but being able to see the beans while roasting ensures you’ll know when they’re done.
The pros of using a fluid air coffee roaster
• Simple to use. Fluid-air roasting is the most effective roasting method since it roasts linearly and, hence, is the simplest to construct a machine for. Best of all, no special equipment is required for home air roasting. A basic air popcorn popper will suffice.
• A visually appealing presentation. The majority of fluid-air roasters roast in glass canisters. Not only does the roast master enjoy watching the beans roast, but he or she can also utilize this gadget to monitor and assess their doneness.
• Roasting time. Air roasting is quick and uniform, bringing out the coffee’s brilliant acidity and minimizing tipping (or burning of the beans), which is common with drum roasts. Air roasting typically takes five to twelve minutes.
• Rapid cooling. The majority of air roasters have quick-response cooling cycles.
Many experts feel that rapid chilling helps to minimize bitterness.
Air Coffee Roaster Disadvantages
• Speed. The rapid roasting pace of the air coffee roaster may boost flavor, but it also entails a quick response when the beans finish roasting. Seconds matter, and an early or late response at the critical moment might damage the batch.
• Excessive loudness. It takes a lot of air movement to keep a bed of beans afloat, which implies a lot of noise, which might make it difficult to hear the first and second snap.
• The yield is low. Most air roasters can only roast a few beans, maybe enough for a pot or two of coffee.
• There is no taste complexity. Some argue that, while air roasting is easy and uncomplicated, it does not produce the same complexity and taste depth as a proper drum roast. Most people believe it has something to do with the convection heating of air, while some direct contact heat does occur when the beans touch.
A user guide for air roasters
1. Unless otherwise stated by the manufacturer, begin with a cool roaster.
2. Using your digital scale, weigh the amount of green beans advised by the manufacturer for the roaster’s capacity. Do not go beyond the prescribed volume.
3. Place the coffee beans in the roaster. Shake gently to distribute them evenly. Start your timer here as well, and watch the beans become yellow.
4. When you hear a cracking sound, your coffee has reached the leading edge of the first crack. Take note of the time. Within 2 minutes, all the beans should be at first crack. When all of the beans have reached the first crack, there will be a little stillness followed by the second crack, which will be identified by a more rapid crackling sound. A Full City roast is delivered at the start of the second crack. Darker roasts, including Vienna and French, are available above this temperature.
5. When your beans are done to your liking, hit the cooling button to override the roaster’s heating and enable your roaster to cool automatically when the timer expires. Your coffee roaster will go into cooling mode and start circulating fresh, cold air. Wear oven mitts and gently remove the roaster’s canister and transfer the hot beans into a heat-safe colander if using a corn popper without a cooling cycle.)
6. When the cooling cycle is complete, the coffee roaster will shut down. Remove the beans from the machine immediately and let them cool for at least 1 hour before wrapping and storing them.
7. Transfer to a mason jar or another airtight container once cold, and clean the chaff from all roasting components after each use.
Why You May Need a Thermometer for Your Home Coffee Roaster

The preceding instructions were purposefully provided without any temperature guidelines.
Internal bean temperature is likely the best and most important data for roasting, but it is also the most difficult to get reliably (even for industrial roasters). Installing a thermometer will allow you to take temperature readings during roasting.
It is difficult to put a thermometer into a coffee bean to determine its exact temperature. We can only make an educated guess by monitoring the air temperature right close to a bean or a bunch of beans. It should be noted that the temperature measurement is almost always close to, although not always exactly, the real temperature of the beans.
The thermometer probe should be inserted into a cluster of beans, away from direct roaster heat. It’s tough to use a thermometer in a drum roaster because you have to maintain the probe in the beans while keeping it away from moving elements.
However, the most difficult roaster design to obtain an accurate measurement from is an air roaster due to the necessity to identify a region distant from moving air where beans cluster.
Lifting the hatch on a stovetop coffee roaster and inserting a thermometer to check bean doneness is difficult with only two hands. This must happen fast so that the beans do not burn while the crank is idling.
How to Preheat a Roaster
We noted one sample was quite undeveloped and another was slightly underdeveloped during a cupping of some wonderful Cup of Excellence coffees a few years back. The other cups were developing to varying degrees. It occurred to me that those two cups had been made from the first and second batches of coffee roasted that day.
We indicated to the cupping host the sequence in which the samples had been roasted that morning. We had accurately predicted the order.
Every roaster we’ve ever spoken with has expressed concern about the quality of the first few batches of a roasting session.
Inadequate roasting machine warming up is typically the source of the problem. Most machine operators warm up a roaster to the charging temperature and then idle the machine for about 15 minutes before charging the first batch. This procedure guarantees that the first batch roasts more slowly than subsequent batches.
Temperature probes, however, are poor indicators of a machine’s thermal energy.
Although temperature probes soon indicate that the air in a cold roasting machine has achieved roasting-level temperatures, the bulk of the machine remains significantly colder than the air in the drum as it warms up. If a batch is charged at this stage, the machine’s bulk will act like a heat sink, absorbing heat from the roasting process and slowing the rate of heat transmission to the beans. After a few roast batches, the machine’s thermal energy will settle into an equilibrium range within which it will vary for the duration of the roasting session.
To normalize the outcomes of the first few batches of a roasting session, overheat the machine during the warm-up before stabilizing it at typical roasting temperatures. To the best of my knowledge, there is no practical, exact technique to quantify the thermal energy of a roaster. However, the operator can use educated experimentation to develop a strategy that gets the thermal energy of a roaster into its equilibrium range. This protocol should be used by the operator before charging the first batch of each session.
To identify an appropriate warm-up technique for your coffee roaster, I propose the following procedure.
1. Adjust the airflow to the average amount you’ll use for roasting.
2. Warm up the machine with a medium-to-high gas setting until the bean probe displays 27°C over your target charge temperature.
3. Idle the machine for 15 minutes at that temperature.
4. Reduce the temperature gradually by lowering the gas setting.
5. After the probe indicates the charging temperature, idle the machine for 12 minutes at that temperature.
6. Start charging the first batch.
7. Roast the first batch using the same gas and airflow parameters as you would for a subsequent batch.
8. Compare the results of this batch to the results of a subsequent roast session. If this batch roasted too quickly, reduce the peak warm-up temperature the next time. If this batch was slow, idle for a longer period at the peak warm-up temperature.
9. Repeat the previous method every day until your initial batch behaves exactly like subsequent batches in a roast session.
We propose the following as a good framework for a between-batch protocol.
Feel free to modify this technique to match the specific requirements of your equipment. We strongly advise setting a timer to guarantee that each modification is made at the same time every time.
1. Reduce the airflow to the lowest setting that will be used for a roast batch.
2. After dumping a roast batch, turn off the heat for 1 minute. Adjust the gas such that the temperature probe reaches the desired charging temperature in 60-90 seconds.
3. After reaching the charging temperature, idle for 1 minute.
4. Charge the following batch.


