Tips and Tricks for Espresso Coffee Bean Grinding
One Hundred Coffee is reader-supported, and some products displayed may earn us an affiliate commission. Details
There’s a little moment I love every morning: that first whirr of the grinder, the scent blooming out like warm chocolate and citrus, and then the hiss of a shot finding its rhythm. When your grinder is dialed in, espresso feels easy—like driving a perfectly tuned car. When it isn’t, every shot becomes a coin toss. If you’ve ever wondered why yesterday’s shot tasted like liquid tiramisu and today’s tastes like a lemon squeezing contest… this guide is for you. I’ll walk you through the real-world things that actually matter for espresso grinding—what to change, how to diagnose, and how to make your beans sing consistently day after day.
Who is this for?
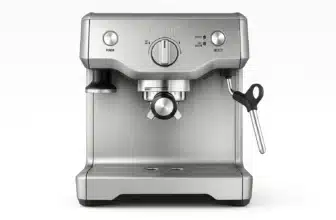
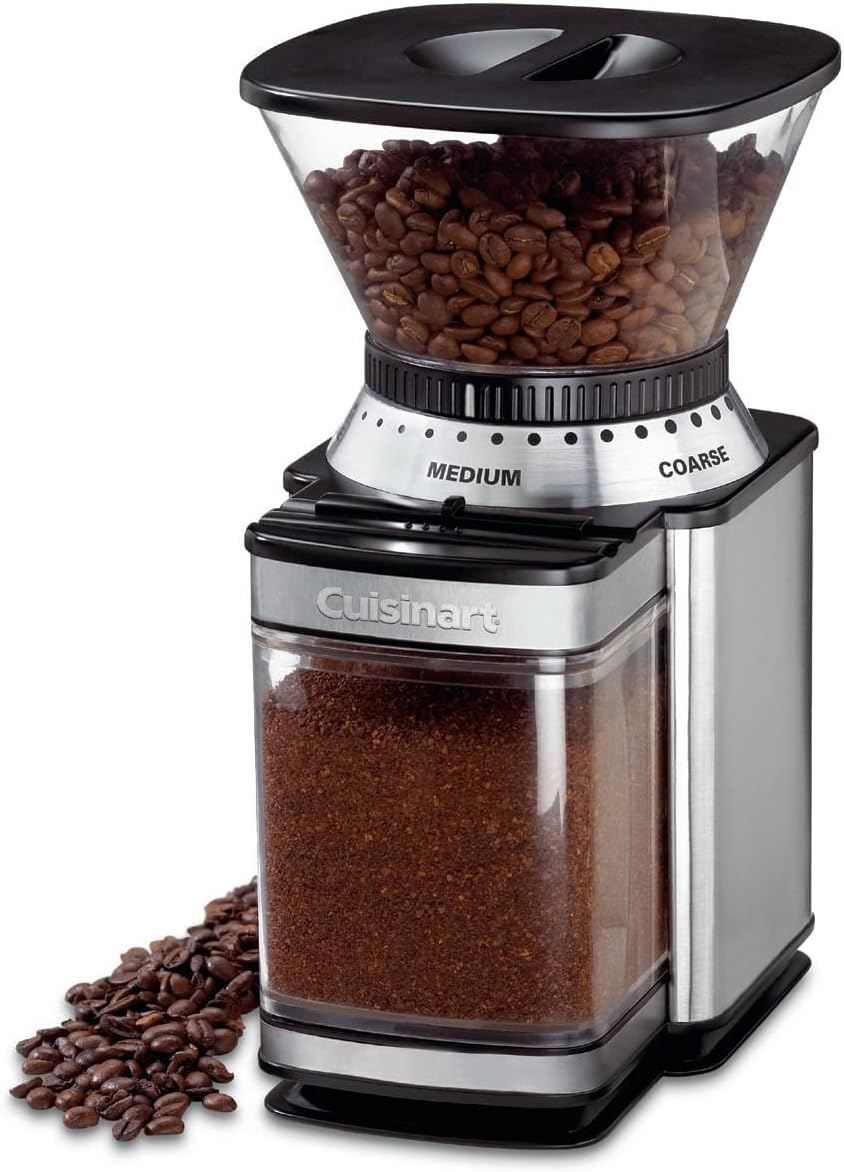
Ideal for coffee enthusiasts who crave precision, the Cuisinart DBM-8 delivers consistent grind texture with 18 settings from ultra-fine to coarse. Its burr grinding mechanism preserves bean flavor while the removable grind chamber holds enough for 32 cups, making it perfect for daily home brewers and coffee lovers alike.Why Grinding for Espresso Is Different (and Fussy in the Best Way)
Espresso is an extraction race run under pressure. You’re forcing hot water through a compact coffee bed in roughly 25–35 seconds, chasing a balance between sweetness, acidity, and bitterness. With that small window, grind size and distribution act like the gatekeepers. A small change in particle size, clumping, or fines content can snowball into channeling, sourness, or bitterness.
Think of it this way: drip coffee forgives you for being “close.” Espresso demands you to be “right now, exactly.” That’s not to intimidate you. It’s actually liberating—because when you focus on a few controllable grinder habits, your espresso becomes remarkably predictable.
Start with the Beans: Roast Profile and Degassing
Before we even touch the grind dial, consider what you’re feeding the grinder.
Freshness and rest: Most espresso roasts shine a few days after roast—often between day 5 and day 21, depending on the roast and packaging. Super fresh beans can be gassy, pushing a shot time that lies to you (you think you’re dialed in, but it’s mostly CO₂ turbulence). If your shots are “foamily” fast and your crema looks overinflated, then deflates quickly, let the beans rest another day and try again.
Roast level influences grind: Darker roasts are brittle and often need a slightly coarser grind. Lighter roasts are denser and usually need slightly finer grinding and sometimes higher brew temperatures. If you switch between roasts, expect to adjust the grind two or three notches—even within the same brand.
Storage: Oxygen, heat, and light are the enemies of flavor. Keep beans sealed, cool, and dry. If you buy in bulk, split into smaller airtight containers and freeze portions you won’t use soon; grind straight from frozen if needed—consistency often improves because the beans fracture more predictably.
Burrs, Not Blades: Why Burr Geometry Matters
For espresso, burr grinders are non-negotiable. Blades hack beans into random shards; burrs create repeatable particle sizes. But not all burrs behave the same.
Conical vs flat burrs: Conicals often deliver a “rounded” flavor with a touch more body at similar extraction, while flats tend to highlight clarity and separation of notes. Neither is “better”; they’re different palettes. What matters most is alignment, sharpness, and stability—not just geometry.
Burr condition: Dull burrs more your shots in fines and inconsistency. If you suddenly need to grind much finer than usual to hit your time (and your taste got muddier), your burrs may be worn. Many home users underestimate how quickly burrs age with daily espresso; depending on the steel and usage, replacement intervals can range from months to a couple of years.
Alignment: Misaligned burrs create uneven particle sizes that invite channeling. Some grinders are near plug-and-play; others benefit from careful alignment. If you’re chasing clean light-roast shots and keep hitting weird, bitter spikes, investigate alignment or have a tech check it.
Zeroing, Calibrating, and “True Zero” Myths
Every grinder has a different “zero” reference—the point where the burrs touch. Don’t obsess over whether your zero equals someone else’s; map your own grinder:
- With the grinder empty and off, close the burrs slowly until you feel or hear a light chirp.
- Mark that as your true zero reference (mentally or with a removable sticker if your dial allows it).
- When you change beans, think in relative moves from your working espresso range, not absolute numbers.
This mapping helps you return to sanity after a big roast switch or a deep clean.
Your First Dial-In: Time, Yield, and Taste
A simple, reliable starting point for a classic double shot is:
- Dose: 18 g (in a 58 mm basket; adjust proportionally for other sizes)
- Yield: 36 g of espresso (a 1:2 ratio)
- Time: 25–30 seconds from the moment the pump engages
From here, treat grind size as your steering wheel:
- Shot runs too fast (sour, thin)? Grind finer.
- Shot runs too slow (bitter, dry, ashy)? Grind coarser.
Make small moves—a few microns or one “click” at a time. Espresso is a series of tiny edits, not grand gestures.
The Particle Distribution Secret: Less Clumping, More Evenness
Even if your average grind size looks right, clumps can sabotage flow, creating micro-channels. A few techniques that quietly transform consistency:
RDT (Ross Droplet Technique): Lightly mist beans with a tiny spray of water (we’re talking a droplet or two) before grinding. This reduces static and clumping, especially in dry climates. Your grind will look different—more fluffy and less speckled with fines everywhere.
WDT (Weiss Distribution Technique): After grinding into the portafilter, stir gently with thin needles (or a dedicated WDT tool) to break clumps and distribute particles evenly. Keep the motion shallow and consistent. This alone can cure strange spurts and sidewall channeling, turning a “meh” shot into a syrupy, even extraction.
Consistent puck prep: Level the bed (a quick side-to-side tap), tamp flat with even pressure, wipe the rim, and lock in. Avoid over-tamping; you’re polishing, not compacting earth. If your tamp angle is off by even a couple of degrees, water will find the thin side and blow a highway through your puck.
Single Dosing vs Hopper: Which Workflow Works Better?
Hopper workflow is convenient and maintains a constant bean column weight that keeps grind feed stable, but beans staling in the hopper can dull flavor over days.
Single dosing (weighing out each dose and grinding it all at once) maximizes freshness and makes switching beans easy. The tradeoff is that some grinders are designed around hopper pressure—without it, they can produce more retention and variability unless you purge or use “bellows” puffs.
If you single-dose:
- Consider using bellows to clear retained grinds.
- Expect to do a small purge after a grind change.
- Keep your dosing funnel handy to avoid spills and preserve fluffy distribution.
Humidity, Temperature, and the “Why Was Yesterday Perfect?” Problem
Air changes your grind. On humid days, coffee can swell slightly and grind differently; shots often slow down. On dry days, static amplifies, and shots can speed up.
Build a ritual:
- If your shot is off in the morning, ask: “Did the weather swing?” Make a tiny grind correction first.
- If you dial in at 7 a.m. and pull again at 3 p.m., be ready to nudge a half-step. Espresso isn’t set-and-forget across the whole day.
Baskets, Doses, and Matching Your Grinder’s “Happy Zone”
Baskets have personalities. A precision 18 g basket likes a true 18–19 g dose; stuffing 21 g into it invites channeling because the headspace disappears. More dose doesn’t automatically mean more flavor; it often means more resistance and less balance.
Match baskets to doses and let the grinder settle into its sweet spot. Most grinders produce their most even distribution in a particular fine-to-medium-fine range. If you fight your grinder (super fine to “force” a time), you’re likely amplifying fines and muddying the cup. Adjust ratio instead (try 1:2.2 or 1:1.8) and re-taste.
Diagnosing Taste with Your Grind Dial
When shots taste off, your palate is trying to tell you what to change. A quick, practical translation:
- Sharp sourness, lemonade edge, thin body → Under-extracted. Grind finer or increase yield time (or raise brew temp slightly).
- Hollow sweetness, dry bitterness at the end → Over-extracted. Grind coarser, or shorten ratio/time slightly.
- Wild pucker with weird astringency → Channeling. Improve distribution (WDT), verify tamp, check for sidewall gaps, and confirm your grind isn’t too fine for your basket.
Taste → change one variable → taste again. That tight feedback loop is how you become “fluent” with your grinder.
Light Roasts: Taming the Harder Nuts
Light roasts make breathtaking espresso—lilac, bergamot, stone fruit—if you respect their physics. They’re denser, so try:
- A hotter brew temperature (93–96°C).
- A slightly finer grind (but watch for channeling—WDT helps).
- A longer ratio (1:2.2 to 1:2.5) to open up sweetness without cakes of bitterness.
If you keep getting a lemon/zest whiplash, don’t just go finer; consider more contact time via ratio or a small temperature bump. Sometimes coarsening a half-step and lengthening the yield nets a sweeter, calmer cup.
Dark Roasts: Keeping the Chocolate without the Char

Dark roasts are fragile and extract quickly. If your shots are smoky and drying:
- Coarsen slightly.
- Try a shorter ratio (1:1.8).
- Lower your brew temperature a couple of degrees.
- Keep puck prep gentle—dark roasts crumble under aggressive tamping and tight baskets.
The goal is syrupy chocolate and caramel with a rounded finish, not ash.
Maintenance: Clean Grinder, Clean Flavor
Old coffee oils and fines hold onto rancid, stale flavors. A clean grinder punches above its class:
- Brush the chute and burr chamber regularly.
- Run grinder cleaning pellets occasionally (check your manufacturer’s guidance).
- Deep clean monthly or after oily beans—remove burrs (if the design allows), vacuum fines, wipe oils carefully.
- Keep screws snug; vibration can nudge burr alignment over time.
If your espresso suddenly tastes like yesterday’s bean, no matter what you do, retention and residue may be smearing your flavor.
Micro-Moves That Add Up
Pre-heating and routine: If your grinder lives in a cool kitchen, the first shot can grind differently from the second. A small purge can stabilize the burr temperature. Consistency in your steps—same order, same tempo—reduces invisible variance.
Weigh in, weigh out: Dosing by weight going in, and measuring espresso yield by weight coming out, gives you real control. Volumetric measures lie when crema swings.
Keep notes: When you hit a magical shot, write down dose, yield, time, dial number, and a few sensory words. You’ll rebuild success faster next time.
On the Myth of “One Perfect Grind Setting”
Your grinder doesn’t have one perfect point; it has a perfect range for a specific bean, dose, and weather. Embrace the nudge. The best baristas are “nudgers.” They don’t spin the dial wildly; they move it half a click, then taste again.
Troubleshooting the Big Three: Sour, Bitter, and Bland
Consistently sour even when time looks right:
Try a touch finer and/or increase your final yield by a few grams. If it’s still edgy, your water may be too low in alkalinity—consider brewing water with a bit more buffer to soften acidity.
Consistently bitter even with short times:
Grind coarser or shorten the ratio, and verify your brew temperature—maybe it’s higher than you think. If the finish is papery or ashy, your beans might be past their prime.
Flat and bland:
Coarseness might be too high, but also check your dose. If you’re underdosing a basket designed for a higher dose, water bypasses the puck. Go to the basket’s intended dose, then fine-tune the grind. And don’t forget to purge a few grams after big grind jumps—old grinds can contaminate the new shot.
The Espresso-Grinder Feedback Loop with Your Machine

Who is this for?
Designed for speed and precision, this KitchenAid blade grinder is perfect for daily coffee lovers. Its stainless steel blade and clear top cover allow easy viewing, while the bowl holds enough for 12 cups. Ideal for small households or quick morning grinds.“Advanced” Without the Drama: Alignment, Upgrades, and Burr Swaps
If you’re happy with your grinder, keep pulling great shots. If you’re chasing more clarity or consistency:
- Alignment kits exist for some grinders and can deliver a cleaner, less “spiky” flavor curve.
- Burr upgrades (SSP and others) can reshape your cup profile—often toward more clarity and higher extraction potential. Expect a learning curve; your sweet spot will move.
- Zero-retention paths help single-dosers, but technique still matters. Even a “zero” grinder benefits from bellows and a consistent workflow.
Upgrades shine most when your technique is already solid. They won’t fix channeling caused by sloppy puck prep.
It’s tempting to blame the grinder for every shot problem, but sometimes it’s the machine:
- Temperature stability: A small single-boiler will cool during back-to-back shots. Adjust your pace.
- Pump profile: Some machines ramp pressure gently; others slam to 9 bar. If you have a hard slam and struggle with channeling, consider a slightly coarser grind with a tad longer ratio and very careful WDT.
- Pre-infusion: If available, it can soften the impact of minor distribution flaws, giving water a moment to settle before full pressure.
Your grinder and machine are dance partners. Let them learn each other’s rhythms.
Best 3–5 Espresso-Capable Grinders to Explore
Baratza Sette 270
Known for fast, low-retention grinding and micro-adjustment that makes dialing in straightforward. Excellent for home baristas who want repeatability without a steeper learning curve.

Who is this for?
The Baratza Sette 270 is for serious home baristas who demand precision and speed. With 270 grind settings, it’s perfect for dialing in espresso or brewing methods like AeroPress or pour-over. Its fast, zero-retention design makes it ideal for daily use and those pursuing café-quality coffee at home.Eureka Silenzio Grinder
A compact flat-burr workhorse with quiet operation and refined particle distribution. Great for those who prize sweet, polished espresso and tidy workflow.

Who is this for?
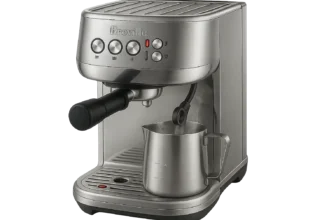
The Eureka Mignon Silenzio is for espresso lovers who prioritize quiet, precise grinding. With stepless micrometric adjustment and commercial-grade burrs, it’s ideal for home baristas aiming for café-quality shots. Its compact size, low noise output, and Italian craftsmanship make it a favorite for stylish and functional kitchen setups.Breville Smart Grinder Pro
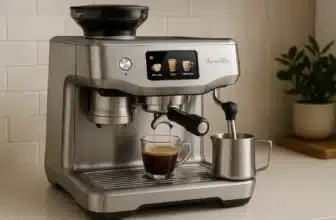
Very approachable, with a broad range of settings and a user-friendly interface. It can produce solid espresso with the right baskets and careful dialing, and it’s versatile for other brew methods.

Who is this for?
The Breville Smart Grinder Pro is for coffee enthusiasts who want control and convenience. With 60 precise grind settings, a digital timer, and LCD interface, it’s ideal for anyone from espresso aficionados to French press fans. Its sleek stainless design and consistency make it a standout choice for home brewers.1Zpresso J-Max (manual)
A high-precision hand grinder built with espresso in mind. If you single-dose and don’t mind a manual workflow, it delivers impressive fine control and clarity in the cup.

Who is this for?
The 1Zpresso J-Max is built for precision-focused coffee lovers who want a premium manual grinder. With its fine adjustment dial (8.8 microns per click), it’s ideal for espresso and pour-over. This is for enthusiasts seeking consistency, durability, and a compact design—perfect for travel or home brewing with barista-level control.Putting It All Together: A Two-Day Espresso Reset
Day 1: Map and Stabilize
Purge old grounds, clean your grinder, and find a working zero reference. Choose a fresh, medium roast. Start at 18 g in, 36 g out, 28 seconds. Taste, nudge, grind, repeat—small moves only. Establish a sweet spot and write it down.
Day 2: Lock the Workflow
Add RDT if static is wild. Do a gentle WDT and even tamp every time. Pull three shots at your “sweet spot” without changing anything. If your variance is still big, look for technique drift (uneven tamp, different distribution) before touching the dial.
Consistency is a habit more than a hack.
Real-World Mini-Case Studies
The lemon shot that wouldn’t sweeten:
A bright Ethiopian natural tasted like bitter lemonade, no matter how fine we ground it. The fix wasn’t just grind—we raised brew temp by 2°C and extended to a 1:2.3 ratio. Sweetness emerged without turning the finish bitter.
The chocolate bomb turned ashy:
A dark roast that tasted like brownies yesterday went dry and smoky today. The kitchen was much warmer. We coarsened one notch and shortened the ratio to 1:1.8—chocolate returned, ash faded.
Channel city on a brand-new grinder:
A neconeal gave us spouts squirting to the sides. We introduced WDT, leveled the bed, tamped gently, and coarsened a half-click. The next shot poured like honey, tiger-striped and sweet.
Frequently Asked Espresso Grinding Questions
Do I need a “zero-retention” grinder?
Helpful, not essential. Good technique (purging after big changes, bellows puffs, RDT) gets you 90% there.
How often should I replace burrs?
It depends on steel, size, and usage, but if you brew daily for espresso and need to keep going finer to hit time—and taste has dulled—consider replacement. For many home users, that’s roughly every 1–3 years.
What’s more important: the grinder or the machine?
For a short taste, grind first. A modest machine plus a great grinder often beats a great machine plus a mediocre grinder.
Do I need to weigh every shot?
If you want consistency, yes—at least while learning. Once your hands are trained, you can loosen up, but weight-in/weight-out is how you diagnose fast.
The Joy of Small Adjustments
Dialing in espresso is a conversation with your beans. They never “speak” the same way twice, and that’s the charm. On a misty morning, you might nudge finer and pull a shot that tastes like raspberries dusted with cocoa. That afternoon, you might step a hair coarser and get caramel with a whisper of orange peel. The trick is to own the variables instead of letting them own you.
Make your grinder a partner, not a puzzle: clean it, learn its map, keep your prep consistent, and move the dial with intention. Do that, and you’ll turn those good-luck shots into everyday espresso—silky, balanced, and entirely yours.
By paying attention to these details, you can consistently make better espresso with more complex and balanced flavors!