The Ultimate Guide to Brewing Coffee Like a Barista

One Hundred Coffee is reader-supported, and some products displayed may earn us an affiliate commission. Details
Brewing great coffee at home isn’t about expensive machines or fancy café setups—it’s about understanding the fundamentals, dialing in your technique, and developing a sharp palate. Professional baristas aren’t magicians—they just know how to control the variables that shape a cup’s flavor. With the right approach, you can do the same.
This guide will walk you through everything you need to brew coffee like a barista, from selecting the right beans to refining your pouring technique. Whether you’re working with a French press or a pour-over, these methods will level up your coffee game—big time.
1. Choose Better Beans, Not Just Any Beans
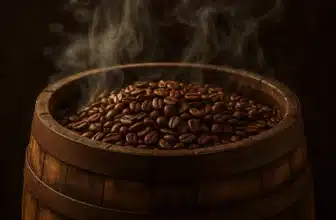
Great brewing starts with great coffee. Baristas never settle for stale supermarket blends—they work with fresh, specialty-grade beans, ideally roasted within the last two weeks.
A Quick Summary of Our Best Coffee Bean Choices
| Image | Product | Features | Price |
|---|---|---|---|
Best Overall  | Best Overall
| Price on Amazon | |
Best Light-Medium Roast Beans  | Best Light-Medium Roast Beans
| Price on Amazon | |
 | Best Blend
| Price on Amazon | |
Best Sealing  | Best Sealing
| Price on Amazon | |
Best Price  | Best Price
| Price on Amazon | |
 | Best Flavored Coffee
| Price on Amazon | |
 | Best Mild roast coffee
| Price on Amazon |
What to look for:
- A marked roast date (not just a “best by” date)
- Single-origin for unique, traceable flavor
- Beans suited to your brewing method (light roasts for pour-over, medium for French press, darker for espresso)
Local roasters or reputable online specialty coffee shops are your best sources. Avoid pre-ground coffee unless you’re in a pinch—it loses flavor fast.
2. Master the Grinder: Uniformity Is Everything
Baristas know that a good grinder is non-negotiable. The grind size directly affects how water extracts flavor from your coffee. Inconsistent grinds lead to inconsistent brews—some particles over-extract, others under-extract, leaving you with a cup that’s all over the place.
Use a burr grinder—not a blade grinder.
- Burr grinders produce uniform particle sizes.
- Let you precisely adjust the grind size for different brewing methods
Grind just before brewing to preserve freshness. If your brew is too sour, your grind might be too coarse. Too bitter? It might be too fine. Adjust and taste—baristas are constantly fine-tuning.
3. Get the Coffee-to-Water Ratio Right
Baristas don’t guess—they weigh. Using a digital scale lets you brew consistently and gives you complete control over your strength and flavor.
Standard starting point:
1 gram of coffee for every 15–17 grams of water
- For a medium-strength brew: 20g coffee → 300g water (1:15)
- For a lighter brew: 20g coffee → 340g water (1:17)
This ratio ensures you’re not overloading or underdosing your brew. Measure both coffee and water by weight—not volume—for accuracy.
4. Use the Right Water and Temperature
Coffee is 98% water, so water quality plays a huge role in flavor. Tap water that’s overly hard or chlorinated can ruin your brew, while distilled water lacks the minerals coffee needs to taste full and balanced.
Barista-approved water:
- Filtered water (via Brita or charcoal filter)
- Temperature between 195°F to 205°F (90°C–96°C)
Too hot? You risk bitterness. Too cool? You’ll under-extract the flavors. A gooseneck kettle with temperature control is ideal, but simply letting boiling water rest for 30 seconds works too.
5. Match Your Method to the Moment
Baristas use different brewing methods for different goals—clarity, body, speed, or intensity. Choose a method that fits your mood and taste preference.
Popular methods:
- Pour-over (V60, Kalita Wave): clean, crisp, nuanced
- French press: full-bodied, bold, rich
- AeroPress: compact, versatile, espresso-style or Americano
- Espresso machine: intense, creamy, concentrated
- Cold brew: smooth, mellow, great for warm weather
Each method has its quirks. Baristas know how to adjust grind size, water ratio, and brew time depending on which tool they’re using—and so can you.
6. Learn to Bloom and Pour with Purpose
One of the biggest barista secrets is pouring with control—especially in manual methods like pour-over or Chemex. It starts with the bloom, a crucial step that allows carbon dioxide to escape from fresh coffee and sets the stage for even extraction.
How to bloom:
- Pour a small amount of hot water (2x the weight of your coffee) over the grounds
- Wait 30–45 seconds before continuing the pour
Then pour in slow, steady spirals or gentle pulses. Baristas avoid dumping all the water in at once—that leads to uneven saturation and poor flavor. The better your pour, the more balanced your brew.
7. Use a Timer to Control Brew Time
Baristas don’t wing it—they time every brew. Brew time affects extraction and ultimately flavor. Too fast, and your coffee may be sour or thin. Too slow, and it can be overly bitter or muddy.
General brew times:
- Pour-over: 2.5–4 minutes
- French press: 4–5 minutes
- AeroPress: 1.5–2.5 minutes
- Espresso: 25–30 seconds
- Cold brew: 12–18 hours
Use your phone or a basic kitchen timer. If your coffee doesn’t taste quite right, use timing (and grind size) to troubleshoot.
8. Clean Gear Is Non-Negotiable
Baristas clean their equipment daily, if not hourly. Oils, fines, and mineral buildup all affect flavor and can make your coffee taste bitter, rancid, or “off.”
Keep it clean:
- Rinse all parts after every brew
- Deep-clean French presses, pour-over cones, and brewers weekly
- Wipe and brush out grinders regularly
- Descalcify espresso machines every 1–2 months
Think of cleanliness as flavor insurance. A spotless setup lets the coffee shine—no stale residue or unwanted funk.
9. Taste Like a Barista (And Take Notes)

Brewing like a barista means tasting like one, too. That doesn’t mean swirling your cup like a sommelier—but it does mean paying attention to acidity, sweetness, body, and balance.
When tasting, ask:
- Is it too bitter or too sour?
- Can I taste any specific notes (fruit, chocolate, spice)?
- How’s the body—thin or full?
- Does it feel balanced, or does one element dominate?
Take notes, adjust your grind or ratio, and keep experimenting. Baristas don’t chase perfection—they chase progress. The more you taste, the more you learn.
10. Invest Wisely in Must-have barista gear
If you’ve ever stood at your kitchen counter at 6:30 a.m., squinting at a bag of beans and wondering why yesterday’s cup sang while today’s tastes like cardboard, you already know what “gear” really means. It’s not toys; it’s control. The right tools nudge your coffee from “sometimes great” to “predictably excellent,” and that predictability is what separates dabbling from barista-level brewing at home. I’ve wasted money on shiny gadgets I didn’t need and under-invested in essentials that would’ve paid me back every single morning. This is the guide I wish I had—practical, warm, and rooted in real kitchen-counter experience—so you can invest wisely in must-have barista gear without falling into the “collect more stuff” trap.
We’ll walk through the essentials (and what makes each essential), how to prioritize your budget, what upgrades actually move the needle, and where to hold off. I’ll weave in mini-stories from my own brews and mishaps, plus realistic benchmarks that keep your purchases grounded in taste, not hype. Whether your happy place is a mellow V60 or a punchy shot of espresso with velvety milk, I’ve got you covered.
The first principle: Invest where precision compounds
Coffee is chemistry dressed up as a daily ritual. Precision—of grind size, time, water temperature, dose, and yield—compounds into better flavor. So the most “profitable” gear lives where precision matters most and where small errors create big swings in taste. In practice, that means:
- Grinder first. Grind size distribution is the biggest lever you own. An accurate, consistent grinder does more for flavor than almost any other tool.
- Scale and timer. Eyeballing is charming until it isn’t. A scale with tenth-gram resolution and an integrated timer stabilizes your brew day.
- Water temperature control. A variable-temperature kettle for pour-over, or a reliable espresso machine with a trustworthy temperature system, keeps extraction sweet instead of sour or bitter.
- Distribution and puck prep (espresso). A good tamper, distributor, and WDT tool lift your shot from “iffy” to “silky.”
Think of these as the foundation. You can build a gorgeous home on them—then accessorize with pitchers, filters, and storage that protect your investment.
The grinder: Where flavor is won or lost
You can brew a decent cup with a basic kettle; you cannot brew a consistently great cup with an inconsistent grinder. What you’re buying in a grinder is uniformity. When particles vary wildly in size, you get over-extracted fines (bitter, astringent) and under-extracted boulders (sour, thin) in the same cup. A well-designed burr set narrows that distribution so more of your grounds extract together, hitting the sweet spot of clarity and body.
- For filter brewing (pour-over, batch brew, AeroPress): Look for flat or conical burr grinders that excel in the medium-coarse range, have repeatable adjustments, and minimal retention. Some home favorites have stepped adjustments with well-spaced clicks that make recipe logging easy.
- For espresso: You need finer micro-steps (or stepless) to dial in shots. Expect to spend more here; espresso magnifies grinder behavior. Motor torque, burr geometry, and adjustment mechanism all matter for shot-to-shot reliability.
Personal note: My first “real” upgrade was not a machine; it was the grinder. That single purchase shrank the gap between my best and worst brews more than any machine ever did. If your budget is tight, bias it toward the grinder—even if it means choosing a simpler brewer for now.
Scales: The quiet hero of repeatability
A 0.1-gram scale with a built-in timer converts guessing into knowing. For pour-over, you’ll track brew water and total time to match a target ratio (say 1:16). For espresso, you’ll hit a dose and a yield within seconds—think 18 g in, 36–40 g out in ~25–35 s—so you can adjust grind or puck prep with evidence instead of vibes. A responsive scale that tars quickly and tolerates heat/steam earns its keep every single shot.
Pro tip: Weighing your beans before grinding doubles as dose control and inventory management. You’ll feel wildly organized with zero extra effort.
Water temperature: A few degrees = a different coffee
Extraction loves a stable temperature. For pour-over, a variable-temperature gooseneck kettle gives you the precision to fine-tune different roasts and origins—198–205°F (92–96°C) is common, but light roasts sometimes bloom happier at the higher end. For espresso, look for machines with PID or similarly stable control so water doesn’t yo-yo mid-shot.
Anecdote: I used to nudge my kettle temperature up just 2°F for washed Ethiopian lots to lift floral notes—same recipe, same grinder—yet the cup felt distinctly more perfumed. Those tiny adjustments are where great gear quietly pays you.
Espresso puck prep: Distribution, WDT, and a tamper that fits
Espresso is micro-surgery. Before tamping, use a WDT (Weiss Distribution Technique) tool—a little forest of thin needles—to break clumps and settle grounds evenly. Follow with a leveler/distributor if you like, then tamp with a flat, well-fitting base (58.5 mm for standard 58 mm baskets). Consistency here prevents channeling, which is what happens when water finds the freeway through your puck and bypasses extraction.
Feel check: Good tamping doesn’t mean Hulk strength—just a straight, firm press and a clean, level surface. A calibrated or spring-loaded tamper can remove the guesswork if you’re new.
Milk steaming: Pitchers, thermometers, and the sound of microfoam
Microfoam is glossy paint, not bubble bath. Two tools help: a well-shaped pitcher (sharp spout for latte art, comfortable handle) and a fast digital thermometer if you’re learning. Aim for 55–60°C (130–140°F). You’ll listen for a gentle “paper-tearing” sound during stretching, then a swirling whisper to polish. A good pitcher won’t make you a latte artist overnight, but it will make learning easier and more pleasant.
Filters, drippers, and brewers: The right tools for your taste
- Pour-over drippers (metal, ceramic, or plastic) shape flow, heat retention, and cup profile. Conical drippers often emphasize clarity and delicate aromatics; flat-bottom brewers can increase sweetness and body. Neither is “better”—buy for the profile you love.
- Immersion and hybrid brewers (French press, AeroPress, Clever) forgive technique and shine with chocolatey comfort cups. They’re also perfect travel companions.
- Batch brewers with proper temperature curves and spray patterns can beat your sleepy manual pours on busy mornings.
If you brew for more than one person or love the “set and forget” life, a quality batch machine paired with a great grinder is the definition of weekday happiness.
Water quality: The invisible ingredient
Most of your coffee is water, and tap chemistry is all over the map. Mineral balance (alkalinity and hardness) drives extraction and protects gear. At a minimum, consider filtering to remove off-flavors. If you chase consistency, explore mineral packets or recipes designed for coffee. The goal isn’t lab-grade water; it’s reproducible water that keeps flavors honest and your machine’s internals free of scale.
ROI note: Good water extends machine life and reduces descaling drama. Boring? Maybe. Worth it? Absolutely.
Storage: Oxygen is the enemy
Whole beans prefer darkness, cool temperatures, and limited oxygen. Air-tight canisters with one-way valves help. Avoid the freezer unless you’re portioning once and keeping it sealed; in-and-out cycling invites condensation. Grind only what you need per brew. Freshness is a sliding scale, but most coffees sing within 2–4 weeks of roast.
Cleaning and maintenance: The unglamorous superpower
Clean equipment extracts better—period. Oils oxidize and turn rancid, and fines clog screens and filters. Build a routine:
- Daily: Brush grinder chute and burrs lightly; purge a couple of beans before changing settings. Wipe the steam wand immediately after use and purge for a second or two.
- Weekly: Backflush espresso machines (if applicable) with detergent; soak baskets, shower screens, and portafilters. Descalcify kettles if your water requires it.
- Monthly/Quarterly: Deeper burr cleaning, inspect gaskets, and check for leaks.
Maintenance isn’t punishment; it’s flavor insurance.
Budget tiers: Spend smart, taste more
Here’s a practical way to stage your investment without buying twice. Think of it as “good → better → best,” with upgrades that respect what you already own.
Filter-first pathway (pour-over, batch, immersion)
- Starter: Reliable burr grinder for filter, 0.1-g scale, basic gooseneck kettle, your favorite dripper, and filters.
- Enthusiast: Higher-end grinder with improved distribution and retention, variable-temp kettle, premium dripper, and a dedicated single-dose workflow.
- Pro-leaning: Flat-burr or premium conical grinder known for clarity, refractometer (optional, for recipe calibration), water-recipe routine, and a quality batch brewer for convenience.
Espresso pathway
- Starter: Espresso-capable grinder, entry machine with stable temps, 58 mm basket, WDT tool, proper tamper, 12–15 oz pitcher, fast thermometer.
- Enthusiast: Grinder with finer control and lower retention, machine with PID and decent steaming power, bottomless portafilter for feedback, upgraded baskets, puck screen if you like.
- Pro-leaning: High-consistency grinder (flat or conical, depending on your profile goals), machine with great temp/pressure stability, ergonomic barista accessories (distribution tool, calibrated tamper), and smart water management.
Comparison table: Where to place your dollars
| Gear Category | Why It Matters Most | Starter Buy Focus | Upgrade That Actually Helps | Skip/Delay If… |
|---|---|---|---|---|
| Grinder | Particle uniformity = flavor | Basic burr grinder matched to brew style | Better burr geometry, finer adjustment, lower retention | You’re not tasting consistent recipes yet |
| Scale + Timer | Repeatability | 0.1-g resolution, quick tare | Faster response, heat resistance, flow tracking (espresso) | You only brew immersion casually |
| Kettle | Temperature stability & flow control | Gooseneck, comfortable handle | Variable temp with fast heat recovery | You only make immersion brews |
| Espresso Accessories | Puck integrity | Proper tamper + WDT | Distributor, precision baskets, bottomless PF | You’re still dialing grind and dose |
| Water | Extraction + longevity | Basic filter | Consistent mineral profile | Your tap water already tastes neutral |
| Cleaning | Taste + reliability | Group brush, detergent, wand wipes | Burr care kit, gasket spares | Never—cleaning is non-negotiable |
Calibrating taste: A simple test to prove your gear is working
Here’s a tiny routine that reveals whether your gear is pulling its weight:
- Pick one coffee you like and brew it three ways over a week with the same ratio (e.g., 1:16 for filter).
- Log grind setting, temp, and time each day on your scale timer.
- Change one variable at a time—grind one click finer, or raise temp 2°F, or adjust bloom time by 10–15 seconds.
- Taste side by side (even a few sips). You’re looking for predictable shifts: finer = more sweetness/body until bitterness creeps; hotter = brighter aromatics until drying astringency appears.
If your changes feel random, it’s often the grinder or water. If your changes map to flavor predictably, your gear is doing its job—and you’ll feel like a barista scientist in the best way.
Espresso dialing: A human checklist that never fails me
When I dial in a new espresso, I follow a five-step loop:
- Does the basket’s sweet spot (often 17–19 g for a nominal 18 g basket).
- Prep with WDT, level, and tamp evenly.
- Pull to a target yield (1:2 to start) within 25–35 seconds from the first drip.
- Taste and adjust:
- Sour/underdeveloped? Finer grind or slightly longer shot.
- Bitter/astringent? Coarser grind or slightly shorter shot.
- Log the winning combo. Tomorrow-you will say thank you.
Gear that makes this loop easier—responsive grinder, precise scale, stable machine—feels “expensive” on day one and “obvious” by week two.
Ergonomics: Comfort is an investment, too
Barista tools are hand tools. Choose a gear that fits your workflow and your hands:
- Tamper grip that doesn’t pinch your wrist.
- Pitcher handle that keeps your thumb relaxed while swirling.
- A kettle balance that makes slow pours steady, not shaky.
- Machine height under cabinets that still allows refilling and cleaning.
Fatigue leads to sloppy technique. Comfortable gear preserves technique on busy mornings.
Protecting your budget: New, used, or “buy once” strategy?
- Used market: Grinders and machines can be great buys if you inspect burr wear, seals, and pump behavior. Ask for videos of the operation and proof of descaling/maintenance.
- Warranty: For new purchases, prioritize brands with accessible parts and support. One email answered quickly is worth more than specs you’ll never use.
- Buy once, cry once: If espresso is your endgame, it’s cheaper to leapfrog the in-between machine and put the money into a grinder and a temperature-stable machine now. Meanwhile, a superb filter setup costs a fraction of an espresso station and can out-taste mediocre espresso every day of the week.
Best 4 Selections on Amazon Right Now
Baratza Encore ESP (Espresso-Ready Grinder)

Who is this for?
The Baratza Encore ESP is ideal for both beginner and intermediate coffee lovers who want to upgrade their grind consistency without breaking the bank. Whether you’re brewing espresso or pour-over, this grinder offers precision and ease with 40 grind settings. Designed for daily use and built to last, it’s great for anyone seeking quality burr grinding in a compact, reliable package. Perfect for home baristas who value control, flavor clarity, and a smooth brewing workflow.What we loved
We loved the dual-range adjustment — it’s simple to switch between espresso and filter grind sizes. The motor is quiet and powerful, and the grind uniformity outperforms many grinders in this price range. The build feels solid, the design is sleek, and Baratza’s support and repairability make it a smart investment.Final verdict
An excellent entry-level burr grinder that delivers pro-grade results. Perfect for espresso lovers and everyday brewers wanting consistent performance, reliability, and upgrade-ready features.A thoughtful refresh of the home-favorite Encore, the ESP variant brings finer control into the espresso range without losing its friendly, low-fuss personality. It shines for dual-purpose kitchens that pull shots on weekends and brew pour-over on weekdays. Stepped adjustments make recipe logging easy, retention is minimal with a neat single-dose workflow, and Baratza’s serviceability reputation means parts and support aren’t a scavenger hunt. Expect forgiving dialing with medium and medium-dark roasts, with enough clarity for lighter beans once you’ve tuned your puck prep.
Fellow Stagg EKG (Variable-Temperature Gooseneck Kettle)

Who is this for?
The Fellow Stagg EKG is ideal for precision coffee brewers, tea drinkers, and anyone who loves design-led kitchen gear. Whether you’re a home barista chasing the perfect pour-over or a tea lover wanting exact temperatures, this kettle delivers. Its gooseneck spout ensures control, while variable temp settings offer precision. Great for coffee pros, hobbyists, and minimalists alike — it’s both high-performing and beautiful on the counter.What we loved
We loved the sleek matte design and ergonomic grip, making it a joy to use and display. The real standout is the precise temperature control — essential for pour-over perfection. It heats quickly and maintains temp beautifully. The gooseneck provides a smooth, steady pour without splashing. A design-forward, function-first tool.Final verdict
Stylish, precise, and thoughtfully engineered — the Stagg EKG is a must-have for coffee lovers serious about technique and aesthetics. It’s worth every penny.If pour-over is your happy place, a kettle that holds temp and pours like a pen is transformative. The Stagg EKG nails heat stability, warm-up speed, and ergonomics. The spout controls flow in slow spirals or deliberate pulses without wrist strain, and the base’s temperature control lets you nudge a degree or two to highlight different roast levels. It’s the kind of tool you forget is there—because it never gets in the way—and that’s the highest compliment in a daily driver.
Timemore Black Mirror Plus (Coffee Scale with Timer)

Who is this for?
The Timemore Black Mirror Plus is designed for precision-focused coffee lovers, especially espresso and pour-over enthusiasts. If you care about extraction accuracy, brew ratios, and timing, this scale delivers. It’s ideal for home baristas and professionals who demand high responsiveness and minimal lag. Whether you’re dialing in a shot or experimenting with new methods, this tool supports consistency and control. Great for those who value premium design, responsive touch operation, and a minimalist aesthetic on their coffee bar.What we loved
We loved the fast response time and integrated timer, which is essential for espresso. The matte finish resists fingerprints, and the backlit display is clear in all lighting. Silicone mat adds grip and heat protection. It’s USB-C rechargeable and holds a long charge — smart, sleek, and super functional.Final verdict
An excellent, precise, and beautifully designed scale for serious brewers. Offers smart features, pro-grade accuracy, and modern styling that upgrades any coffee setup.A sleek, responsive scale that gives you everything you need and nothing you don’t: fast tare, tenth-gram accuracy, and a clear timer you can read bleary-eyed. It’s sturdy enough for espresso drip trays and sensitive enough for delicate pour-over pulses. The platform footprint suits both a small demitasse and a big Chemex. The subtle friction surface keeps gear steady, and the built-in auto-timer mode for pour-over removes one more mental plate to spin on busy mornings.
Hario V60 Metal Dripper (02 Size)

Who is this for?
The Hario V60 Metal Dripper (02 Size) is perfect for pour-over enthusiasts who want precision, elegance, and durability in one compact tool. Ideal for home brewers who appreciate clarity in flavor and hands-on control. It’s great for those dialing in grind size, bloom time, and water flow. Whether you’re new to pour-over or a seasoned expert, this sturdy, travel-friendly dripper delivers café-quality results and elevates your brewing ritual. A must-have for minimalist and performance-focused coffee setups.What we loved
We loved its stainless steel body — durable, sleek, and lightweight — making it both travel-ready and counter-worthy. The spiral ridges improve water flow and extraction, while the heat retention is excellent for consistent brews. Easy to clean, rust-resistant, and compatible with standard 02 filters. It’s elegant, efficient, and built to last.Final verdict
An essential dripper for serious pour-over fans. It combines Hario’s proven V60 performance with metal durability and visual appeal. Stylish, functional, and always consistent.The classic cone reimagined in metal for better heat retention and durability. The spiral ribs and large outlet reward good pouring with clarity and nuance, while the metal body keeps temperatures steadier than thin ceramic in cool kitchens. It’s a dripper you grow with: forgiving enough to start, expressive enough to reward technique. Pair it with quality filters, a steady kettle, and a dialed grinder, and it will show you what your coffee actually tastes like—no fog, just flavor.
Troubleshooting: When the cup doesn’t match the effort
It tastes flat. Increase extraction: grind finer, raise temperature a notch, extend contact time, or improve agitation (pour pattern or stir/bloom). Check your water’s mineral balance—too soft can taste hollow.
It tastes harsh or bitter. Pull back extraction: grind coarser, lower temperature one or two degrees, shorten brew time, or reduce agitation. Clean your gear—old oils impart bitterness.
Espresso is spurting or channeling. Revisit puck prep: WDT more thoroughly, tamp level, confirm your tamper matches basket diameter, and check that your dose isn’t overdense against the shower screen.
Milk foam is bubbly. Start the wand tip just at the surface to stretch gently; once volume increases slightly, bury the tip and create a whirlpool to polish. Stop around 55–60°C and purge/wipe immediately.
Dialing your shopping list by brew style
If you love pour-over clarity
- Invest in the grinder first (filter-focused burrs are fine).
- Add a variable-temp gooseneck kettle.
- Choose a dripper that matches your taste (conical for sparkle; flat for sweetness).
- Get a fast scale with a timer.
- Tune water and filters; keep everything clean.
If you’re espresso-curious (and milk-drink happy)
- Prioritize an espresso-capable grinder with reliable micro-adjustments.
- Choose a machine with temperature stability appropriate for your milk volume (steam power matters).
- Add WDT, tamper, pitcher, and scale.
- Practice dose/yield timing before you chase latte art. Art follows texture; texture follows technique.
If you brew for a crowd
- Pair an excellent grinder with a temperature-honest batch brewer.
- Use a scale to confirm ratios in your brew basket.
- Keep a pour-over dripper for weekend tinkering—best of both worlds.
Real kitchen notes: The little habits that made the biggest difference
- Pre-heating matters. Warm your dripper, mug, and pitcher. You’ll see the same recipe taste fuller.
- Rinse filters fully. It removes paper taste and stabilizes brew temperature.
- Purge grinders on big jumps. Two or three beans will clear stale grounds and improve the first cup after a big adjustment.
- Log your wins. A tiny notebook or phone note with dose/grind/time makes your best cups reproducible. It’s oddly satisfying.
- Tidy bar = tidy mind. A small tray for tools, a brush for grounds, and a cloth by the wand keep you in flow.
Frequently asked gear questions (and straight answers)
Do I need a flat-burr grinder for filter clarity? Not necessarily. Many conical grinders produce fantastic clarity. Burr geometry influences flavor style, but quality and alignment matter more than marketing.
Is single-dosing mandatory? It’s convenient for variety and freshness, but a well-designed hopper workflow can be excellent if you stick to one coffee. Choose what fits your routine.
Do paper filters steal oils that I might want? Yes—and that can be desirable. Paper gives clarity and a clean finish; metal filters give body and texture. Neither is “correct.” Experiment with the same grind and ratio to taste the difference.
Should I buy the machine or the grinder first for espresso? Grinder first, nine times out of ten. A great grinder on a decent machine can make gorgeous espresso; the reverse is a struggle.
Is a refractometer worth it at home? Only if you love data and iteration. Most people can get remarkably consistent cups by taste with a scale, temperature control, and a good grinder.
A pragmatic buying roadmap (so you don’t overspend)
- Define your main drink. If you mostly drink black filter coffee, spend 60–70% of your budget on the grinder and kettle. If you live for cappuccinos, shift 60–70% to the grinder and machine.
- Secure the foundation. Grinder + scale + temperature control. Stop here until your taste tells you what’s missing.
- Add the espresso toolkit if applicable: WDT, tamper, pitcher, possibly a bottomless portafilter for feedback.
- Protect with water and cleaning. Boring, yes. And the best money you’ll “never taste” because it prevents problems.
- Upgrade intentionally. If your cups are consistently good and you can articulate what’s lacking (clarity, body, speed), choose the upgrade that addresses that specific gap.
Taste-forward recipes to get you started
A bright, sweet V60 baseline
- Coffee: 20 g, Water: 320 g at 203°F (95°C)
- Grind: Medium-fine (adjust until total brew ~2:45–3:15)
- Method: Rinse filter, bloom with 50 g for 35 s; three equal pours to 320 g, finishing by 2:00–2:15; gentle swirl at the end.
- Taste goals: Citrus-forward sweetness, clean finish. If sour, grind finer or raise temp 1–2°F. If bitter/drying, coarsen slightly.
A sweet, balanced espresso starting point
- Dose: 18 g in a “18 g” basket
- Yield: 36–40 g in 28–32 s (from first drip)
- Temp: Machine default/PID ~200°F (93–94°C)
- Taste goals: Chocolate base with lingering sweetness; adjust grind before you adjust anything else.
Long-term value: How gear pays you back
Good gear cuts waste (fewer sink shots), guards your beans (fewer stale leftovers), and saves café runs when you’re busy. But the sneakiest value is confidence. When you know your tools won’t sabotage you, you get to focus on the sensory adventure—new origins, roast levels, and recipes—without anxiety. That confidence translates into more brewed cups at home, which amortizes your investment faster than you’d expect.
If your budget is tight today, buy less but better. A superb filter setup can produce café-quality cups for a fraction of an espresso station. If espresso is your dream, stage it: grinder now, honest machine next, accessories after that. The only wrong move is buying sideways—lots of small upgrades that don’t address the biggest bottleneck.
Final thoughts: Build a bar you’ll use every day
Investing wisely in must-have barista gear is less about chasing status and more about designing a daily experience that’s delightfully repeatable. Choose tools that sharpen your senses, simplify your mornings, and respond faithfully when you make a change. Start with the grinder, add a trustworthy scale and temperature control, then expand into the espresso or filter world you love. Keep your water honest and your tools clean. The rest—the latte art tulips, the tasting notes that actually show up, the friends who ask “how did you make this?”—will follow naturally.
Coffee isn’t a contest; it’s a craft. With the right gear, it becomes your craft. Brew boldly, take notes, and let your tools fade into the background while your cups take center stage.