How to Make Café-Quality Coffee Without Fancy Equipment

One Hundred Coffee is reader-supported, and some products displayed may earn us an affiliate commission. Details
I’ll be honest: the day I realized my favorite café wasn’t using secret magic—but a repeatable technique—I felt liberated. You don’t need a $2,000 espresso machine, a café-grade grinder, or a milk wand that sounds like a jet engine. What you do need is a pinch of curiosity, a handful of good habits, and a small toolkit that can cost less than a week of takeaway coffees. In this guide, I’ll walk you through everything I do at home when I want that café-quality taste without the fancy gear—from selecting beans and dialing in grind size (even with an inexpensive grinder) to water, ratios, bloom, agitation, makeshift milk, and reliable brewing routines. I’ll also share hard-won lessons, comparison tables, and simple “rules of thumb” you can memorize and use every morning.
This isn’t about perfection. It’s consistently delicious.
The Mindset Shift: Technique Beats Technology
Expensive machines make workflows faster and more forgiving, but they don’t create flavor by themselves. Flavor is the consequence of:
- Fresh, well-roasted beans (not necessarily pricey—just fresh and suited to your taste).
- Proper grind size and consistency (yes, even from budget grinders with a bit of care).
- Right dose-to-water ratios and contact time.
- Clean water with balanced mineral content.
- Gentle, intentional agitation and even saturation.
- Clean equipment (old oils are coffee’s sworn enemy).
When you control those variables, you’ll taste brightness when you want brightness, sweetness when you crave sweetness, and a balanced, round cup when that’s the mood. Machines help; technique decides.
Beans First: Picking Coffee That Makes You Look Good
If you’re skipping fancy equipment, your coffee choice matters even more. A few practical tips from my kitchen experiments:
- Roast level:
- Light to light-medium roasts are complex and vibrant, but more sensitive to grind and water; they shine in pour-over and Aeropress-style brews.
- Medium roasts are friendlier and more forgiving across most manual methods.
- Dark roasts emphasize chocolate, caramel, and smoky notes; they pair well with milk and sugar and can disguise inconsistencies in grind.
- Origin vs. blend:
- Single origins (e.g., Ethiopia, Kenya, Colombia microlots) offer distinct character—berries, florals, citrus—great for black coffee lovers.
- Blends are balanced and consistent, great for milk drinks or if you prefer a reliable flavor profile every morning.
- Freshness:
Look for a roast date, not a “best by” date. Beans are lively within 2–6 weeks after roasting. If you’re forced to buy supermarket coffee, pick the most recently roasted bag and stash it in an airtight container away from heat, light, and moisture. - Grind on demand:
Grinding right before brewing remains the biggest flavor unlock you can control at home.
Water: The Invisible Ingredient That Decides Everything
You can upgrade your coffee overnight by fixing the water. Most tap water either has too many minerals (muting acidity and clarity) or too few (causing sour, thin cups). A simple, inexpensive path:
- If your tap water tastes great on its own, brew with it and judge the results.
- If not, use filtered water (pitcher filter or faucet filter) or mix distilled water with a mineral packet formulated for coffee.
- Target: total dissolved solids (TDS) roughly 60–150 ppm, alkalinity in the 30–50 ppm range. You don’t need a meter to start; taste is your meter. If cups are flat and dull, try slightly lower mineral water; if cups are sharp and sour, try slightly higher alkalinity.
Gear (on a Budget): What You Really Need
You can go café-quality with a minimal kit:
- Kettle: Any kettle works. Goose-neck is nice but optional. A gentle pour is more about your wrist than the spout shape.
- Scale: A small kitchen scale (to 0.1 g precision if possible) is the single most useful tool for consistency.
- Grinder: A decent hand grinder is often a better value than a cheap electric one. If you only have a blade grinder, use short pulse-grinds and shake between pulses for more even particles (details below).
- Brewer: A pour-over cone (plastic is totally fine), a reusable metal cone, an Aeropress-style brewer, or even a plain jar + fine mesh filter can produce café-grade cups with good technique.
- Thermometer (optional): Helpful at first; your palate becomes the thermometer later.
Ratios That Work: A Simple Starting Point
- Pour-over & filter brews: 1:16 (e.g., 18 g coffee to 288 g water)
- Aeropress-style (classic): 1:14 to 1:15 (e.g., 15 g coffee to ~210 g water, then top up if needed)
- Immersion (French press): 1:15 (e.g., 25 g coffee to 375 g water)
These are starting points, not commandments. If your cup is too sour and thin, grind finer or lengthen the brew time slightly. If it’s too bitter or muddy, grind coarser or shorten brew time.
Temperature, Bloom, and Agitation—The “Flavor Steering Wheel”
- Temperature:
- Light roasts: ~94–96°C (201–205°F) to dissolve delicate aromatics and sugars.
- Medium: ~92–94°C (198–201°F).
- Dark: ~88–92°C (190–198°F) to avoid leaching harsh bitterness.
- Bloom:
Saturate grounds with ~2–3x their weight in water and wait 30–45 seconds. This de-gasses CO₂, preventing channeling and helping even extraction. - Agitation:
Gently stir or swirl during bloom and once mid-brew. Agitation improves extraction, but overdoing it can release fines and bitterness. Think “intentional, minimal, and gentle.”
Grinder Reality Check (and How to Win With Any Grinder)
If you have a hand burr grinder
- Start at a medium grind and adjust by taste.
- For pour-over, aim for particles like table salt to be slightly coarser.
- For immersion methods, go a touch coarser than pour-over.
- Tip: Count your handle turns for a consistent dose.
If you have a blade grinder
You can still brew good coffee with technique:
- Pulse, don’t hold: Short bursts (1 second on, 1 off) to reduce heat.
- Shake between pulses: Evens out particle size so you don’t get dusty fines at the bottom.
- Sift if possible: A fine mesh kitchen strainer can remove the worst fines—this alone can lift cup clarity significantly.
- Brew method choice: Immersion methods (French press, jar brew) are more forgiving of uneven grind than pour-over.
Three No-Fuss Brewing Paths to Café-Quality
1) The Plastic Pour-Over (Yes, Plastic)
Plastic holds heat well enough for home use and won’t scorch like thin metal. It’s cheap, nearly unbreakable, and brilliant for beginners.
Recipe (1 cup):
- 18 g coffee, medium grind
- 288 g water at ~93–95°C (199–203°F)
- Paper filter (rinsed) or a fine metal filter
Steps:
- Rinse the filter to remove papery taste and pre-heat the cone.
- Add coffee and flatten the bed. Start a timer.
- Bloom with 36–45 g water; swirl to saturate evenly; wait 35–45 seconds.
- Pour in two or three steady pulses, keeping the water level stable.
- Gentle swirl when you’re halfway through; total brew time 2:45–3:30.
Taste tuning:
- If lemony/sour → grind slightly finer or pour more slowly.
- If dry/bitter → grind slightly coarser or pour faster.
2) Aeropress-Style Brew (or Any Cylinder With a Filter)
I use an Aeropress because it’s effortless, but you can improvise with a jar + fine mesh and then pass through a paper towel if needed.
Recipe (balanced):
- 15 g coffee, medium-fine
- 210 g water at ~92–94°C (198–201°F)
Steps (inverted or normal):
- Bloom with 30–40 g water; stir gently; wait 30–40 seconds.
- Add remaining water; stir once; cap with filter.
- At 1:45–2:00, press gently over 20–30 seconds.
- If too intense, top up with hot water to taste.
Why it tastes café-clean: Short contact, gentle pressure, and a paper filter strip away grit and excess oils.
3) The “Jar Press” Immersion (Your French Press Without a French Press)
You can brew in a heat-safe jar, then pass the brew through a fine mesh strainer or paper filter into your cup.
Recipe:
- 25 g coffee, medium-coarse
- 375 g water at ~92–94°C (198–201°F)
Steps:
- Add grounds and hot water; stir gently to saturate.
- Steep 4 minutes.
- Stir briefly, wait 30 seconds for grounds to settle.
- Decant slowly through a strainer or paper filter.
Result: Silky body, forgiving of grinder imperfections, deep sweetness.
Comparison Table: Which Method Should You Use Today?
| Method | Best For | Body | Clarity | Forgiveness | Typical Time |
|---|---|---|---|---|---|
| Plastic Pour-Over | Bright, nuanced cups; black coffee lovers | Light-Med | High | Moderate | 3–4 min |
| Aeropress-Style | All-rounder; tea-like to concentrated “Americano” | Light-Med | Medium-High | High | 2–3 min |
| Jar/Immersion | Chocolatey, rounded comfort cups; dark roasts | Medium-Full | Medium | Very High | 4–6 min |
The Café-Clean Cup: Extraction in Plain Language
Extraction is how much of the coffee’s soluble goodness you dissolve into water. Too low? Sour, thin, grassy. Too high? Bitter, ashy, hollow. The sweet spot tastes balanced and layered. Your dials are:
- Grind size: Finer = more extraction; coarser = less.
- Time: Longer contact = more extraction.
- Agitation: More movement usually means more extraction.
- Temperature: Hotter water pulls more.
Change one variable at a time and taste again. Write simple notes: “Day 1: medium grind, 3:15 total, sweet but a bit flat. Day 2: a hair finer, still 3:15, more orange sweetness—keeper.”
Milk Without a Steam Wand (and It’s Actually Good)
If you love lattes and cappuccinos, you can still get café-style milk texture without a steam wand.
Simple microwave jar method:
- Fill a small jar halfway with cold milk.
- Shake for 30–40 seconds until foamy.
- Microwave 20–40 seconds to warm and stabilize foam (don’t boil).
- Tap to knock out large bubbles, swirl, then pour over coffee.
Stovetop whisk method:
Warm milk gently (never boil), then whisk vigorously off the heat. You won’t get microfoam as fine as a café wand, but you’ll get velvety milk that blends beautifully with strong coffee or Aeropress concentrate.
Tip: Whole milk foams creamiest; oat milk (barista style) is very forgiving and tasty. Keep your milk and jar cold before shaking for finer bubbles.
Sugar, Sweeteners, and Flavor Boosters—How to Keep It Balanced
- Simple syrup (1:1 sugar: water) dissolves instantly in cold or hot drinks, preventing gritty cups.
- A pinch of salt (literally a pinch) can mute harsh bitterness in dark roasts.
- Cocoa powder and cinnamon bloom better if you whisk them in a tiny splash of hot water before adding to milk or coffee.
- Orange or lemon zest (just a little) makes light roasts sing on cold mornings.
Clean Gear = Clean Coffee
Old oils = rancid flavors. Keep a small routine:
- Rinse filters and brewers immediately after use.
- Weekly: soak plastic cones and filters in warm, mild soapy water; rinse thoroughly.
- Grinders: brush burrs or blades; wipe the chute; occasionally grind a handful of plain white rice (for blade grinders) to absorb oils, then wipe clean.
Troubleshooting: What to Fix First
Sour Taste
- Grind a notch finer; brew a touch longer or hotter; agitate slightly more.
Bitter Taste
- Grind coarser; brew a bit shorter or cooler; agitate less.
Watery Taste
- Increase dose (e.g., from 15 g to 17 g), keep water constant, or shorten the brew time slightly.
Strong Taste
- Keep the dose, but grind a hint coarser or use slightly cooler water.
There’s sludge in my cup:
- Use a paper filter or strain through a clean paper towel. With blade grinders, sift out fines.
“Espresso-Like” Drinks Without an Espresso Machine
No pump? No problem. You won’t replicate 9-bar extraction, but you can create a bold, syrupy concentrate that pairs wonderfully with milk.
Aeropress-style concentrate:
- 18 g coffee, medium-fine
- 120–140 g water at ~94°C (201°F)
- Bloom 30 seconds; add the rest; stir once; press slowly over 30–45 seconds.
- Use with warmed, foamed milk for a “flat white-ish” treat.
Moka pot alternative (if you have one):
- Fill the base with hot water (just below the valve); fill the basket level (don’t tamp).
- Brew on low heat; remove the pot the second it starts to gurgle.
- Stir the top chamber to mix early/late extractions.
- Combine with foamed milk for a café-style drink.
Cold Coffee Without the Gadgets
No-strainer cold brew (overnight jar):
- 60 g coffee, coarse to medium-coarse
- 600 g cold water
- Stir, cover, and steep 12–18 hours in the fridge.
- Decant slowly through a paper filter (or two) into a clean bottle.
- Dilute to taste when serving (1:1 is a common starting point).
- Keeps in the fridge ~5–7 days.
Iced “flash brew” pour-over (fast, bright, floral):
- Put 100 g of ice in your carafe.
- Brew 18 g coffee with 190 g hot water (ratio accounts for the melting ice).
- The ice traps aromatics and preserves acidity—very café-like, very refreshing.
Micro-Skills That Add Up to Café-Quality
- Flat coffee bed: Tap or shake your brewer gently after adding grounds. Even beds = even extraction.
- Center-out pour: Start at the center and spiral out, then back in—smooth and controlled.
- Pause with purpose: Short pauses help water percolate evenly; don’t rush.
- Finish clean: At the end of a pour-over, a gentle swirl can level fines and settle the bed.
- Taste systematically: Always change one variable at a time.
Quick Visual Cues for Grind Size
- Too fast drain (<2:15 on 1-cup pour-over): Too coarse; cup likely under-extracted.
- Stalled or very slow (>4:30): Too fine; likely bitter or silty.
- Target window (2:45–3:30): Usually balanced for 1-cup brews with medium roasts.
Comparison Table: Roast Level, Water Temp, and “Flavor Goal”
| Roast Level | Water Temp (°C) | Grind Target | Flavor Goal |
|---|---|---|---|
| Light | 94–96 | Medium → Med-fine | High clarity, citrus/berry, florals |
| Medium | 92–94 | Medium | Balanced sweetness + gentle acidity |
| Dark | 88–92 | Med-coarse → Coarse | Chocolatey, low acidity, smooth |
The 5-Minute Morning Routine (That Tastes Like You Spent 15)
- Kettle on. While it heats, weigh beans (18 g).
- Grind (hand grinder or pulse-shake blade grinder).
- Rinse filter, add grounds, tap to level.
- Bloom 35–45 seconds with ~40 g water; swirl.
- Two steady pours to target weight; one gentle swirl mid-brew.
- Sip the first odor of steam—if it smells bright and sweet, you’re on track.
How to “Read” Your Coffee Like a Pro
- Aroma on bloom: Sweet and bready? You’re extracting sugars. Sharp and grassy? Try hotter water or a finer grind.
- First sip: Pay attention to temperature; some sourness disappears as the cup cools.
- Mid-cup: Sweetness should peak. If it falls flat, your brew might be short; grind a hair finer next time.
- Last sip: If it’s bitter or astringent, go coarser or shorten contact time.
Keep a tiny notebook or notes app. Even five words (“coarse, sweet, short finish—good”) keep your learning compounding.
Make Your Kitchen Smell Like a Café (Without Buying Anything New)
- Warm your mug with hot water before you brew. Hot mugs keep aromas lively.
- Grind right before brewing; let the bloom aroma fill the room.
- Serve in narrower-top cups to capture fragrance if you like bright, aromatic coffees.
- Wipe counters and gear—clean spaces smell like cafés for a reason.
Budget Upgrades That Punch Above Their Price
If you’re ready to spend a little, these pay back daily:
- A hand burr grinder: Consistency improves instantly versus most budget electrics.
- A simple gooseneck kettle: Not mandatory, but it makes controlled pours effortless.
- Reusable metal cone filter: More oils, rounder body; paper filters give more clarity—choose your style.
- A digital kitchen scale: Turns “good” into “repeatable good.”
Best 5 Selections to Elevate Your Daily Brew
Below are compact, affordable picks that pair beautifully with everything in this guide. No links—just names you can search. I’ve chosen models that don’t rely on expensive machines or complicated workflows.
Wacaco Nanopresso
If you crave intense, espresso-adjacent shots without a bulky machine, the Nanopresso is the pocket rocket that consistently surprises people. It uses manual pressure (your hands) to extract a short, rich concentrate that blends beautifully with foamed milk from the jar method. It’s travel-tough, easy to clean, and perfect for “weekend latte” routines when you’re short on counter space but high on ambition.

Who is this for?
The Wacaco Nanopresso is ideal for espresso lovers who travel, camp, or commute. It’s perfect for those who want café-quality espresso without electricity. Compact, lightweight, and easy to clean, it suits minimalists, adventurers, and anyone needing a reliable, manual espresso shot anywhere—without sacrificing flavor or crema.What we loved
We loved its sturdy build and pressure power. The Nanopresso delivers excellent crema with minimal effort. It’s portable, versatile, and doesn’t rely on batteries—just add hot water and pump.Final verdict
A compact, rugged espresso solution for travelers and outdoor brewers. It’s consistent, convenient, and a must-have for serious espresso lovers on the go.Cafflano Klassic All-in-One Brewer
Grinder, drip brewer, and tumbler in one compact unit—ideal for small kitchens or work desks. The hand grinder is surprisingly capable for its size, and the metal filter yields a cup with a juicy body and pleasing sweetness. It removes the excuse of “too many moving parts,” making a great daily driver for anyone who wants café-level clarity without juggling gear. Excellent for medium roasts.

Who is this for?
The Fellow Stagg EKG is ideal for precision coffee brewers who value both performance and design. Whether you’re a pour-over enthusiast or home barista, this gooseneck kettle delivers accurate temperature control, sleek style, and a comfortable pour. Great for those who want consistent results and minimalist countertop aesthetics.What we loved
We loved the precise temperature control, matte black finish, and balanced handle. The flow rate is perfect for pour-over, and the LCD display is crisp and intuitive. Built to impress.Final verdict
A premium electric kettle built for serious brewers. Combines form, function, and precision in one iconic design. Ideal for daily rituals and café-quality results.Kalita Wave 185 Dripper (Plastic or Stainless)
The flat-bottom design and three small drainage holes encourage even extraction and reduce the “oops, I poured too fast” panic that new brewers face. It reliably delivers cups with a rounded sweetness and less edge than some conical drippers. If you’re chasing café-clarity on a budget, this is a go-to. Pair it with a basic scale and you’ll feel like a pro.

Who is this for?
The Kalita Wave 185 Dripper is ideal for pour-over brewers who want consistent, forgiving extractions. Its flat-bottom design is perfect for those who prefer an easier, more balanced cup without the need for precision pouring. Great for both beginners and seasoned brewers looking for simple, reliable brewing at home or work.What we loved
We loved its simplicity, portability, and consistent results. The wave filters and flat bed promote even extraction. It’s lightweight, durable, and perfect for fast, no-fuss brewing with minimal technique.Final verdict
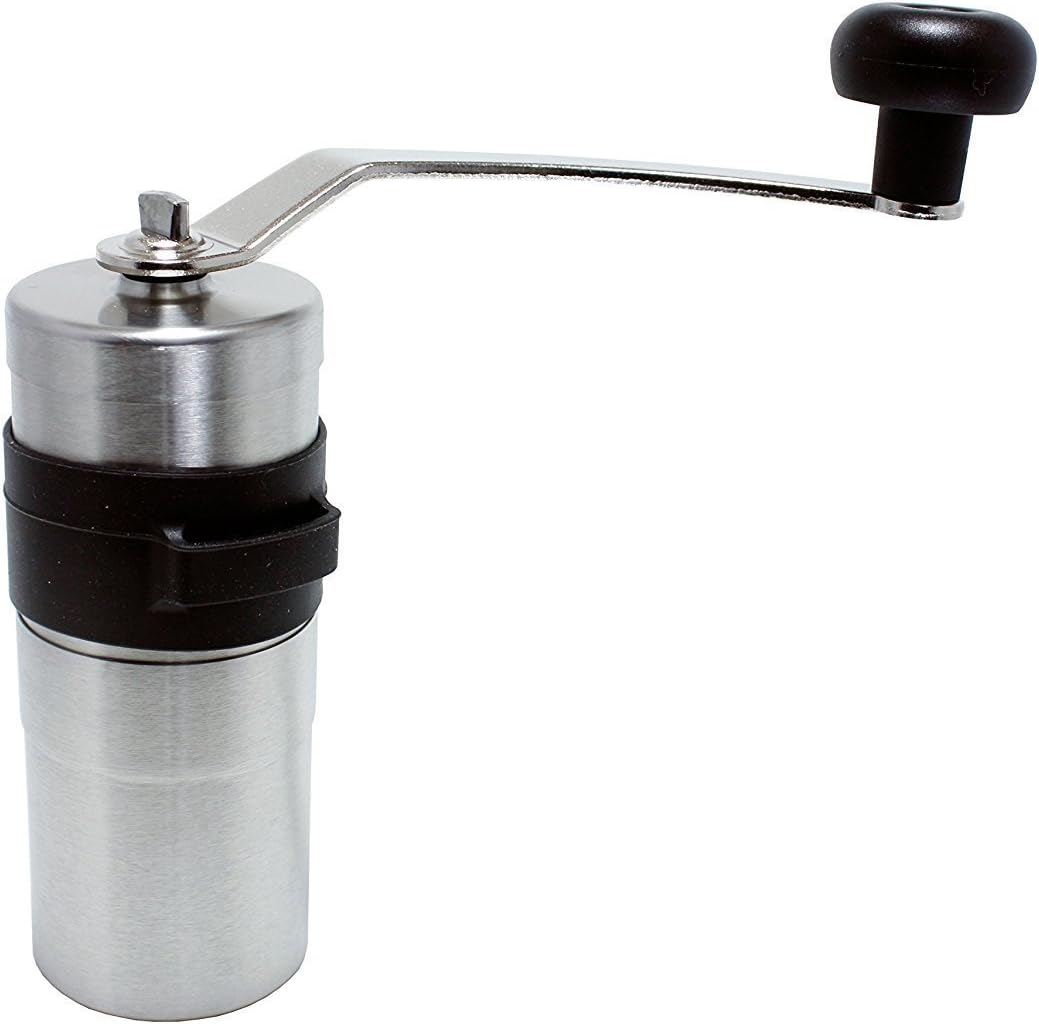
A fantastic choice for anyone who wants reliable, easy pour-over coffee. Consistent, approachable, and great for learning or everyday brewing without overcomplication.Porlex Mini II Hand Grinder
Compact, stainless, and built like a little tank. It’s not a luxury grinder, but it’s consistent, travel-friendly, and a huge upgrade over blade grinders. The click-based adjustment is easy to remember, and the burrs stay sharp for ages. If you’ve ever felt your coffee is “almost there,” this is the kind of small upgrade that unlocks sweetness and balance you can actually taste.
Who is this for?
The Porlex Mini Grinder is perfect for travelers, campers, and minimalists who want high-quality manual grinding without bulk. Built from durable stainless steel, it’s ideal for espresso and pour-over lovers alike. Its compact, no-electric design makes it a favorite for remote brewing and everyday countertop simplicity.What we loved
We loved its sleek, all-metal build, consistent ceramic burrs, and portability. It fits inside an AeroPress, grinds evenly, and feels incredibly sturdy — no-nonsense and built to perform.Final verdict
A compact, ultra-reliable grinder for coffee on the go. Great for manual brew lovers who want quiet, precise grinding without compromising durability or portability.Able Kone Reusable Filter (for Cone Brewers)
If you love fuller body and longer-lasting aromatics, the Kone gives you café-style metal filter goodness without paper waste. It lets oils through for a richer mouthfeel while keeping most sediment at bay. I like it with comfort-leaning medium to darker roasts. Cleaning is quick: rinse immediately after brewing, and you’re done.

Who is this for?
The Able Kone filter is made for eco-conscious coffee drinkers who brew with Chemex or other cone-shaped brewers. Perfect for those who prefer a fuller-bodied cup, want to reduce paper waste, and value clean design. Great for daily brewers who appreciate simplicity, durability, and great coffee with less hassle.What we loved
We loved the ultra-fine stainless steel mesh that delivers rich flavor with minimal sediment. It’s easy to clean, long-lasting, and fits most cone brewers perfectly. Great for daily, sustainable brewing.Final verdict
A reusable, zero-waste coffee filter that keeps flavor in and paper out. Ideal for those who value sustainability without sacrificing taste or brew clarity.Your First 7-Day Plan to Lock In Café-Quality
Day 1–2: Baseline
Use the 1:16 pour-over recipe with a medium roast. Record time, taste, and one tweak for tomorrow.
Day 3–4: Water
Brew the same coffee with filtered water if you started with tap water. Note changes in clarity and sweetness.
Day 5: Grind Discipline
If using a blade grinder, try pulse-and-shake plus a quick sift. If hand burr, tighten one click finer than baseline. Taste and note.
Day 6: Temperature & Agitation
Brew slightly hotter. Add one gentle stir mid-brew. Did acidity bloom pleasantly or tip into sharpness?
Day 7: Milk Day
Make a café-style milk drink with the jar foam method over a concentrate brew. Try a pinch of cinnamon; dial sweetness with simple syrup.
By the end of the week, you’ll not only have better coffee—you’ll have a system that makes good coffee inevitable.
Frequently Asked Real-World Questions
Do I need a gooseneck kettle?
No—but it helps. Practice smooth, steady pours with any spout; your wrist is the real skill.
Is a hand grinder worth it?
For most home brewers, yes. It’s the most cost-effective way to improve flavor clarity and sweetness.
What if my coffee still tastes flat?
Try fresher beans or switch roast levels. Also, test different water (bottled spring or filtered). Flat cups often trace back to stale beans or unbalanced water.
How fine should I grind?
For pour-over: medium. Adjust by brew time and taste. Under 2:30? Coarser. Over 4:00? Finer. Use your timer as a training wheel.
Can I get café-like latte art without a steam wand?
True microfoam is tough without steam, but you can get close with the jar method—polish your swirl and slow pour to create simple hearts or tulips in time.
A Few Flavor “Templates” You Can Steal
Bright and Zesty Morning Cup (Pour-Over):
- Ethiopia or Kenya light roast
- 18 g coffee → 288 g water @ 95°C
- Medium grind, slightly finer than your baseline
- Two pours + gentle swirl mid-brew
- Expect citrus, florals, and honeyed sweetness
Comfort Cocoa Cup (Immersion):
- Brazil or Sumatra medium-dark
- 25 g coffee → 375 g water @ 92°C
- 4-minute steep, 30-second settle, slow decant
- Expect chocolate, nuts, and low acidity
Weekend “Latte” (Aeropress Concentrate + Jar Milk):
- Medium roast blend
- 18 g → 120–140 g water @ 94°C; slow press
- Foam whole milk in a cold jar; microwave; tap and swirl
- Add a dot of simple syrup if desired
Comparison Table: Fix-It Fast—What to Change First
| Problem | Likely Cause | Quick Fix #1 | Quick Fix #2 |
|---|---|---|---|
| Sour, thin | Under-extraction | Finer grind | Hotter water |
| Bitter, dry | Over-extraction | Coarser grind | Cooler water |
| Muddy/silty cup | Too many fines, agitation heavy | Sift or gentler pour | Reduce stirring |
| Flat/dull | Stale beans or water minerals | Fresher beans | Adjust water source |
| Weak | Low dose or too coarse | Increase coffee dose | Slightly finer grind |
| Harsh strong | Over-extracted concentrate | Coarser grind | Shorter contact time |
Beyond Recipes: Making It Yours
Café-quality coffee at home is a practice, not a purchase. Some mornings, I want a sparkling, lemonade-bright cup that wakes up my brain. Other days, I want a plush, chocolate-heavy mug that hugs me back. By learning a few dials—grind, temperature, agitation, and time—you get to design your morning mood.
A few rituals to make it stick:
- Set your gear the night before: Beans in canister, kettle filled, filter placed.
- Keep a two-bag rotation: One bright, one cozy. Your palate stays curious.
- Share your cup: Brewing for someone else is the fastest way to care about the details.
And the best part? You’ll start trusting your senses more than labels or price tags. That’s when you cross from “person who drinks coffee” to “person who makes coffee.”
The Shortlist: What Actually Matters Most
If you skimmed to the end (I get it), here’s the essence:
- Fresh beans, roasted within 2–6 weeks.
- Good enough grinder (hand burr if possible; pulse-and-shake if blade).
- Consistent ratios (start 1:16), right temp (light = hotter, dark = cooler).
- Bloom + gentle agitation for even extraction.
- Water that tastes good (filtered or balanced).
- Clean gear, clean cup, clean routine.
Do those, and “café-quality” stops being a place you go—and becomes something you make.
Final Word: Make the Coffee You Want to Drink
Your kitchen can absolutely produce cups that rival your favorite café—without buying an espresso machine or a café-grade grinder. Every time you brew, you’re learning how water meets coffee and how small choices shape flavor. That’s the quiet magic cafés’ harness. Now it’s yours, too.
Set the kettle, weigh the beans, bloom with patience, and pour with intention. The rest is just practice—and the very enjoyable kind.
Enjoy your cup.