The Ritual Behind the Brew: Why Coffee Extraction Matters

Coffee isn’t just a drink; it’s a morning ritual, a midday boost, a social glue. But what makes a cup truly great? It all comes down to extraction. Extraction is pulling flavors, oils, and compounds from ground coffee beans using water. If you’ve ever had a cup that was too bitter or too sour, you’ve experienced what happens when extraction goes wrong. Perfect extraction is where the science and craft of coffee collide—and when it’s right, you can taste the difference immediately.
Under-Extraction vs. Over-Extraction: The Balance of Flavor
| Extraction Level | Taste Profile | Clue Characteristics |
|---|---|---|
| Under-Extracted | Sour, grassy, sharp | Quick finish, pale color |
| Perfectly Extracted | Balanced, sweet, complex | Full body, pleasant acidity |
| Over-Extracted | Bitter, dry, hollow | Lingering astringency, dark tone |
Achieving the right balance is all about understanding what influences the extraction process. Let’s break that down.
Grind Size: Where the Science Begins
Your grinder isn’t just a fancy gadget—it’s your most important tool. Grind size controls how much surface area is exposed to water. The finer the grind, the more quickly flavors are extracted. A coarse grind might be perfect for a French press, but too coarse for an espresso shot. On the other hand, too fine a grind can clog your filter and lead to over-extraction. Getting your grind size right is about matching it to your brewing method.
Common Brewing Methods and Their Ideal Grind Sizes

| Brew Method | Recommended Grind Size |
|---|---|
| French Press | Coarse |
| Pour Over | Medium |
| Drip Coffee Maker | Medium-Fine |
| Espresso | Fine |
| Turkish Coffee | Extra Fine (like powder) |
A good rule of thumb? If your coffee tastes sour, try grinding finer. If it tastes bitter, go coarser. Simple tweaks can make a big difference.
Water Temperature: The Hidden Variable
Water might be the most overlooked part of your coffee routine. But it’s crucial. Water that’s too hot will extract bitter compounds. Too cold, and you won’t get enough flavor. The sweet spot is generally between 195°F and 205°F (90°C to 96°C). A thermometer helps, but if you’re just eyeballing it, bring your water to a boil, then let it sit for about 30 seconds.
And don’t forget about water quality. Hard water with minerals can throw off flavor. Filtered water is usually the safest bet for consistency.
Brew Time: Patience Equals Flavor
How long water is in contact with your coffee grounds impacts extraction just as much as temperature or grind size. Too short, and you leave good stuff behind. Too long, and you start pulling out the bad stuff. Brew time varies by method. Espresso? 25–30 seconds. French press? Four minutes. Pour over? Usually around three. Always match your grind size to your brew time to stay in the extraction sweet spot.
Brew Time Guidelines by Method
| Method | Average Brew Time |
|---|---|
| Espresso | 25–30 seconds |
| French Press | 4 minutes |
| Pour Over | 2.5–4 minutes |
| Cold Brew | 12–24 hours |
The Coffee-to-Water Ratio: Precision Over Guesswork
A good cup of coffee starts with the right ratio of coffee to water. Too much coffee and it’s overpowering. Too little, and it’s weak. The standard rule is about 1:16—that’s 1 gram of coffee for every 16 grams (or milliliters) of water. Use a scale, not a scoop. It’s not about volume; it’s about mass.
That said, preferences vary. Some people love a stronger brew, closer to 1:14. Others go lighter at 1:17. Start with the golden middle and tweak from there.
Freshness: Beans Make or Break It

No matter how dialed-in your method is, stale beans will ruin your coffee. Coffee starts losing its peak flavor within two weeks of roasting. Buying whole beans and grinding them just before brewing is key. Store them in an airtight container away from light, air, heat, and moisture.
Avoid buying ground coffee unless you have to. And skip the freezer—that can introduce moisture. Think of beans like fresh produce. You wouldn’t eat wilted lettuce and expect a great salad, right?
Agitation: Stirring Things Up (On Purpose)
Agitation is how you mix water and coffee during brewing. Stirring, swirling, or pulsing helps ensure even extraction. If you just let water sit passively, you risk uneven saturation—leading to some grounds being over-extracted while others are under. With our over methodour overtle swirl after the bloom helps. In the French press, a light stir right after adding water can work wonders.
Don’t go wild. Over-agitation can lead to too much extraction. You’re aiming for gentle and even, not a coffee cyclone.
The Bloom: The Pre-Game That Matters
Ever noticed that puff of bubbles when hot water first hits fresh ground? That’s the bloom. It’s CO2 being released. Letting coffee bloom before continuing your brew allows trapped gases to escape so water can fully saturate the grounds. Skip this step, and water paths unevenly, ruining your extraction.
For most manual methods, pour just enough water to cover the grounds and wait 30–45 seconds. You’ll see the magic happen. Then pour the rest of your water slowly and evenly.
Filters: Paper vs. Metal vs. Cloth
Filters don’t just strain grounds—they influence flavor. Paper filters (used for pour-over) absorb oils, producing a cleaner cup. Metal filters (used in French presses or reusable pods) let more oils and fine particles through, resulting in a richer, fuller body. Cloth filters land somewhere in between but require more maintenance.
Filter Comparison
| Filter Type | Flavor Profile | Maintenance | Sustainability |
|---|---|---|---|
| Paper | Clean, bright | Disposable | Compostable |
| Metal | Full-bodied, rich | Easy to rinse | Reusable |
| Cloth | Balanced, smooth | Needs washing often | Reusable (short-term) |
Your choice depends on your taste preference and how much cleanup you’re willing to do.
Brewing Gear: Invest in What Matters
Not all gear is created equal. Fancy machines might help, but they’re not essential. What is essential: a good burr grinder (for consistent particle size), a kettle with a gooseneck spout (for control), a scale (for precision), and a thermometer (for water temp). Everything else is nice to have, but those four tools make the biggest difference.
Skip the blade grinders. They chop unevenly, which causes inconsistent extraction. A cheap burr grinder beats an expensive blade grinder every time.
How to Improve Coffee Extraction Over Time
If you’ve ever brewed a cup that tasted thin one day and harsh the next—even though you swear you did the same thing—you’re not alone. Improving coffee extraction isn’t about one magic trick; it’s about stacking a few small, consistent habits that make every brew taste more like the coffee you wanted to drink. Think of it like tuning a guitar. The strings are the same, the instrument is the same, but the way you tune and play it changes the music completely. Over time, those tiny adjustments add up, and your palate learns to guide your hands almost automatically. This guide is the long, friendly version I wish I had when I started: practical, human, and focused on how normal people can get steadily better.
What “Extraction” Actually Means (and Why Your Cup Tastes the Way It Does)
Extraction is simply how much of the coffee’s soluble material ends up in your cup. Coffee beans are full of flavor compounds; you’re dissolving them into water. When extraction is too low, your coffee tastes sharp, sour, or hollow—like the music is missing the middle notes. When extraction is too high, you get bitterness, dryness, and a “lingering bark” aftertaste. Right in the middle is “balanced,” where sweetness shows up, acidity is lively but not shrill, and the finish feels clean and complete.
Understanding this spectrum is the foundation. You’ll improve fastest when you can taste which direction to move. Over time, your palate becomes your compass; it will tell you to grind a bit finer, brew a little hotter, extend contact time, or adjust the dose-to-water ratio. You don’t need lab gear—though a scale helps a lot. What you need most is a repeatable routine and a habit of paying attention.
Your Five Biggest Levers: Grind, Ratio, Time, Temperature, and Turbulence
Nearly every “mystery” in a brew can be traced back to one or more of these five. Each one makes the water pull different flavors from the coffee bed.
Grind Size
Grind size is your steering wheel. Finer grounds mean more surface area and faster extraction; coarser grounds slow things down. If your cup tastes sour, lemony, or empty, go finer. If it’s bitter, astringent, or drying, go coarser. A good burr grinder is the single most impactful upgrade most home brewers can make, because it creates more uniform particles (fewer “boulders and dust”) and more consistent extractions brew to brew.
Brew Ratio (Dose to Water)
Ratio is your geometry. 1:15 (one gram coffee to fifteen grams water) produces a richer cup than 1:17, while 1:18 leans lighter and more tea-like. For pour-over, 1:16 is a friendly starting point. For the French press, 1:15 is common. Espresso ratios are often written as “in: out,” like 1:2 (18 g coffee yields ~36 g liquid espresso). If your coffee tastes thin even when the extraction seems okay, try nudging your ratio richer before you do anything else.
Time / Contact
In immersion methods (French press, cupping, AeroPress), time is the literal contact duration. In percolation methods (drip, pour-over, espresso), “time” shows up as flow rate and total brew duration. Longer contact generally means more extraction. With pour-over, if the water zips through in two minutes, you’re probably underextracting; if it crawls beyond four minutes, you’re probably overextracting. With espresso, a typical “normie” shot at a 1:2 ratio might land between 25–35 seconds, but let taste—not a stopwatch—make the final call.
Temperature
Hotter water pulls more, colder water less. For most filter coffee, 92–96°C (197–205°F) is a safe range. If your kettle lacks a thermometer, just off the boil and a short rest works. For espresso, temperature stability is king; big swings create a roller coaster of sour-then-bitter. If your shots taste sharp and thin, a small bump in brew temperature can help. If they taste bitter and flat, you might be too hot—or simply overextracting due to grind/time.
Turbulence (Agitation)
Stirring, swirling, pulse pouring, the way water hits the bed—these shape extraction, especially in percolation. Gentle agitation can even out channeling. Aggressive agitation can overextract fine particles and turn the cup harsh. My rule: create just enough movement to keep the bed level and avoid dry pockets, then let gravity do its job. Over time, you’ll “feel” how much agitation a given grinder and coffee need.
A Real-World, Repeatable Dial-In Routine (Filter Coffee)
Here’s the practical way I approach a new bag of beans for pour-over or drip at home. It’s deliberately boring—because boring is repeatable, and repeatable unlocks learning.
- Pick a starting point: 1:16 ratio, 94°C water, medium-fine grind, a three-minute target brew time.
- Brew and taste without sugar or milk: note your first sip, mid-cup, and last sip. If the last sip turns harsh while hot, that’s a sign of overextracted fines or a grind that’s a touch too fine.
- Make one change at a time: If the cup is sour or papery, go a little finer or brew slightly longer. If it’s bitter or drying, coarsen the grind or pour a touch faster to shorten contact time.
- Log a single sentence: “Day 1 – washed Colombia – medium-fine – 1:16 – 3:05 – slightly sour, went finer.” You will be surprised how much memory this sentence gives you next time.
Within two or three brews, you’ll land in the zone. Then the fun becomes micro-adjustments based on roast level, bean age, and the style of cup you prefer that day.
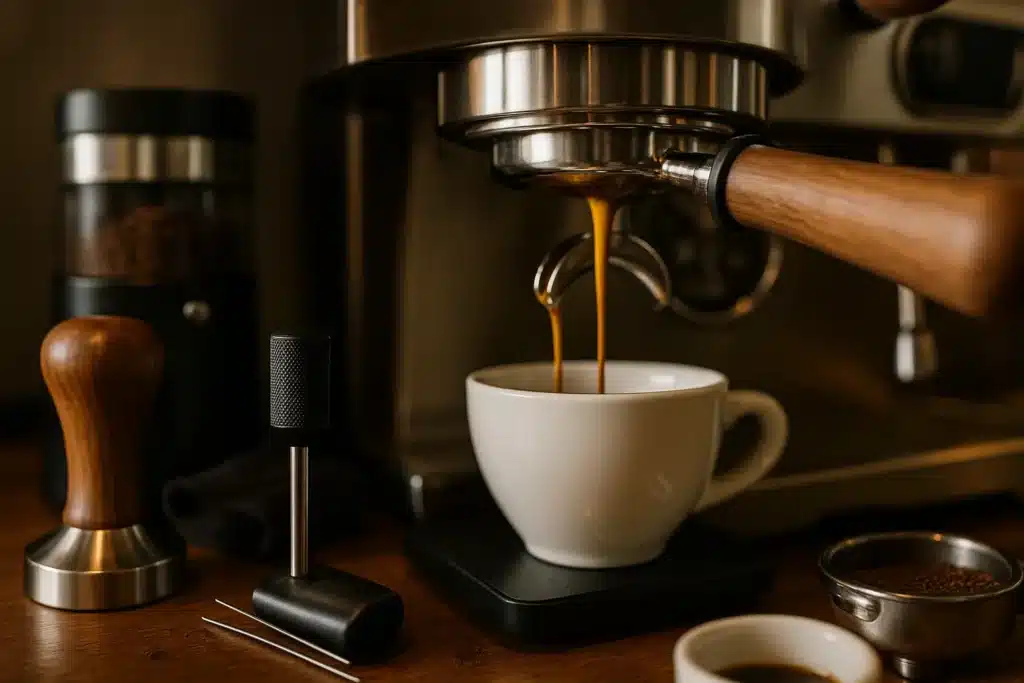
Espresso: Managing Channeling and Consistency
Espresso magnifies everything. That’s its magic and its headache. If one brew parameter is off, you taste it immediately. Improving over time is about calming the variables down so your changes tell you something useful.
- Puck prep matters. Distribute grounds evenly. A quick WDT (Weiss Distribution Technique) with a thin needle, then a consistent tamp. Aim for a level surface, not Hulk strength.
- Grind in tiny steps. If shots gush under 20 seconds, go finer. If they choke, go coarser. Once you hit a reasonable time window, taste tells you what’s next.
- Use yield as your anchor. Pulling to a fixed output (say, 36 g) makes tasting comparisons credible. If you change both yield and time and grind, you’ll play thermostat roulette and learn slower.
- Chase texture, then flavor. First, get shots to feel syrupy and cohesive. Then dial the taste toward sweet and balanced by refining grind, yield, and temperature in small nudges.
Espresso’s famous “sour first then bitter later” problem often means water is finding the easy path through cracks or uneven density (channeling). Better distribution and a level tamp usually do more than a new basket or a miracle gadget.
Water: The Hidden Giant of Extraction
Two people can brew the same beans with the same grind and get two different cups because their water is different. Minerals like calcium and magnesium help extraction and amplify perceived sweetness. Water that’s too soft can taste flat; water that’s too hard can accentuate bitterness and dull clarity.
You don’t need to chase a perfect formula, but you’ll improve faster if your water is consistent. If your tap swings wildly or tastes off, consider filtered or bottled water with mid-range hardness. Mineral packets designed for coffee are a handy way to stabilize your baseline—especially if you move or travel. Over time, a predictable water profile turns your tweaks into lessons rather than random surprises.
Roast Level, Bean Age, and Storage
- Light roasts often need finer grinds, hotter water, and slightly longer times to bring out sweetness and bloom the aromatics. If a light roast tastes lemony and thin, don’t be afraid to push extraction harder.
- Medium roasts are flexible. They’re a great classroom for dialing in because they’ll show you both under- and over-extraction without jumping to extremes.
- Dark roasts extract easily. If bitterness creeps in, back off on grind fineness or temperature. Shortening contact time usually helps.
Freshness matters, but so does rest. Many coffees hit a sweet spot between day 4 and day 14 post-roast for filter, sometimes a bit longer for espresso. Trust your nose: if the ground coffee smells vibrant, you’re in a good window. Store beans in an airtight container away from heat and light. Don’t freeze your daily jar; freeze only larger portions in airtight bags if you must, and thaw sealed to avoid condensation.
The Quiet Power of a Scale (and Why You’ll Never Go Back)
The first time I brewed with a scale, it felt fussy. Then I realized the scale wasn’t a chore; it was a translator. Suddenly, “that was a great cup” had numbers attached, so I could repeat it. You don’t need to weigh every drop forever, but during your learning curve—and whenever you switch beans—a scale gives you a common language between your hands and your taste buds. It shortens the guesswork, which shortens the time to delicious.
Extraction Over Months: Building a Personal Feedback Loop
Improvement doesn’t look like a straight line. It looks like getting stuck, solving one thing, noticing another, then circling back with more context. The secret is to lower the cost of curiosity.
- Keep a tiny log. Not a novel, just enough notes to resume where you left off. After a month, patterns appear: “I always like this roast at 1:16.5,” or “This grinder prefers a gentler pour at bloom.”
- Taste side by side. Brew two small cups: one with your current best recipe and one with a single change (grind a notch finer, or ratio 1:16 → 1:15.5). Sip back and forth. Your brain is good at differences; give it a pair to compare.
- Revisit old beans with a new skill. A coffee you once found boring might reveal sweetness once your grind and flow are more even. You’ll surprise yourself.
Pour-Over Flow Control: How Your Pouring Style Shapes
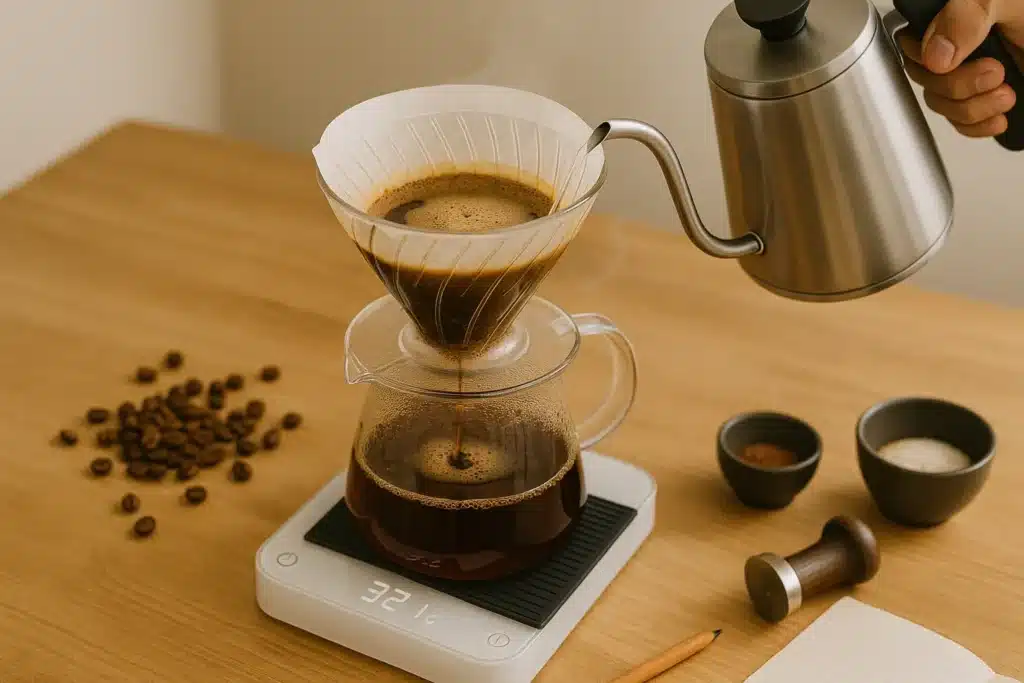
- Bloom with intention. Saturate all grounds, wait 30–45 seconds. If the bed doesn’t rise or smells flat, your beans might be old, or your grind could be too fine to let CO₂ escape.
- Pulse pours vs. continuous. Pulse pouring (adding water in small additions) gives you rhythm and keeps the bed from drying out. A steady, continuous pour can be beautifully even once you know your kettle and dripper. Try both—keep the one that makes you calmer.
- Keep the bed level. A lopsided mound encourages channeling. Gentle circular pours help; aggressive bulldozing with the stream does not.
These details sound fussy until you experience a cup that suddenly tastes “clearer.” That clarity is flow evenness, and once you taste it, you’ll chase it by instinct.
Immersion Methods: Timing, Turbulence, and the Final Filter
For French press and cupping, extraction is about time and how uniformly your grounds are suspended. Stir at the beginning to wet everything; let it sit; then either break the crust and skim or plunge gently. If your press tastes silty and harsh, try a coarser grind and a gentler plunge. If it tastes thin, extend the steep by 30 seconds or grind a click finer. With AeroPress, immersion-extraction meets pressure-assisted filtration. Small changes in grind and total contact time have an outsized impact—log them and taste side by side.
Espresso Over Time: The Three-Week Learning Curve That Never Ends
If you’re new to espresso, give yourself two to three weeks with one coffee. Lock a basic recipe and focus on puck prep. Practice distributing, tapping to settle, tamping level, wiping the rim, locking in, and starting the shot without delay. Keep your yield constant for a few days. Taste and adjust the grind only. You’ll build a feel for the machine’s personality. Later, play with yield to nudge sweetness up or bring acidity into focus. Temperature tweaks come after. The long game is consistency: same prep, same dose, same yield—then change one variable at a time.
Maintenance: The Unsexy Multiplier
Old coffee oils go rancid and make everything taste “muddy.” Descale when needed, backflush espresso machines as recommended, and replace water regularly. Clean your grinder’s chute and burrs; a bit of retained coffee can bend the flavor toward stale without you realizing why. The cleaner the pathway, the clearer the cup—and the clearer your feedback loop becomes when you make changes.
Sensory Training: Teaching Your Palate to Talk to You
You already know more than you think. When a cup tastes thin, your mouth tells you “not enough”; when it bites, it’s telling you “too much” or “uneven.” To accelerate learning, give your palate labels. Sip a light roast that’s deliberately underextracted and say the word “sour” out loud. Brew one that’s obviously overextracted and say “bitter/dry.” Then brew one in the middle and say “sweet/balanced.” Words become shortcuts. Soon, a quick taste becomes a clear decision: “Go a touch finer,” or “shorten the brew 15 seconds.”
The Role of Consistency Tools: Scales, Kettles, and Grinders
Consistency turns your kitchen into a reliable test bench. A basic coffee scale, a kettle with a stable spout (electric temperature control is a nice plus), and a burr grinder that doesn’t wander are the trifecta. You don’t need the most expensive versions; you need versions you trust to behave the same way tomorrow as today. That reliability makes your changes meaningful and your learning faster.
Troubleshooting Through Taste (Without Getting Nerdy)
If the cup tastes sour/green/lemony:
- Grind a bit finer, brew a little hotter, or lengthen the time.
- Consider a richer ratio (more coffee to water) if the body feels thin.
If the cup tastes bitter/dry/astringent:
- Grind a hair coarser, brew a touch cooler, or shorten time.
- Reduce agitation; be gentler with your pour or stirring.
If the cup tastes flat/muddy:
- Check for stale beans or dirty gear.
- Increase agitation slightly during bloom for better evenness.
- Verify your water isn’t overly hard or oddly soft.
I keep these in my head like traffic signals—sour means “more extraction,” bitter means “less,” muddy means “clean things up and even the flow.”
When Your Coffee Changes on You: Humidity, Altitude, and Season
Beans are hygroscopic—they absorb moisture. On humid days, you might need a slightly finer grind to keep extraction up, because moisture can slow water flow in the bed. In a very dry climate, static increases and distribution gets trickier; a quick spritz of water on beans (the “RDT” trick) before grinding can reduce static and improve evenness. Seasonal shifts in tap water can nudge flavor, oo. If you’re suddenly chasing your tail with adjustments, consider whether the environment changed before blaming your hands.
The Long View: How to Actually Get Better Month After Month
Improving extraction over time is about turning moments of “huh, that’s weird” into small experiments. You build an internal playbook of cause and effect: this taste means that change. Your coffee bar becomes less about chasing perfection and more about enjoying the tiny wins—today’s bloom rose higher; this morning’s shot had a honeyed finish; the same beans sang at a slightly richer ratio. The goal isn’t to freeze your recipe; it’s to become comfortable guiding it.
The Best 5 Amazon-Available Tools to Help You Improve Extraction
- Baratza Encore ESP Conical Burr Coffee Grinder
- Timemore Black Mirror Coffee Scale
- Fellow Stagg EKG Electric Gooseneck Kettle
- Breville Precision Brewer Thermal Coffee Maker
- AeroPress Clear Coffee Press
These picks map directly to the “consistency trifecta” and flexible brew methods. The grinder improves particle uniformity; the scale stabilizes your ratios; the kettle helps control flow and temperature; the Precision Brewer gives you repeatable auto-drip with manual-level control; and the AeroPress is a forgiving lab for learning extraction with minimal fuss.
Frequently Asked (Real) Questions, Answered Like We’re Standing at the Counter
“Why does my coffee taste good one day and bad the next?”
Because small variables drift. Your grind slips a notch, your pour is a little more aggressive, the beans are aged, and your water has changed. The fix is to control one or two things better—usually grind and ratio—and accept micro-variations as part of the craft. Keep notes for three days; you’ll spot a pattern fast.
“Do I need a refractometer and TDS geekery to improve?”
No. Those tools are great for analyzing consistency, but your tongue already knows where “balanced” lives. A scale and a reliable grinder will get you 95% of the way. If you enjoy data, go for it—but don’t let tools stand between you and taste.
“My espresso is sour even at long shot times. What gives?”
Likely uneven extraction from channeling. Work on distribution and tamping. Use a needle tool to break up clumps, settle the bed, and tamp level with consistent pressure. Check your water temperature; a small bump can help light roasts.
“Is my water really that important?”
Yes. Poor water can make every other fix feel less effective. If you’ve hit a consistent process but flavors won’t pop, try a different water source for a week. You’ll often taste immediate improvement in sweetness and clarity.
“How long should I let beans rest?”
It depends on roast and brew method, but a friendly rule is 3–14 days for filter, 7–21 for espresso. Trust your nose. If the grounds smell vibrant and the bloom is lively, you’re in a good window.
A Simple Four-Week Plan to Level Up Your Extraction
Week 1: Baseline and Notes
Pick one brew method and stick with it. Use one ratio (1:16), one temperature (94°C), and one pouring pattern. Brew daily and write a single sentence of notes. Adjust only the grind.
Week 2: Ratio Play
Keep the grind near your Week 1 sweet spot and try 1:15.5 and 1:16.5 on alternate days. Note which tastes sweeter or more complete. Your taste calibration will jump here.
Week 3: Temperature and Turbulence
Try 93°C and 96°C with your favorite Week 2 ratio. Practice gentler and slightly more assertive agitation to learn how the bed responds. You’ll hear your coffee “speak” more clearly.
Week 4: Method Crossover
If you started with pour-over, brew French press, or AeroPress, using what you learned about grind and ratio. Notice how your instincts transfer. This cross-training cements cause and effect in your muscle memory.
At the end of the month, read your notes. You’ll find a handful of reliable moves that work on almost any coffee.
How I Personally Decide What to Change First
When a cup isn’t right, I run a tiny mental flowchart:
- Does it taste thin or sharp? → Finer grind or richer ratio.
- Does it taste bitter or dry? → Coarser grind or shorter contact time.
- Does it taste muddy/flat? → Clean equipment, check water, and reduce over-agitation.
- Is the brew time weird for my method? → Fix grind to land in a normal window before tweaking anything else.
This triage works because it connects taste to a single, obvious lever, and it stops me from changing three things at once.
From “Sometimes Great” to “Usually Great”: Embracing Small Routines
- Purge your grinder briefly before dialing in a new coffee so old grounds don’t skew your first cup.
- Rinse filters thoroughly to remove paper taste and preheat gear.
- Brew at the same time of day for a week; repetition builds muscle memory.
- Use consistent cups for tasting—the shape and thickness change perception more than you’d think.
The goal isn’t to become robotic. It’s to reduce noise so your experiments ring clearly.
What to Do When You’re Totally Lost
It happens. Reset to a friendly baseline. For pour-over: 1:16, 94°C, medium-fine, 3–3:30 minutes, gentle pulse pours, minimal agitation after bloom. For French press: 1:15, 94°C, 4 minutes, gentle stir at start, slow plunge. For espresso: 18 g in, 36 g out, ~30 seconds, good puck prep. Brew that, taste, and adjust only the rind. You’ll be back on track faster than you expect.
The Takeaway: Improvement Is a Habit, Not a Hack
Better extraction isn’t “secret technique” territory. It’s ordinary repetition with attention, anchored by a few consistent tools. Over time, you build a personal library of tastes and fixes: you’ll know that this Kenyan wants a longer bloom, this Guatemala sings at 1:16.5, this natural Ethiopia prefers a gentler pour to keep pithy bitterness away. You’ll trust your hands and palate more than any recipe card.
Tomorrow morning, brew the same way you did today, but change one small thing on purpose. Sip, notice, and write a single sentence. That’s how extraction improves—one quiet cup at a time, adding up to a body of knowledge you can taste.