Espresso Basics: How to Pull the Perfect Shot at Home

OneHundredCoffee is reader-supported, and some products displayed may earn us an affiliate commission. Details
There’s a moment in Home Espresso that changes everything. The machine is humming, the cup is warm, and the first drops begin to bead at the bottom—thick, syrupy, the color of burnt honey. The aroma says chocolate and toasted nuts, maybe a whisper of citrus. You watch the stream turn from tiger-striped to steady caramel and finally cut it off by instinct rather than a timer. You sip, and it’s sweet—actually sweet—balanced and dense, with that creamy texture you thought only cafés could manage. That’s the moment you realize perfect shots aren’t magic; they’re repeatable, learnable, and wonderfully personal. This guide walks you there.
I’ve spent years pulling shots at home—burnt, sour, flat, and finally great. What follows is everything I wish I’d known sooner, written for real kitchen counters, not lab benches. You’ll learn the pieces of the puzzle: beans, grind, dose, distribution, tamp, pressure, temperature, and time. You’ll also learn how to “dial in” your espresso so you’re not guessing, you’re adjusting with purpose. And because taste is king, we’ll translate numbers into flavors you can recognize. Let’s get you to that sweet, balanced shot—consistently.
Why Espresso at Home Is Worth It
Espresso amplifies everything in coffee—the good and the bad. That’s exactly why brewing at home is so rewarding. You control the variables and taste your progress in real time. You also make coffee that fits your preferences, not a café’s house style. Like a sweet, chocolate-forward shot with a velvet mouthfeel? Prefer something punchier with stone-fruit brightness? You can aim for either. Espresso is not a machine trick; it’s a conversation between coffee and water. The more fluent you get, the better the conversation tastes.
There’s also practicality. A bag of excellent beans is usually cheaper per shot than a café drink, and once your technique is dialed, you get quality and speed without leaving the house. But here’s the catch: Espresso rewards attention to detail. “Close enough” usually isn’t. The good news: the details are learnable, and they build on each other.
The Espresso Formula You’ll Keep Coming Back To
The simplest reliable place to start is a 1:2 ratio: for every gram of dry coffee in your portafilter, you aim to produce about two grams of liquid espresso in your cup. If you’re dosing 18 g in your basket (a very common starting point), you’ll target 36 g out. Time-wise, look for 25–30 seconds from the moment the pump engages to when you hit your target weight. That’s not a law, but it’s a sensible baseline that produces drinkable, balanced shots with the majority of medium to medium-dark roasted espresso blends.
From there, you adjust. If your shot tastes sour and thin, you probably need a finer grind or a longer time. If it tastes bitter and dry, you probably need a coarser grind or a shorter time. If it tastes hollow—somewhere between sour and bitter with not much sweetness—you might need fresh beans, a better distribution, or hotter water. Each change has a flavor consequence. Once you connect those dots, dialing in gets much faster.
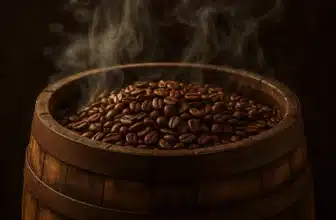
Fresh Beans: Your First Lever for Better Espresso
If your coffee isn’t fresh, you’re working uphill. “Fresh” doesn’t mean roasted yesterday; that can actually be too gassy and hard to tame. For most espresso blends, a sweet spot is 7–21 days post-roast (earlier for lighter roasts, later for darker). If you’re buying supermarket coffee, aim for sealed bags with roast dates, not just “best by.” Store them airtight, in a cool, dark place, and only freeze if you’re portioning and sealing well (think single-shot pouches). Grinding immediately before brewing matters more than any storage hack—pre-ground espresso goes stale frighteningly fast.
Flavor-wise, medium roasts are friendliest to beginners: they extract more easily, give you chocolate/caramel notes, and tolerate minor technique slips. Light roasts can be extraordinary, but they demand precision, hotter water, and often longer ratios to unlock sweetness.
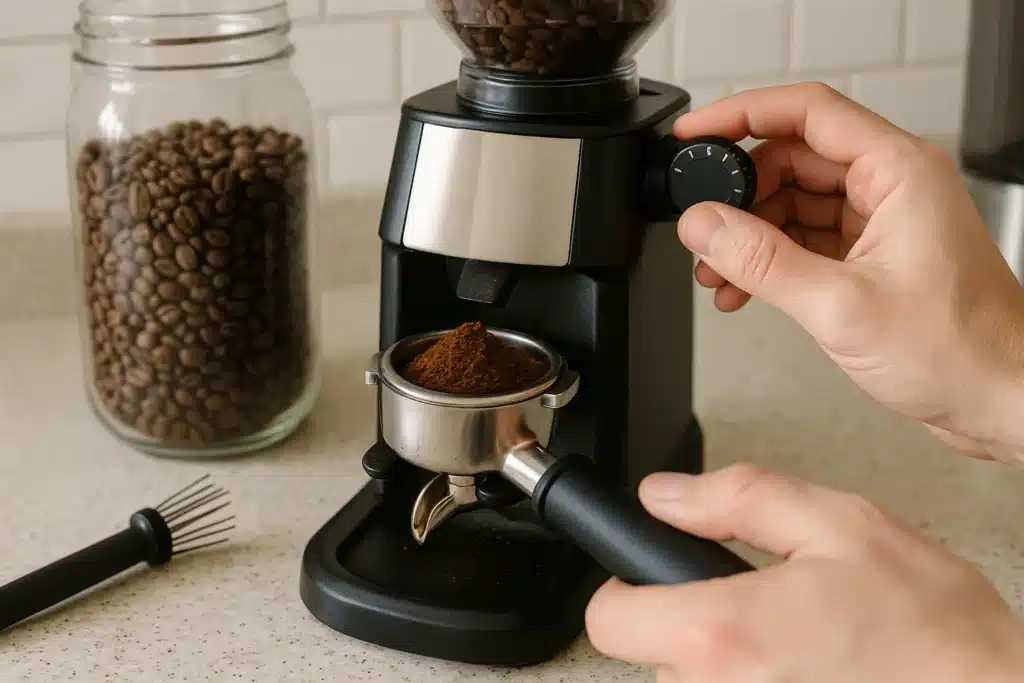
Your Grinder Matters More Than You Want It To
I resisted this truth early on, trying to squeeze café results from a budget grinder. It was humbling. For espresso, the grind size must be both fine and microscopically adjustable. A click or two can be the difference between sour lemonade and molten chocolate. Burr quality and stability matter because you want consistent particle distribution—too many boulders and fines in the mix cause channeling and uneven extraction.
A good espresso grinder will let you grind finer or coarser in tiny steps. If you share the grinder for filter coffee, look for a model with “micro” adjustments near the espresso range (or consider a dedicated grinder just for espresso). The payoff is immediate: better crema, richer body, and—most importantly—shots that actually respond to your tweaks instead of swinging wildly.
Dose, Distribution, and Tamp: The Puck-Prep Trifecta
Brew water is impatient; it will find the quickest exit. Your job is to present a uniform coffee puck so water can extract evenly, not tunnel through weak spots.
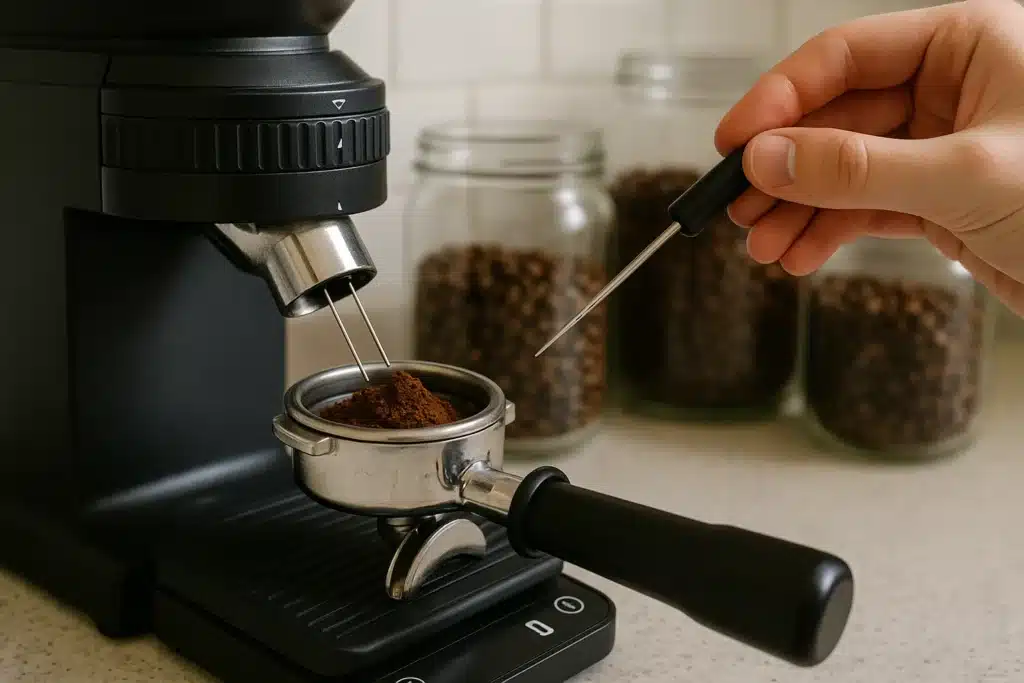
Dose: Start at 18 g in an 18–20 g basket. Use a scale that reads to 0.1 g. Changing your dose changes puck depth, which changes flow. When you’re dialing in, keep the dose constant and adjust the grind and yield first.
Distribution: Fluffy clumps lead to weak spots. After grinding, break clumps and level the surface. A quick “WDT” (Weiss Distribution Technique) using thin needles is shockingly effective: stir gently through the grounds to break clumps, then settle by tapping and smoothing. Avoid aggressive tapping that compacts edges and risks channeling.
Tamp: Level is non-negotiable. Press straight down with consistent pressure (you don’t need to crush it—~15–30 lb is plenty) and make sure the surface is flat. A crooked tamp = uneven flow. Calibrated tampers and palm levelers can help, but your eyes and a steady hand are enough. Do not polish wildly or knock the portafilter after tamping; you’ll break the seal at the puck edge.
Get this trio right and you’ll see it in the first seconds of the shot: an even bead across the basket that merges into a single, centered stream.
Temperature, Pressure, and Pre-Infusion—What Actually Matters
Espresso likes hot but not boiling. A typical sweet spot is 90–94°C (194–201°F). If your machine allows temperature control, start at 93°C (199°F) for medium roasts. Go a degree hotter for light roasts, cooler for dark roasts that scorch easily. If your machine isn’t adjustable, give it a full warm-up (at least 15–20 minutes) and preheat your portafilter and cup. Temperature stability is flavor stability.
Pressure is often marketed as 15 bars, but most classic recipes are built around ~9 bars at the puck. Many modern machines soften the initial hit with pre-infusion—a gentle wetting of the puck at lower pressure before full pressure ramps. Pre-infusion helps saturate coffee evenly, reducing channeling and often boosting sweetness. If your machine has it, use it (a few seconds is enough). If not, a manual “bloom” can be simulated on some machines by briefly starting and stopping the pump, but don’t overcomplicate this early on—focus on puck prep first.
The Pull: Watching, Timing, and Tasting
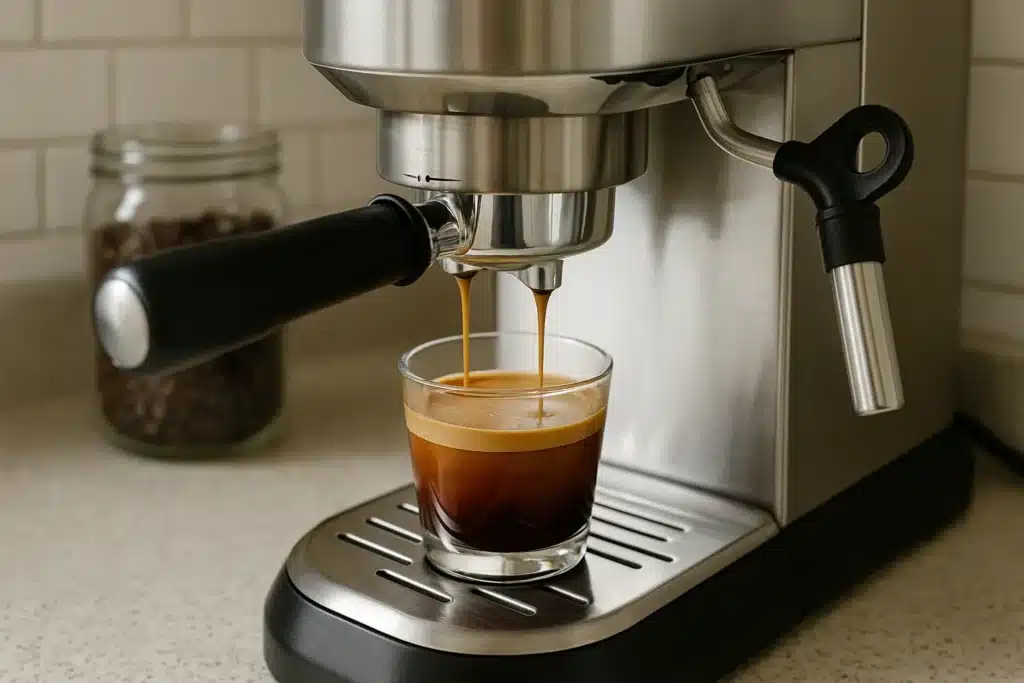
When you lock in your portafilter and start the pump, the first drops should appear around 5–8 seconds in a well-prepped puck. If they gush immediately, you’re too coarse. If nothing happens for ages, then it spurts, you’re too fine or channeling. Watch the stream turn from dark to lighter caramel as the shot progresses—that transition tells you about extraction and when to stop.
Use a scale under the cup and stop the shot at your target yield (e.g., 36 g for an 18 g dose). Log the total time from pump on to cut-off. Then taste. If it’s sour like under-ripe fruit, you probably under-extracted: finer grind or longer shot. If it’s bitter/astringent and dries your tongue, you likely over-extracted: coarser grind or shorter shot. If it’s flat, consider a slightly higher temperature, fresher beans, or fix your distribution.
A helpful starting routine:
- 18 g in, 36 g out, 28 seconds, 93°C, pre-infusion if available.
- Taste. Adjust only one variable for the next shot.
- Keep notes. Patterns emerge faster than you think.
Crema: Pretty, But Not the Whole Story
Crema looks like success, but it’s not a flavor guarantee. Fresh blends (especially with robusta or darker roasts) produce lots of crema; lighter roasts may produce less but can taste brighter and more complex. Use crema as a visual clue, not a target. A mottled, tiger-striped crema that persists for a minute or two generally suggests good extraction, but your tongue is the final judge.
Ratio Games: Ristretto, Normale, and Lungo
That 1:2 ratio is your baseline, not a prison. A ristretto (~1:1–1:1.5) concentrates body and sweetness but risks sourness if your grind isn’t spot-on. A lungo (~1:2.5–1:3) leans toward bitterness but can tease out florals in some lighter roasts when executed well. Move slowly: tweak your yield by ±3–4 g at a time and note what happens to sweetness, acidity, and texture.
Milk Texturing at Home: The Secret Is Microfoam

If you’re chasing that glossy, paint-like microfoam, think stretch, then texture. Start with cold milk in a cold pitcher (whole milk is forgiving). Place the steam tip just below the surface near the pitcher’s side. As you open the steam, you should hear a gentle paper-tearing whisper. That’s air being stretched into the milk. Don’t let it screech; that means you’re injecting big, soapy bubbles.
After a few seconds of stretch (for a cappuccino) or almost none (for a latte), sink the tip slightly deeper to spin the milk. The whirlpool integrates bubbles into silky microfoam. Stop when the pitcher is too hot to hold comfortably for more than a second or two—around 60–65°C (140–149°F). Tap and swirl to polish. The milk should look like wet paint, not bubble bath. Begin pouring immediately; microfoam degrades as it sits.
Troubleshooting by Taste (Not Just Timers)
You’ll read a lot of numbers online; they’re useful but not universal. Taste tells the truth.
- Sour, lemony, thin: Under-extracted. Go finer or increase the yield time. Consider hotter water by 1°C.
- Bitter, hollow, ashy: Over-extracted. Go coarser or reduce yield/time. Consider cooler water by 1°C.
- Harsh bite at the finish with no sweetness: Likely channeling. Improve distribution and tamp. Try WDT; ensure your basket isn’t overloaded.
- Gusher (fast flow, pale crema): Too coarse or low dose. Grind finer or add a 0.5–1 g dose if your basket supports it.
- Choking (barely any flow): Too fine or high dose. Coarsen slightly or reduce dose by 0.5–1 g.
If you’re stuck between sour and bitter, change beans. Some roasts simply won’t sing at your machine’s temperature/pressure profile or your taste goals. That’s normal.
Water: The Invisible Ingredient That Changes Everything
Water makes up nearly all of your espresso, and its chemistry matters. If it’s too hard, you’ll fight scale and may mute acidity. If it’s too soft or distilled, shots can taste hollow or sharp. A general target for pleasant, machine-safe coffee water is 50–150 ppm total dissolved solids, with a bit of alkalinity to buffer acidity. If your tap water tastes great and doesn’t destroy kettles with scale in a month, you might be fine. If you see crusty scale or taste chalkiness, consider using a carafe filter, bottled spring water with moderate minerals, or a coffee-specific water recipe designed for espresso machines. Your taste buds and machine internals will thank you.
Basket Size, Headspace, and the “18 Gram Myth”
Manufacturers print numbers on baskets—14 g, 18 g, 20 g—as guidelines, not rules. What matters is headspace: the gap between the top of your puck and the shower screen. Too little headspace, and the puck can stick or erode; too much, and flow can get weird and turbulent. A simple test: after tamping, place a coin on the puck and insert the portafilter (machine off). Remove and check for a faint imprint. Deep gouges mean you’re overdosing. If there’s no mark at all and your shots gush, you might be underfilling. Adjust the dose to your basket and machine, not the printed number.
Bottomless Portafilters: Honesty Tools
A bottomless (naked) portafilter lets you see the truth. If your prep is solid, the shot beads evenly across the basket and converges center. If you see jets, sprays, or squirting, you’re watching channeling—uneven density in your puck guiding water into shortcuts. Bottomless won’t fix issues, but it will teach you quickly what helps: better WDT, gentler tapping, level tamp, correct dose, and sometimes simply fresher coffee.
Light Roast Espresso: When You’re Ready
If you love bright, floral, complex coffee and want that in espresso, try light roasts once you’re comfortable. Expect to grind finer, increase temperature slightly (94–95°C), and often pull longer ratios (1:2.2–1:2.8) to coax sweetness. Patience pays off. The first shots may taste sharp; nudge a variable at a time and let your tongue be the judge. When it clicks, you’ll taste fruit, florals, and delicate sweetness you didn’t know espresso could show.
Consistency: The Habit That Makes Perfect Shots Normal
Perfect is a strong word, but “consistently great” is realistic. Build a five-minute ritual:
- Purge the group head. Heat is stability.
- Weigh your dose and yield (0.1 g scale).
- Prep carefully (WDT, level tamp).
- Time your shot and log results.
- Adjust one thing if needed, then brew again.
You’ll be amazed at how quickly patterns form. You’ll also spend less time “chasing” a good shot and more time drinking them.
Espresso Drinks at Home: Building a Small Menu
Once your base shot is sweet, everything else gets easier.
- Espresso: Your baseline. Sip it fresh; it evolves quickly in the cup.
- Americano/Long Black: Add hot water to espresso (or vice versa). Sweet, softer edges, and still punchy.
- Cortado: Equal parts espresso and steamed milk—silky, balanced, great for taste testing milk texture.
- Cappuccino: Smaller, foam-rich drink. Focus on stretching microfoam; texture is the star.
- Latte: Larger, milk-forward, a canvas for latte art once your foam is glossy and elastic.
Purists will debate ratios forever. Make what you enjoy and keep notes on how the espresso profile changes in milk. Chocolatey blends shine in milk; super-light roasts can vanish.
Maintenance: The Unsexy Secret to Good Taste
Dirty machines make dirty-tasting coffee. Get in the habit:
- Purge and wipe the steam wand immediately after use.
- Flush the group head before and after shots.
- Backflush with water daily if your machine allows; use detergent per manufacturer guidance weekly.
- Descale when needed based on your water and machine instructions.
- Brush the grinder chute and burrs regularly. Old grounds ruin flavors faster than you think.
Clean gear pulls sweeter shots. It’s that simple.
When to Upgrade (and What Actually Helps)
Before you chase a new machine, make sure you’ve squeezed the most from what you have. If you’re hitting walls—your grinder won’t go fine enough, your machine is wildly unstable in temperature, your basket/fittings are inconsistent—then upgrades matter.
- Grinder upgrades usually improve your espresso more dramatically than machine upgrades. Finer, steadier, and more adjustable grinding equals better extraction and easier dialing in.
- Machine upgrades that help most: temperature stability, pressure control or soft pre-infusion, and a solid group head that maintains heat. Features like volumetric dosing are convenient; features like stable brew water are transformative.
Top Picks on Amazon for Getting Started
Here are five widely available, beginner-to-intermediate-friendly products that pair beautifully with this guide. I’ve used or coached with each enough to know where they shine:
Breville Barista Express (or Barista Express Impress)
A proven all-in-one with a capable built-in grinder, decent temperature stability for its class, and a forgiving workflow. Great first machine because it shortens the learning curve while still letting you develop real skill. The “Impress” version improves puck prep with assisted dosing and tamping.

Who is this for?
The Bonavita 5-Cup Coffee Maker is perfect for compact kitchens, small households, or solo coffee lovers. It delivers specialty-quality brews with one-touch operation, precise temperature control, and pre-infusion for blooming. Ideal for those who want a simple, efficient machine that makes exceptional coffee without sacrificing space or flavor.Gaggia Classic Pro
A compact single-boiler machine with a devoted community and upgrade path. Steams well for its size, and with a good external grinder, it punches above its weight. Reliable, repairable, and a workhorse for classic-style espresso.

Who is this for?
The Gaggia Classic Pro is built for espresso lovers who want café-quality shots at home. It’s perfect for beginners and pros alike, offering commercial-style features, a rugged build, and fast heat-up time. If you’re serious about consistent crema and smooth milk frothing, this machine delivers real espresso performance affordably.Rancilio Silvia
A sturdier single-boiler legend with commercial-style components. Demands a little more technique (temperature surfing helps), but rewards you with stable extractions and strong steaming. Pair with a quality grind, and it becomes a long-term companion.
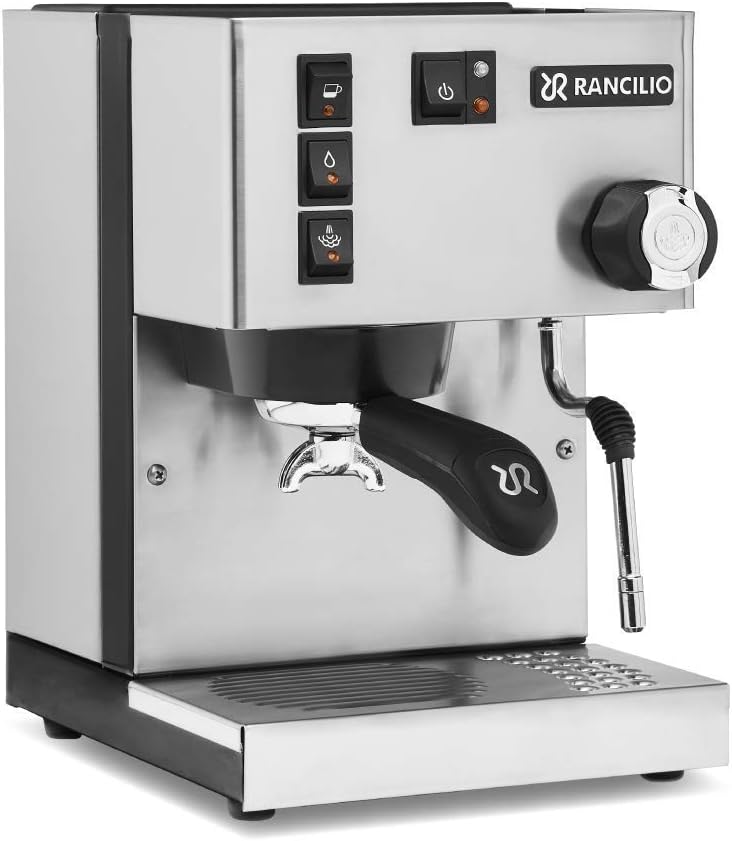
Who is this for?
The Rancilio Silvia is perfect for home baristas who demand commercial-grade performance. With a professional steam wand, robust stainless steel build, and consistent shot quality, it’s ideal for espresso lovers who want hands-on control and reliability in their home setup without jumping to high-end prosumer machines.Lavazza Super Crema (Whole Bean Espresso Blend)
An approachable, consistent blend that plays beautifully at 1:2 ratios and in milk drinks. It’s not fussy, it produces generous crema, and it’s easy to dial—ideal for practice without sacrificing flavor.

Who is this for?
Lavazza Super Crema is ideal for espresso lovers seeking a smooth, aromatic, and full-bodied experience. Its balanced flavor with notes of honey, almonds, and dried fruit makes it perfect for both home brewers and professional baristas. A great choice for those who appreciate creamy espresso with consistent crema.A Practical Dial-In Walkthrough (Real-World Example)
Let me show you how a typical first session looks when I open a fresh bag.
Beans: Medium roast espresso blend, 10 days post-roast.
Machine: Mid-tier home espresso machine with temperature control and pre-infusion.
Grinder: Espresso-capable burr grinder with micro-steps.
Target: 18 g in, 36 g out, ~28 seconds at 93°C.
Shot 1:
Grind set to a conservative fine. WDT, tamp level. Pre-infusion 5 seconds, pump on. First drips at 6 seconds—good. Yield hits 36 g at 22 seconds—fast. Taste: bright, a bit sour, thin finish.
Adjustment: Finer grind by ~1 micro-step. Keep dose/yield the same.
Shot 2:
Now 28 seconds to 36 g. Crema looks better, stream centered. Taste: sweeter, caramel on the front, still a little citrus snap at the end, but pleasant.
Adjustment: Try raising the temperature to 94°C to round the acidity slightly.
Shot 3:
Same grind, same yield, 29 seconds. Taste: chocolate, nougat, balanced sweetness with a lingering caramel finish. That’s the keeper.
Milk drink: With this shot profile, a small cappuccino is chocolate-malt heaven.
Notes: I log grind step, ratio, time, temperature, and a few flavor words. Tomorrow I’ll pick up right here.
Espresso Myths That Make Life Harder
- “More crema equals better espresso.” Not always. Crema can indicate freshness and extraction, but doesn’t guarantee sweetness or balance.
- “Tap as hard as possible.” No. Tamp evenly and consistently. Level matters more than brute force.
- “My machine must do 15 bars.” Not necessary. Classic espresso is built around ~9 bars at the puck; pre-infusion and puck prep matter more than headline pressure.
- “Light roasts are impossible at home.” Harder, yes. Impossible, no. You’ll need hotter water, finer grind, and patience.
- “Ratios are rules.” They’re starting points. Your tongue decides the destination.
Common Problems and Quick, Taste-First Fixes
Problem: Sour shots no matter what.
Check grind (likely too coarse), temperature (go 1–2°C hotter), and freshness (beans older than 6–8 weeks post-roast? Try a newer bag). Ensure your puck isn’t collapsing—WDT helps.
Problem: Bitter, dry shots even at 1:2.
Grind a touch coarser, stop the shot a few grams earlier (e.g., 32–34 g out), or drop the temperature by 1°C. Darker roasts especially prefer cooler water and shorter yields.
Problem: Inconsistent shots day to day.
Warm up longer. Purge the group head. Keep the dose and distribution the same. Humidity and bean age can shift grind—expect to adjust slightly each day.
Problem: Good taste, ugly flow under a bottomless.
If the cup tastes good, don’t chase the most Instagram-perfect cone immediately. Use the visuals to refine distribution, but let flavor be the judge.
Espresso at Home, Fully Realistic
You will have off days. Everyone does—even café pros. Espresso has mood swings: weather shifts, bean age, and you were in a hurry. But there’s a quiet joy in the rhythm of it. You learn your machine’s quirks, your grinder’s sweet spots, and your own palate’s preference for chocolate vs. citrus. You’ll develop small rituals—purging the group head, polishing the milk, the pause before cutting the shot—that make mornings calmer.
And then there are the wins: the first time a guest says, “This tastes like the café,” the first dial-in of a tricky light roast, the latte art heart that finally looks like a heart. Those moments stick.
A Simple, Repeatable Routine (That Still Feels Human)
- Choose a baseline: 18 g in, 36 g out, 28 seconds, 93°C, gentle pre-infusion.
- Prep carefully: WDT to break clumps; tamp level with calm hands.
- Pull and taste: Use your scale and timer, then your tongue.
- Adjust one thing: Finer/coarser or hotter/cooler based on flavor.
- Log it: A few words and numbers you can return to tomorrow.
This isn’t about chasing perfection for its own sake. It’s about building a small, satisfying craft into your day—one that rewards attention, forgives small mistakes, and serves joy in a demitasse.
Final Sips: Your Perfect Shot Is Personal
When you make espresso at home, you become the roaster’s collaborator, the barista, and the drinker in one. You’re not just copying a café shot; you’re shaping your own. Maybe your perfect shot is syrupy and chocolate-heavy, pulled a touch short at 1:1.8 with a velvety cappuccino as the encore. Maybe it’s a longer 1:2.5 from a light Ethiopian, shining with bergamot and honey. The point is, you decide—and now you know how to get there.
Tomorrow morning, warm up the machine a little earlier. Weigh your dose, prep the puck with care, watch the first beads, and cut the stream right where your instincts say “now.” Take a sip while it’s still singing. If it’s not perfect, it’s information. If it is perfect, you’ll know—because you made it that way.