Can I Use Any Coffee Beans for Making Espresso?

OneHundredCoffee is reader-supported, and some products displayed may earn us an affiliate commission. Details
Understanding The Importance Of Coffee Beans In Espresso Making
When it comes to making espresso, the choice of coffee beans plays a vital role in determining the quality and flavor of your brew. Unlike regular coffee, espresso requires a specific type of bean that is carefully roasted and ground to perfection. The ideal coffee beans for espresso are typically medium- to dark-roasted, as this brings out the rich flavors and oils needed for a balanced shot.

Who is this for?
Lavazza Espresso Italiano Premium is perfect for espresso fans who want authentic Italian flavor at home. This 100% Arabica medium roast delivers a smooth, well-balanced taste and velvety crema. Ideal for espresso machines, Moka pots, or drip brewers—great for coffee lovers craving café-quality shots with every pour.Additionally, espresso beans should have a fine grind size to ensure proper extraction during the brewing process. Choosing high-quality beans with distinct flavor profiles can enhance your espresso experience, allowing you to savor notes of chocolate, caramel, or fruitiness. Thus, understanding the importance of selecting suitable coffee beans is crucial for achieving that perfect cup of espresso.
When choosing coffee beans for making espresso, it’s important to look for beans that are specially roasted to bring out the rich flavors and create the desired balance in a shot. Here are a few key points to consider:
1. Roast Level
- Dark Roast: Most espresso blends are dark roasted because they develop a deeper, more robust flavor profile that stands up well in espresso brewing. This roast level typically features a bolder, fuller taste with a slightly bittersweet aftertaste.
- Medium Roast: Some espresso drinkers prefer a medium roast for a more balanced flavor, highlighting the nuances of the beans without too much bitterness.
- Light Roast: Though less common for espresso, light roasts are gaining popularity among coffee aficionados for their complex and bright flavor notes.
2. Blends vs. Single-Origin
- Blends: Most espresso is made with blends of beans from different regions. These blends are designed to balance acidity, sweetness, body, and bitterness to create a harmonious shot.
- Single-Origin: Some espresso drinkers enjoy single-origin beans, which can bring out distinct flavors from a specific region or farm. However, these may require more attention to brewing techniques to highlight their unique flavors.
3. Bean Freshness
- Freshly roasted beans are crucial for the best espresso. Beans should be used within a few weeks of roasting to ensure maximum flavor, but they also need a few days to “rest” after roasting for the best extraction.
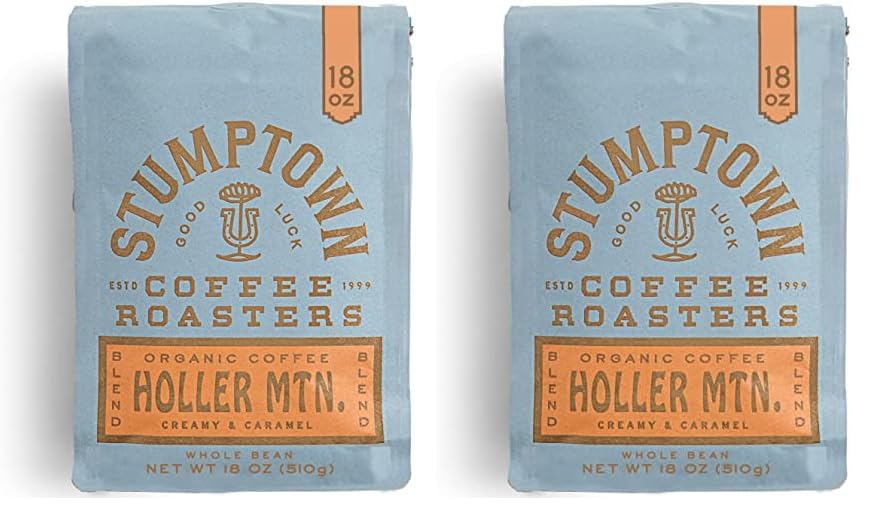
Who is this for?
Stumptown Organic Medium Roast is for coffee lovers who appreciate bold flavor and ethical sourcing. Certified organic and expertly roasted, it offers balanced notes with a smooth finish. Perfect for drip, pour-over, or press, this is a top pick for those who want quality, sustainability, and great taste in every cup.- Grind your beans just before brewing to preserve freshness.
4. Coffee Origin
- Beans from Latin America (such as Colombia or Brazil) tend to have a good balance of sweetness, nuttiness, and low acidity.
- African beans, like those from Ethiopia or Kenya, often have brighter, more fruity, and floral notes.
- Indonesian beans (like Sumatra) are known for their earthy, full-bodied characteristics, which work well in espresso blends.
5. Recommended Espresso Beans
- Lavazza Super Crema: A popular Italian blend, known for its smooth, creamy texture and mild flavor.
- Intelligentsia Black Cat Classic Espresso: A high-quality espresso blend with bright, chocolatey flavors.
- Stumptown Hair Bender: A well-balanced espresso blend with a hint of fruitiness and a sweet finish.
- Blue Bottle Bella Donovan: Known for its balanced acidity and sweet, fruity undertones.
6. Grind Size
- Espresso requires a very fine grind. It’s crucial to have a burr grinder that can achieve this consistent, fine grind for the best extraction.
If you’re just starting, experimenting with different roasts, blends, and regions can be a fun way to find your favorite espresso beans!
Tips And Recommendations for Brewing Delicious Espresso
If you’ve ever looked down at a tiny, syrupy cup and thought, “How on earth did this little shot taste like a hug and a thunderbolt at the same time?”, you already know what great espresso can do. Brewing espresso at home is part craft, part science, and part ritual. Over the years, I’ve had shots that sang with chocolate and caramel, others that hit me with sparkling berry notes, and—let’s be honest—more than a few that tasted like someone roasted a tire. The difference between luscious and lackluster often comes down to a handful of repeatable habits. This guide distills those habits into practical, friendly steps you can put to work right away—whether you’re using a classic semi-automatic machine, a sleek super-auto, or a manual lever that makes you feel like a 1950s barista.
My goal is simple: help you brew consistently delicious espresso without turning your kitchen into a lab. We’ll talk beans, grind size, puck prep, water, temperature, brew ratios, milk, and maintenance—plus easy fixes when your shots go sideways. Along the way, I’ll share what’s actually worked at home, not just textbook theory. We’ll also include a quick comparison table and a curated “Best 3–5 Selections” section so you can pick beans that support your learning curve and bring joy to your cup.
What Makes Espresso “Delicious,” Really?
Delicious espresso is a harmony of sweetness, acidity, and bitterness, with a texture that feels like velvet: dense, syrupy, and lingering. That “wow” comes from balanced extraction—the process of dissolving tasty compounds from coffee grounds into water under pressure. Too little extraction (coarse grind, short shot, low water temperature) and you’ll get sour, thin espresso that skews lemon peel and raw nuts. Too much (too fine, too long, too hot) and bitterness takes over: char, ash, dryness. When it’s right, the shot settles into a confident center—sweet like caramelized sugar, balanced by a gentle sparkle, framed by a tidy, pleasant finish.
What makes balance possible? Fresh, appropriate beans. A grinder that can produce consistent fine particles. Clean, hot water at the right temperature. Even puck preparation and a steady, repeatable brew ratio. The rest—tamping pressure debates, WDT needle diameters, and pressure profiles—matter, but only after you’ve nailed the fundamentals.
Choose Beans that Want to Be Espresso
Not all coffees want to become espresso. Espresso emphasizes everything: sweetness, flaws, acidity, and roast character. As a rule of thumb:
- Blend vs single origin: Blends tend to be forgiving, with chocolate and nut notes that “behave” across various settings. Single origins can be spectacular—think strawberry jam, jasmine, or tropical fruit—but usually require tighter dialing-in.
- Roast level: Medium to medium-dark roasts are generally easier to extract into classic, chocolate-forward espresso. Lighter roasts can be stunning but demand precision: finer grind, longer time, higher temperature.
- Freshness: Beans peak a few days after roasting and can stay great for weeks if sealed and stored away from heat, air, and light. Don’t freeze and thaw repeatedly; portion if you freeze.
If you’re just getting started or want fewer variables to juggle, pick a reputable espresso blend that many people love for its chocolate-caramel notes. Once you consistently hit balanced shots, treat yourself to a lighter single-origin and stretch your skills.
Water Quality: The Invisible Ingredient That Changes Everything
Your espresso is mostly water, which makes water chemistry surprisingly decisive. Tap water can be great—or a saboteur. Too hard and you’ll battle scale and muddy flavors; too soft and shots can taste hollow. If your tap water tastes good on its own and isn’t extremely hard, it may be fine. Otherwise, consider filtered or espresso-targeted mineral recipes.
A simple at-home approach: use reputable filtered water or bottled water in a moderate mineral range. You’re aiming for a balance that protects your machine while keeping flavor lively and textured. Clean water also helps crema form and persist, which is more than just looks—good crema often signals healthy extraction.
The Grinder Is the Heart of Consistency
I used to think the espresso machine was the star. Then I upgraded the grinder, and my shots finally clicked. Espresso is incredibly sensitive to particle size; a capable burr grinder designed for espresso anchors everything. You want:
- Micro-adjustment for small, predictable changes.
- Minimal clumping so water flows evenly through the puck.
- Low retentio, so yesterday’s grounds don’t haunt today’s shot.
If your grinder produces inconsistent particles or clumps, you’ll chase your tail. Even a modest machine can pull beautiful shots if the grind is right.
Dialing-In: A Simple, Repeatable Workflow
This is the routine I use most mornings. It’s calm, consistent, and it works.
- Dose
Pick a dose for your basket. Many “18g” baskets thrive at 18–20 g. Start at 18 g to keep things simple. - Grind
Grind fine enough that your target yield (say, 36 g out) takes ~25–32 seconds from the first drip. Adjust finer if the shot runs too fast and tastes sour, coarser if it chokes or tastes bitter. - Distribute and Settle
Break up clumps with a quick WDT (a few gentle needle swirls), then settle the bed by tapping the portafilter lightly. Avoid aggressive banging—just enough to level. - Tamp
Firm, level, consistent. About 15–30 lbs of pressure is fine; the consistency matters more than the number. - Pull and Observe
Start the shot. Watch for even beading across the basket. If you see spurting, channeling, or rapid blonding, that’s useful feedback. - Taste and Adjust
- Sour and thin: go finer, or increase shot time; consider slightly higher temperature or a bit more dose.
- Bitter and dry: go coarser, or shorten shot time; consider a degree lower temperature or slightly less dose.
- Flat: increase extraction modestly (finer or longer) to coax sweetness.
Keep notes. Two or three tweaks are usually enough to lock a bag of beans in. Then you’ll ride that sweet spot for days.
Brew Ratios and Shot Styles (With a Handy Table)
Ratios give you a compass. Think of them as flavor templates. “1:2” means twice as much liquid espresso as dry coffee grounds.
| Shot Style | Typical Ratio | Time (from first drip) | Flavor Profile | When to Use |
|---|---|---|---|---|
| Ristretto | 1:1–1:1.5 | 20–25 s | Dense, syrupy, intense sweetness, low acidity | Chocolate-heavy blends, milk drinks needing punch |
| Normale | 1:1.8–1:2.2 | 25–32 s | Balanced sweetness/acidity, classic espresso | Everyday shots, versatile |
| Lungo | 1:2.5–1:3 | 30–40 s | Lighter body, more aromatics, can lean bitter if overdone | Some lighter roasts, longer sips |
Start with 1:2 for most medium roasts. If the espresso feels tight and jammy, stretch toward 1:2.2. If it’s thin or tart, shorten toward 1:1.8.
Temperature: Subtle, But Powerful
If your machine lets you adjust brew temperature, start around 92–94°C (198–201°F). For lighter roasts, nudge slightly higher to help extraction; for darker roasts, slightly lower to keep bitterness in check. Small changes—1°C (≈2°F) at a time—are enough to steer a shot.
If your machine doesn’t have control, “temperature surfing” on single-boilers can help: purge steam or run a short blank shot to stabilize the group before brewing. Consistency here matters more than the absolute number.
Puck Prep That Actually Matters
I’ve tried all the toys. Here’s what reliably helps:
- Even distribution: Whether you WDT with a simple needle tool or use a distributor, aim for a levelhomogeneousus bed. Clumps and voids are the enemy.
- Level tamp: A slightly crooked tamp invites channeling. Use the countertop rim as a reference or a tamping station to stay square.
- Dry, clean basket: Residual moisture in the basket can grab fines and encourage channeling.
- Avoid over-tapping post-tamp: It can fracture the puck edge. If you knock, do it gently before tamping, not after.
Little habits stack into big consistency.
Pressure, Flow, and Pre-Infusion (Demystified)
Not every machine lets you play with pressure or flow, but understanding them helps:
- Pre-infusion wets the puck at lower pressure before full extraction, reducing channeling and encouraging more even flow. Machines with a gentle pre-infusion often pull more forgiving shots.
- Flow control lets you start slower and ramp up, or finish with a taper to avoid over-extracting late-stage bitter compounds. If you have it, think “slow start, confident middle, measured finish.”
- Classic 9 bar is a solid benchmark. If your machine overshoots, you may see harshness; if it undershoots, shots can be weak. Stability is key.
None of these are required for delicious espresso—but they’re powerful tools once you’ve nailed grind, dose, and ratio.
Milk Steaming for Silky Microfoam
Great milk is a texture and temperature story. Aim for 55–65°C (130–149°F) in the pitcher—a range that tastes sweet and comfortable, preserving delicate milk sugars. Keep the steam tip just under the surface to introduce tiny sips of air early (“stretching”), then bury the tip to integrate and spin the milk into a whirlpool (“texturing”). You’re chasing gloss, not big bubbles.
For cappuccino, stretch a bit more to build foam; for latte art, keep stretching minimal and texturing thoroughly. Use cold, fresh milk and a pitcher with a spout that suits your pouring style.
A Simple Troubleshooting Map (Taste First, Numbers Second)
- Sour, sharp, lemon peel → grind finer, push extraction longer; try slightly hotter water.
- Bitter, ashy, drying → grind coarser, shorten; try slightly cooler water.
- Hollow, watery → dose a touch higher, grind slightly finer; confirm your ratio and time.
- Channeling (spritzing, uneven flow) → improve distribution; check for sidewall gaps; tamp level; dry basket.
- Crema vanishes instantly → beans may be stale; grind may be too coarse; water chemistry can also play a role.
Trust your palate. It learns faster than any chart.
Espresso Maintenance That Actually Prevents Bad Shots
Delicious espresso dies in dirty machines. Oil buildup makes shots rancid and uneven. Keep it simple:
- Purge and wipe the group head and steam wand after every session.
- Backflush with water daily (for machines that allow it) and with detergent periodically.
- Descale on a cadence suited to your water hardness.
- Replace gaskets and screens when they look tired or you get persistent leaks.
- Grinder care: Brush burrs, empty retention areas, and clean chutes. Fresh grounds in, stale grounds out.
Maintenance is flavor insurance and equipment longevity in one.
A Calm, Real-World Dial-In Example
Let’s say you’re using a medium roast espresso blend. Start with 18 g in, aiming for 36 g out in 28–30 seconds from the first drip. Your first shot tastes a bit tart, with a green-apple edge. You go one click finer. The second shot lands at 32 seconds, with richer caramel but a tiny bitter twinge at the finish. You shorten the yield to 34 g on the next shot; the sweetness pops, the finish cleans up, and suddenly the espresso is chocolate-almond with a light citrus sparkle. You’ve found home.
The point isn’t the exact numbers; it’s the process: small changes, one variable at a time, then taste and note. Over a bag or two, this becomes second nature.
Espresso Myths That Need a Gentle Goodbye
- “You must tamp at exactly 30 lbs.” Consistency beats precision. A level, repeatable tamp matters; the number rarely does.
- “Darker is always better for espresso.” Dark roasts can be great, but medium roasts often hit a sweeter, more complex balance.
- “Single origin equals sour.” Not at all—just demands careful dialing-in. Some light Ethiopian espressos, dialed right, are pure dessert.
- “Pressure profiling is a magic fix.” It helps, but if grind and puck prep are off, no profile will save a shot.
- “Crema guarantees quality.” Pretty crema can come from stale beans, too. Taste remains the judge.
Best 5 Selections (Amazon-Available) to Elevate Your Espresso
Kicking Horse Coffee, Cliff Hanger Espresso
A reliable, “chocolate meets fruit” blend that makes dialing in friendly for beginners and rewarding for veterans. Expect cocoa, brown sugar, and a gentle red-berry lift that plays well as straight shots and in milk. It’s forgiving: a click or two coarser still pulls sweet, a touch finer gives you syrupy intensity. If you’re practicing ratios and shot times, Cliff Hanger’s broad sweet spot keeps you encouraged while you refine your puck prep.
Stumptown Coffee Roasters, Hair Bender
Famous for a reason, Hair Bender is a lively, complex espresso that shows you what nuance looks like in the cup. The profile often blends dark chocolate, citrus zest, and a little spice, giving shots a layered, café-style personality. It rewards careful distribution and even flow; when you nail it, the sweetness sparkles and the finish lingers. In milk, it stays articulate—never muddy—so lattes taste like dessert, not just hot milk.
Illi Classico Espresso (Ground for Espresso, Pressurized Tin)
If you crave consistency with minimal fuss, Illy’s Classico is a time-tested option. It leans classic Italian—smooth, balanced, creamy crema, and a round body that makes macchiatos taste like silk. The pressurized tin keeps the coffee fresher than most pre-ground, and it can help less-powerful machines produce satisfying shots. This is a “teach your hands the routine” espresso: steady, dependable, and still charming in cappuccinos.
Peet’s Espresso Forte
Bold and chocolatey without tipping into bitterness when dialed correctly, Espresso Forte is a crowd-pleaser for home bars. Expect fudgy sweetness, toasted nuts, and a caramel finish that cuts through milk elegantly. This is a blend that helps you build confidence: its extraction window is generous, so minor grind misses still land you in “enjoyable” territory. It’s a perfect house espresso when you want reliable deliciousness day after day.
Caffè Vergnano 1882 Espresso Crema
An under-sung gem with an old-world vibe, Vergnano’s Espresso Crema brings thick, hazelnut crema and a comforting profile of cocoa, caramel, and a whisper of spice. It’s a reminder that “classic” and “boring” are not synonyms. With gentle pre-infusion and a 1:2 ratio, shots feel plush and satisfying. In a flat white or cortado, it keeps its chocolate core without turning ashy—great for those who love smooth, café-style drinks at home.
Comparison Table: Quick Reference for Dial-In Targets
| Variable | Starting Point | Nudge This Way If Sour | Nudge This Way If Bitter |
|---|---|---|---|
| Dose (18g basket) | 18 g | +0.5–1.0 g (sometimes helps) | −0.5–1.0 g (can reduce over-extraction) |
| Grind | Fine | Finer (slower flow) | Coarser (faster flow) |
| Ratio | 1:2 | Shorten (1:1.8) | Lengthen slightly (1:2.2) |
| Time | 25–32 s | Longer | Shorter |
| Temp | 92–94°C | +1°C | −1°C |
| Pre-infusion | 2–6 s | Slightly longer | Slightly shorter |
Use the table as a compass, not a law. Taste is the captain.
Milk Drinks that Let Espresso Shine (Not Hide)
A delicious milk drink showcases espresso rather than burying it. Two favorites when I’m testing beans:
- Cortado: Equal parts espresso and steamed milk. It’s the espresso in a softer voice. If your espresso is in balance, the cortado tastes like caramel custard with structure. If shots are sour or bitter, the cortado tattles immediately—handy for diagnostics.
- Flat White: A bit more milk than a cortado, with microfoam so fine it looks like wet paint. It needs espresso with enough backbone (chocolate, nuts, caramel) to carry through; lighter roasts can be gorgeous here if you’ve extracted enough sweetness.
With both, aim for that 55–65°C milk temperature range. Too hot and you’ll lose the sweetness you worked so hard to extract.
Espresso with Budget Gear vs Premium Gear
Premium machines and grinders buy you stability and control: temperature management, pressure profiling, micro-adjustments, low retention, and repeatability. That stability shrinks the learning curve. But delicious espresso is absolutely possible on budget gear if you lean on the fundamentals:
- Warm-up time: Give your machine and portafilter time to preheat; a cool group saps energy and flavor.
- Prep beats price: WDT, level tamp, clean basket—these are free performance upgrades.
- Water and beans: Get these right, and your gear has a fair fight.
- Patience: Make small changes. Log dose, ratio, time, and taste; your palate will lead the way.
I’ve had shots on modest setups that I’d happily put next to café pulls. The secret wasn’t hidden firmware—it was a repeatable technique.
The Light Roast Espresso Adventure
When you’re ready, take a light roast for a spin. Expect to move finer, stretch ratio slightly (1:2.2–1:2.5), and possibly increase temperature a degree or two. Look for flavors like citrus, stone fruit, sugarcane, or florals. The payoff is huge—a shot that tastes like fruit syrup with sparkling acidity and remarkable clarity. If you’re getting lemon pith bitterness, you’re under-extracting; keep inching finer and lengthen a tad.
A gentle pre-infusion or flow-controlled ramp can help light roasts open up without channeling. Keep WDT tidy and avoid over-tamping. The first time you nail a light Ethiopian or Kenyan espresso at home is a day you remember.
Simple Routine for Busy Mornings (That Still Delivers)
On weekdays, I run a streamlined play:
- Warm up: Machine and portafilter preheated while I rinse the pitcher.
- Dose and grind: 18 g, set at my known grind for the current beans.
- WDT and tamp: Quick, neat, level.
- Pull: Watch flow; stop at 36 g ±2 g around 28–30 s.
- Taste: If it’s inside the pocket, I steam milk; if not, I mark one change for tomorrow.
Because the variables are already logged, I don’t start from zero each day. Two minutes, café-level results, and out the door.
Espresso Storage and Freshness Without Fuss
Keep beans sealed, cool, and dark. Use a canister with a tight seal; purge air when possible. If you buy in larger quantities, portion into small bags right away and freeze those you won’t touch for a couple of weeks. Thaw a bag overnight sealed; don’t ping-pong beans in and out of the freezer. Freshness is a curve: a few days off roast to de-gas, then a sweet spot. Your palate will tell you when the spark starts to fade.
When to Change One Variable vs Many
Change one thing at a time. If you adjust grind, ratio, and temp all at once, you’ll never know which lever helped. The only exception: if a shot is catastrophically off (15 seconds, gushing sour water), you can make a “macro” change (much finer grind) to get in the ballpark, then return to single-variable adjustments.
Espresso Etiquette for Sharing and Hosting
If you’re making espresso for friends, keep it simple and inclusive. Ask about preferences: straight shots, sweetened, or milk drinks. Pull a “house shot” you know well, then add a small twist—a sprinkle of cocoa on a cappuccino, a neat latte heart, or a side of sparkling water. A little ritual turns your kitchen into a tiny café, and it’s often the moment people decide to try espresso at home themselves.
Putting It All Together: Your Espresso Game Plan
- Pick beans that suit your goals (forgiving blend for practice; a lively single origin to stretch).
- Stabilize water and gear (consistent warm-up, clean machine, decent water).
- Anchor a starting recipe (18 g in, 36 g out, ~28–30 s at ~93°C).
- Refine grind and ratio based on taste (finer/longer for sour, coarser/shorter for bitter).
- Keep puck prep consistent (WDT, level tamp, avoid wet baskets).
- Log and learn (tiny notes today save time tomorrow).
- Maintain (clean equipment pulls sweeter shots and lasts longer).
You don’t need the perfect shot every time; you need a repeatable process that produces excellent shots most of the time and tells you exactly how to fix the rest.
A Final Word Over a Small Cup
Brewing delicious espresso at home is a skill that grows with you. One month you’re celebrating a chocolate-hazelnut shot that glides into microfoamed milk; the next you’re coaxing strawberry jam from a light roast you never imagined could be so sweet. Along the way, you’ll learn more about your taste than any café can teach you. The routine—warming up the machine, leveling the bed, steady tamp, that first sip—becomes a kind of daily centering. It’s practical, it’s sensory, and yes, sometimes it’s gloriously nerdy.
Keep your changes small, your notes honest, and your curiosity large. With a few good beans, a reliable grinder, and a calm workflow, delicious espresso stops being an accident and becomes your new normal. Here’s to the next shot being your best one yet.