Pour-Over Perfection: How to Nail the V60 Every Time

OneHundredCoffee is reader-supported, and some products displayed may earn us an affiliate commission. Details
If you’ve ever stood over a Hario V60 and wondered why your cup swings from brilliant one morning to “meh” the next, you’re not alone. The V60 is honest and revealing—when you do your part well, it rewards you with a cup that’s crystalline, sweet, and expressive. When you don’t, it tells on you. I’ve brewed hundreds of V60s at home and in friends’ kitchens, and I’ve made every mistake possible. The good news is that V60 consistency isn’t about chasing an elusive barista magic trick. It’s about narrowing variables, paying attention to a few sensory cues, and locking a routine you can repeat with your eyes half-open. This guide is the playbook I wish I had from day one—search-friendly answers, real-world tweaks, and a workflow that works.
Why the V60 Is Worth Learning (and Keeping)
The V60’s spiral ribs and large single exit hole give you enormous control. That’s a blessing when you want to tune clarity, body, and sweetness across different coffees. It’s also why your pour style, grind, and filter prep matter more than they would on a more “forgiving” dripper. Where other brewers smooth everything into a pleasant middle, the V60 lets the character of a washed Ethiopian pop with jasmine and lemon or a chocolatey Colombian roll like silk. Once you learn to steer that control, you’ll feel like you can “aim” flavors.
The Three Pillars: Grind, Flow, and Heat

Every V60 choice you make echoes through one of three pillars. Please keep them in balance, and your cup stays on track.
Grind (resistance): Finer grind slows the drawdown, extracts more; coarser speeds it up, extracts less. Your grinder’s alignment, burr sharpness, and retention all matter. If your brew is finishing inconsistently or tastes sandy or hollow, the grind is usually the culprit.
Flow (hydraulics): How fast water can pass through the bed governs contact time. Your pouring rhythm, kettle height, filter shape, and even how you rinse will change how water travels.
Heat (energy): Water temperature and how much heat the brewer retains determine extraction power. Cold dripper? Expect under-extraction. Hyper-hot kettle? You might strip delicate aromatics.
Think of every tweak as a nudge to one pillar. If you change two pillars at once, you’ll struggle to diagnose results.
Your Baseline Recipe (The One You Can Trust)
When I teach someone the V60, we anchor a repeatable recipe. Master it unchanged for a week. Only then start experimenting.
- Coffee: 18 g
- Water: 288 g (for a 1:16 ratio)
- Water temp: 94°C / 201°F
- Grind: Medium-fine (about 25–30 clicks on a Comandante C40; slightly finer than regular drip on most electric burrs)
- Filter: Hario V60 02 white paper, thoroughly rinsed
- Total time: 2:40–3:15 (from first pour to last drip)
Pours:
- Bloom — 45–50 g water in ~10 seconds, swirl, wait to 0:45
- Main 1 — to 150 g by 1:15 (gentle circles)
- Main 2 — to 220 g by 1:45
- Finish — to 288 g by ~2:05, light center pour to keep the bed flat
Goal drawdown: Last drip between 2:45 and 3:10.
Lock this in before chasing exotic ratios. It’s engineered to ride the line between sweetness and clarity without demanding perfect gear or monk-level patience.
Filter Prep: Rinse Like You Mean It
If your V60 tastes papery or a bit astringent, check how you’re preparing the filter. Use hot water to thoroughly rinse the paper and heat the dripper and server. You’re removing paper flavor and pre-heating your brewing environment, which stabilizes extraction. After rinsing, empty the server completely—lingering rinse water is diluted coffee waiting to happen.
Bloom: Where Your Coffee Wakes Up
The bloom is your first handshake with the grounds. You’re saturating the bed, releasing CO₂, and setting up an even extraction. I pour 2.5–3x the coffee weight as bloom water (for 18 g, ~45–54 g), then give the brewer a firm swirl to push water through the capillaries of the coffee bed. If you don’t swirl or stir, dry pockets remain, and extraction becomes lopsided.
Watch the dome. If the bloom balloons aggressively and hisses, your coffee is very fresh or the roast is gassy—extend bloom to 45–50 seconds. If it barely bulges, 30–35 seconds can be plenty. You’re reading the coffee, not a stopwatch.
Pouring Technique: Gentle, Centered, Consistent
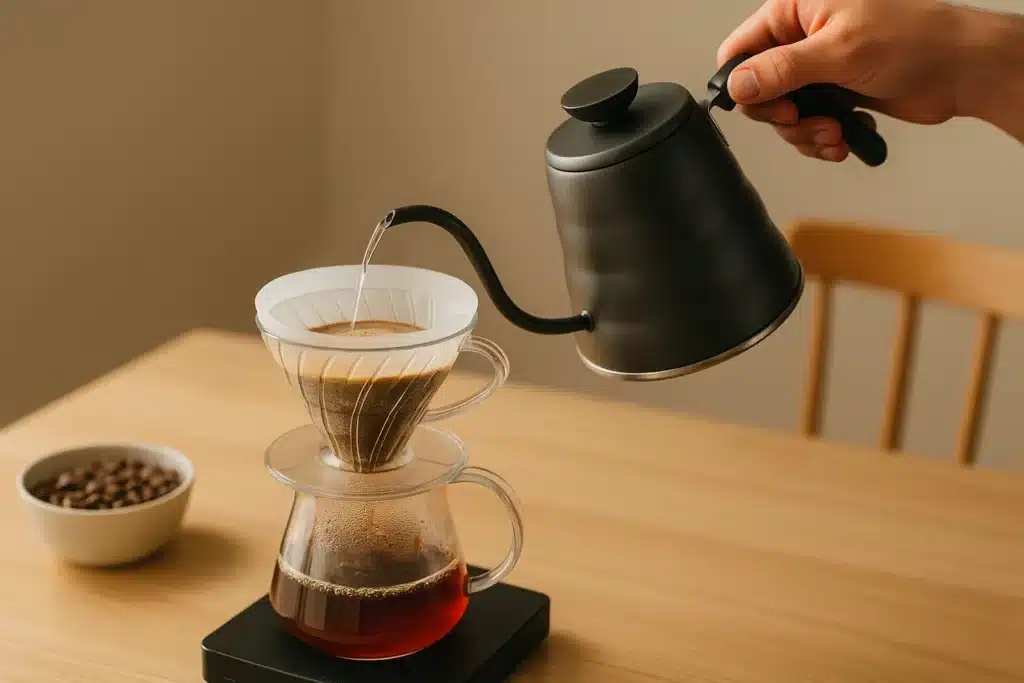
The V60 punishes erratic pouring. Keep your kettle close (2–5 cm above the bed), pour in small concentric circles, and aim for a steady flow rate rather than bursts of water. Your job is to nourish the slurry, not blast it.
- Height: Low kettle height reduces channeling.
- Pattern: Start inner circles, expand outward, then back to the center. Avoid pouring directly on the paper; it bypasses the bed.
- Rhythm: Think in 25–30 second pours with 10–15 second rests to let the bed sink and flatten.
- Swirl: After big additions, a gentle swirl re-levels the bed and equalizes temperature.
If the bed caves in and you see crater walls, your stream is too aggressive or your grind is too fine. If the bed is flat and calm but the cup tastes thin, you may be too coarse or too cool.
Water Temperature: The Quiet Power Lever
91–96°C (196–205°F) is the V60 sweet zone. Higher temperatures favor clarity in light roasts, lower temperatures can soften darker roasts and reduce bitterness. I default to 94°C for modern light–medium roasts because it reliably pulls sweetness without scorching aroma.
If your kettle doesn’t have temperature control, bring water to a boil and wait 30–40 seconds before pouring. And remember: a cold room or cold dripper will drag your effective brew temp down. Rinse hot; keep the heat in play.
Grind Size: Calibrate to Time, Taste, and Bed
Your drawdown time is the sanity check. With 18 g and 288 g of water, finishing near 3:00 usually means you’re close. Too fast (under 2:30)? Go finer. Too slow (over 3:30)? Go coarser or adjust your pours to be gentler.
Taste will refine the direction:
- Sour, sharp, thin, salty finish: Under-extracted → finer grind, slightly hotter water, or extend bloom.
- Bitter, harsh, drying, hollow sweetness: Over-extracted → coarser grind, slightly cooler water, or reduce agitation.
Look at the bed after brewing. A flat, level bed is a good sign. Sidewalls exposed and a deep crater suggest channeling. Tweak your pour and consider one good swirl after the final pour to flatten.
Agitation: Enough to Help, Not to Hurt
Agitation is your seasoning. A bloom swirl (or a single gentle stir) ensures full wetting. Later, a brief swirl after your second or third pour re-levels the bed. Overdo it and you risk fines, migration, and clogging; underdo it and extraction is patchy. If your fines keep choking the filter, try one decisive swirl instead of multiple small stirs, and consider coarsening slightly.
The Ratio Question: 1:15 vs 1:16 vs 1:17
- 1:15 (18 g coffee → 270 g water): Richer body, denser sweetness, can veil high notes.
- 1:16 (18 → 288 g): Balanced, my default.
- 1:17 (18 → 306 g): Lighter body, extra sparkle, reveals acidity and floral notes.
Use ratio as a style control. When I brew a syrupy natural with big strawberry notes, I often stretch to 1:16.5–1:17 for air and definition. For a washed Guatemalan that’s walnut-sweet, 1:15.5 can make it plush.
Roast Level: Tuning for Light, Medium, Dark
Light roast: Hotter water (93–96°C), finer grind, 1:16–1:17, and be mindful not to over-agitate. Aim for clean structure and sweetness without harsh edges.
Medium roast: It’s the V60 playground—94°C, default grind, 1:16. Taste and nudge.
Dark roast: Consider cooler water (90–92°C), coarser grind, 1:16–1:17, and shorter total time. You’re managing solubles that extract quickly to avoid bitterness.
Water Quality: The Invisible Ingredient
If your V60 fluctuates while your routine stays steady, it might be your water. Hardness and alkalinity shape extraction and flavor clarity. Aim for soft-moderate hardness (around 50–100 ppm as CaCO₃) with moderate alkalinity (30–50 ppm). Too soft and the cup tastes flat; too hard and you lose nuance, gain scale. If local water is unpredictable, use a consistent bottled source or brew salts designed for coffee.
Common Problems and Fixes
Problem: Sour, thin cup finishing in 2:20.
Fix: Go finer 2–3 notches, raise water temp to 94–95°C, extend bloom to 45–50 seconds with a swirl.
Problem: Bitter/astringent cup with slow 3:50 drawdown.
Fix: Coarsen 2–3 notches, reduce agitation to a single final swirl, lower temp to 92–93°C.
Problem: Papery aftertaste.
Fix: Rinse the filter more thoroughly and drain the rinse completely.
Problem: Cratered bed/channeling.
Fix: Lower kettle height, soften pour rate, incorporate small, even circles, and a gentle end-swirl.
Problem: Inconsistent results day to day.
Fix: Weigh everything, stabilize water temp, keep the same pouring timeline for a week, and mark your grinder setting.
Dialing in a New Coffee (Fast)
- Start at the baseline recipe. Don’t guess wildly.
- Taste the first cup without milk or sugar. Note sour vs. bitter, texture, and finish.
- Make one change. Finer if sour/thin; coarser if bitter/drying.
- Lock the kettle temp. Keep it constant while you adjust the grind.
- Re-brew immediately. Palate memory fades fast; the second brew teaches you double.
With practice, you’ll nail a new bag in two brews. The key is discipline: one change at a time, everything else constant.
Bed Management: Flatness and Fines
After your last pour, watch the slurry’s surface. If it domes in the center, gently swirl to flatten. A flat bed promotes even flow through the whole coffee column, avoiding localized over-extraction near the cone’s tip. If you see persistent silt layers, your grinder might produce too many fines; coarsen slightly, nd see if the cup brightens without losing sweetness.
Filters: White vs. Tabbed vs. Alternatives
Standard Hario V60 white papers are crisp and fast. Some tabbed variants or region-specific batches can drain a hair slower. If drawdown is unexpectedly sluggish with the same grind, your filter box could be the difference. Rinse thoroughly and adjust the grind a step coarser. If you experiment with copper or plastic drippers, remember: thermal mass changes behavior. Ceramics and metal tend to hold heat better than plastic; compensate with your rinse and temperature.
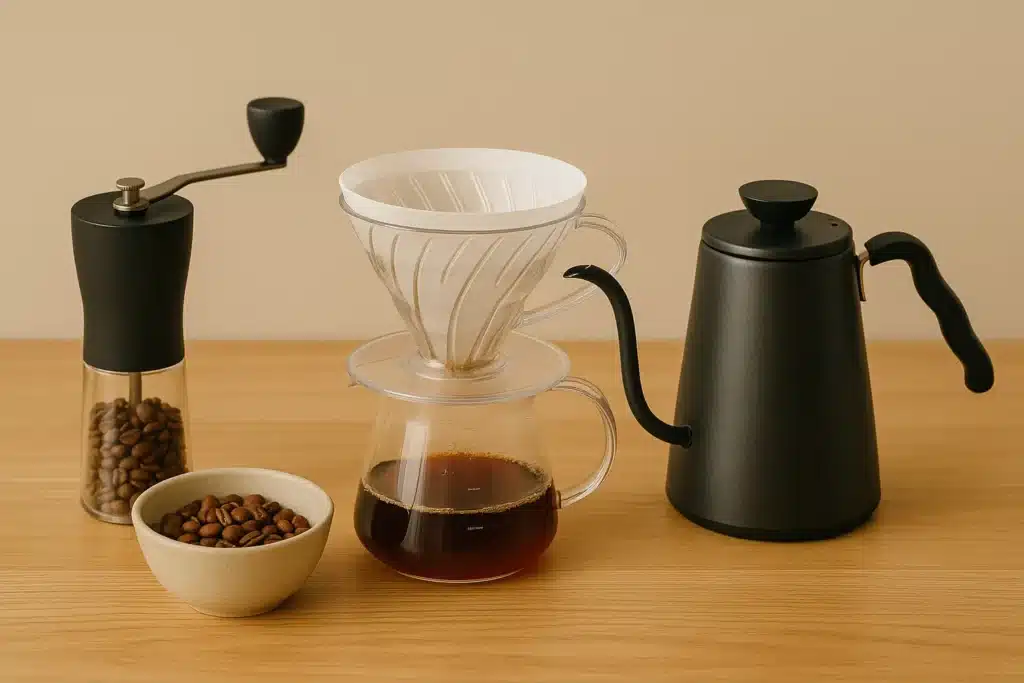
The Kettle: Flow Control Matters
A gooseneck kettle isn’t a luxury with the V60—it’s your steering wheel. Look for a controlled, linear flow that lets you pour precisely without wrist gymnastics. If your kettle gushes, you’ll fight channeling and inconsistent agitation. Many temperature-controlled goosenecks also stabilize your routine by keeping you within a degree of your target.
Scaling Up: Brewing for Two (or Three)
The V60 02 can comfortably handle 25–30 g coffee (1:16 → 400–480 g water) without becoming unruly. The principles remain: bigger bloom (~70–90 g), same gentle circles, a final swirl. Expect drawdown to extend to ~3:30–4:00; coarsen slightly if needed. Beyond 30 g, consider a larger dripper or split brews to protect clarity.
Iced V60: Bright, Clean, and Summer-Ready
For flash-brewed iced coffee with V60 clarity:
- Coffee: 20 g
- Ice in server: 150 g
- Hot water: 220 g at 94°C (1:18 total water equivalent)
Bloom with 50 g, then pour to 220 g as normal. The ice shock locks in aromatics and acidity. If it’s too bright, grind slightly finer or increase hot water to 240 g and reduce ice to 130 g.
Routine Maintenance: Keep Your Gear Honest
Coffee oils linger. Rinse your dripper and server after each brew; give them a deep clean weekly with a coffee-safe cleaner. Descalcify kettles regularly if your water leaves deposits. A clean setup narrows variables and brightens cups—oils dampen aromatics like a veil.
Sensory Notes: Training Your Palate on the V60
A simple three-step palate check sharpens your feedback loop:
- Aroma while hot: Do you get florals/fruits or heavy roast notes?
- Mid-palate while warm: Sweetness vs. acidity balance; search for structure.
- Finish as it cools: Clean, lingering sweetness = win; drying bitterness or lemon-pith sourness points you to grind and temp.
As cups cool, flaws shout louder. Use that to your advantage when diagnosing.
Real-World Adjustments (Because Life Isn’t a Lab)
- Brewing in a cold kitchen? Rinse longer and bump the water to 95–96°C.
- Using an average grinder? Compensate with a touch longer bloom and a single decisive mid-brew swirl.
- Coffee that’s a week past peak? Grind a notch finer to re-engage sweetness, but don’t chase stale aromas with high temps.
- Rushed morning? Brew 15 g to 240 g water (1:16) with the same timings; smaller brews are faster and more forgiving.
Best Picks for V60 Success
Hario V60 02 Ceramic Dripper
The classic. Holds heat well, offers that signature clarity, and pairs with widely available filters. Ceramic’s thermal stability helps consistency from cup to cup.

Who is this for?
The Hario V60 02 Ceramic Dripper is perfect for coffee enthusiasts who love manual pour-over brewing. Its spiral ribs and cone shape allow for optimal extraction and flavor clarity. Ideal for home brewers seeking control over brewing time and technique, it brings professional-quality coffee into your daily morning ritual.Hario V60 02 White Paper Filters
Clean, fast-draining, and predictable. Rinse well, and you’ll get the sparkle the V60 is known for.

Who is this for?
These Hario V60 Paper Filters are ideal for pour-over enthusiasts using the V60 dripper. Made from high-quality oxygen-bleached paper, they ensure clean, crisp brews by preventing sediment and bitterness. Designed to fit the 02 size dripper perfectly, they’re a must-have for anyone who values flavor clarity and brewing consistency.Fellow Stagg EKG Gooseneck Kettle
Stable temperature and precise flow make your pours repeatable. It’s the easiest upgrade for instant consistency.

Who is this for?
The Fellow Stagg EKG Gooseneck Kettle is for precision-minded coffee and tea lovers. With exact temperature control, a sleek minimalist design, and a perfect pour spout, it’s ideal for pour-over enthusiasts and professionals alike. This kettle combines function and form for those who value both style and brewing precision.Timemore Black Mirror Coffee Scale
Fast responsiveness and a clear timer keep your recipe honest. No drift, no lag—just dependable numbers.

Who is this for?
The Timemore Black Mirror Coffee Scale is designed for pour-over and espresso lovers who value precision. With accurate weight readings, built-in timer, and fast response, it’s ideal for dialing in your brew. Its sleek, minimalist design fits any setup, while the silicone mat adds stability for baristas and home brewers alike.Baratza Encore ESP (or Baratza Encore)
For pour-over, the updated ESP (or classic Encore) hits a sweet spot in grind quality and ease. If you later upgrade, it remains a great daily driver or travel grinder.
(Prefer bean picks? Look for Stumptown Hair Bender, Counter Culture Big Trouble, or Intelligentsia Frequency—all generally available and very V60-friendly. Their consistency helps you learn cause and effect without chasing batch variability.)
My Step-by-Step Workflow (Exactly How I Brew Most Mornings)
- Heat water to 94°C. Place V60 and filter on a pre-warmed server.
- Thorough rinse. Saturate the filter, heat everything, then dump rinse water.
- Does 18 g. Tap the dripper gently to level.
- Bloom to 48–50 g. Pour in 8–10 seconds, swirl firmly, wait until 0:45.
- Pour to 150 g by 1:15. Low, slow circles; stop and let it sink.
- Pour to 220 g by 1:45. Same pattern; observe the slurry calm.
- Pour to 288 g by ~2:05. Gentle center pour to finish; tiny swirl to flatten.
- Target finish 2:50–3:05. If it’s faster, go finer next time; slower, go coarser.
- Sip without additions first. Note hot, warm, cool stages. Then add milk/sugar if that’s your style—no judgment.
This routine delivers a balanced, sweet cup across 80% of the coffees I try. The other 20% are solved with a click or two on the grinder and, rarely, a 1–2°C temperature nudge.
FAQ: The Questions People Actually Search
What grind size for V60?
Medium-fine. If your brew finishes around 3:00 with a 1:16 ratio, you’re close. Adjust by taste: sour → finer; bitter/astringent → coarser.
What ratio for V60?
1:16 is the all-purpose baseline. Use 1:15 for more body, 1:17 for more clarity.
What water temperature for V60?
93–96°C for light to medium roasts; 90–92°C if using darker roasts to avoid harshness.
Do I need a gooseneck kettle?
Strictly, no—but practically, yes. It’s hard to pour evenly without one, and consistency suffers.
Why is my V60 bitter?
Likely over-extracted: grind coarser, reduce agitation, or lower the temperature slightly.
Why is my V60 sour?
Under-extracted: grind finer, increase temperature, or extend bloom time with a good swirl.
Why does my drawdown stall?
Too fine, too much agitationmoving too the bottom, or a slow batch of filters. Coarsen a notch, use a single decisive swirl, and rinse filters thoroughly.
How much coffee for one cup?
18 g to 288 g of water makes a generous mug. For a smaller cup, 15 g to 240 g works perfectly.
Is plastic or ceramic better for the V60?
Plastic is more forgiving (less heat loss during bloom), and ceramic offers excellent thermal stability if you rinse hot. Choose based on your environment and preferences.
Troubleshooting Stories from Real Life (So You Can Shortcut the Pain)
The “Lemon Pith” Ethiopian:
A washed Ethiopian kept tasting like lemon pith—bitter-sour at once. I had been chasing clarity with 96°C water. Dropping to 93°C and coarsening half a notch transformed it: lemon candy, honeysuckle, silky finish. Lesson: Light roasts still punish too-hot water when your grind is already quite fine.
The “Muddy Chocolate” Colombian:
A chocolatey medium roast felt heavy and muddy. Drawdown was a lethargic 3:40. Coarsening a full notch, keeping temp at 94°C, and reducing agitation to a single end swirl cleared it up: fudge sweetness with a clean, nutty finish. Lesson: a bodA without clarity often means slow hydraulics.
The “Paper Whisper”:
Subtle papery aftertaste haunted a month of brews—turned out I’d gotten lazy about rinse volume. A longer, hotter rinse fixed it instantly. Lesson: the boring steps matter.
Going From Good to Great: Micro-Tweaks That Stack
- Bed grooming: A tiny tap before bloom levels grounds for even wetting.
- Kettle spout angle: If your flow starts strong and weakens, adjust wrist angle so your stream weight is consistent through the pour.
- Pour start point: Begin circles in the center to anchor the slurry, then expand. It reduces edge channeling.
- Cooling curve tasting: Taste at 65°C, 55°C, and room temp. Make notes. The best cups stay sweet as they cool.
- One variable per day: Don’t change grind and temp together. You’ll learn faster by isolating causes.
Final Calibration: Build Your Personal V60 Preset
Your kitchen, your kettle, your grinder, your water—they’re different from mine. The recipe below is a proven starting line; your “forever preset” may be a touch different. Invest four quiet mornings to lock it.
- Recipe: 18 g in, 288 g out, 94°C, white V60 filter
- Time windows: Bloom to 0:45; 150 g by 1:15; 220 g by 1:45; 288 g by 2:05; finish ~3:00
- Rules: One swirl after bloom; one small swirl at the end. Pour low, pour steady.
- Tweak logic: Sour/thin → finer or hotter; bitter/drying → coarser or cooler; muddy → coarser and reduce agitation; papery → better rinse.
Write your grinder setting, kettle temp, and total time on a sticky note. That’s your personal “V60 Profile.” When you change beans, adjust one thing. When you change seasons, revisit water temp. When you change nothing and the cup slides, look at your filter rinse and pour height.
The Takeaway
Nailing the V60 every time isn’t romantic or mysterious. It’s pragmatic: a sound baseline, an eye on drawdown, and tiny adjustments with a purpose. Treat grind, flow, and heat as your three pillars; listen for what the cup tells you; keep your routine simple enough to repeat before your first email of the day. The V60’s reward is a cup that tastes like it came from inside the coffee, not from a trick. Clean sweetness, gentle texture, and flavors that feel inevitable. Once you taste that inevitability, you’ll know you’ve crossed from “sometimes lucky” to “always in control.”
Tomorrow morning, take 18 grams and five calm minutes, and brew with intention. Your best V60 is closer than you think.